
Guide on how to install the PC-FAX driver to be able to send out FAX from the PC.
NOTE: This will only work on machines that have a FAX kit installed to it. Konica Minolta FAX kit is not a standard add-on on all Konica Minolta machine and this one needs to be purchased and installed separately.
For Window 10 Installation
STEP 1 – Download and extract the PC-FAX Driver
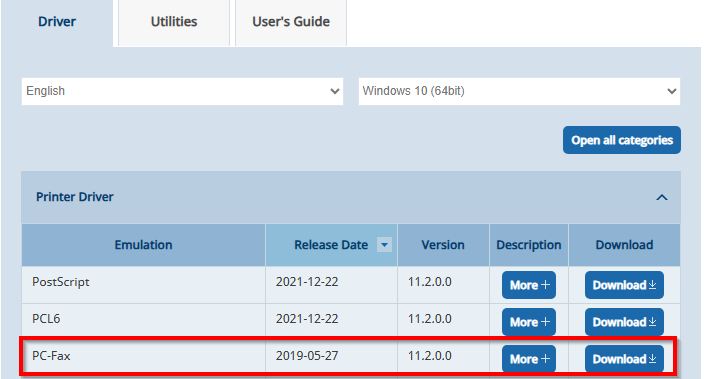
- Download the printer driver by going to this link: Drivers & Downloads
- Select the Compatibility Operating System, choose the PC-Fax and select Download to download the driver.
- Tick License Agreement and Select Zip.File to download the Printer Driver to the PC.
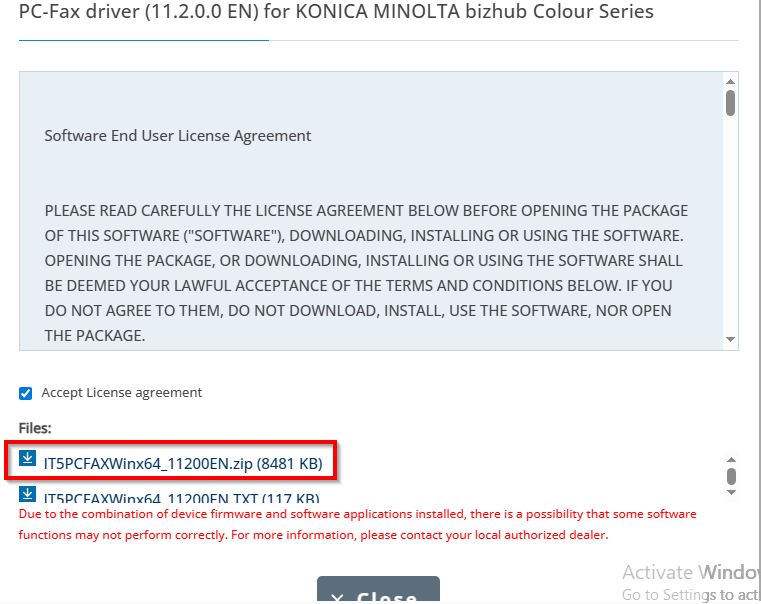
- Extract the Zip file after download and it will appear another folder on the same path, this will be used for Install Printer Driver later.

STEP 2 – Install the PC-FAX Driver on the PC/Laptop
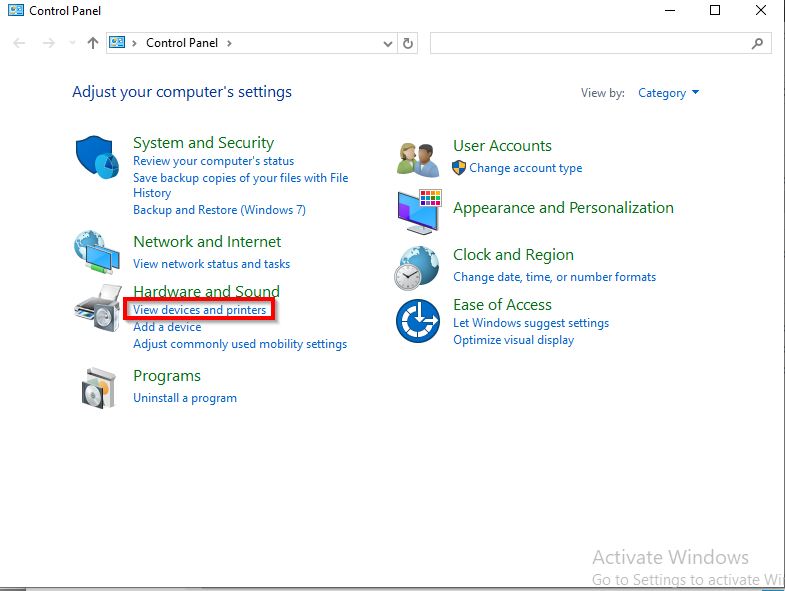
- Go to Control Panel, Select Devices and Printers.
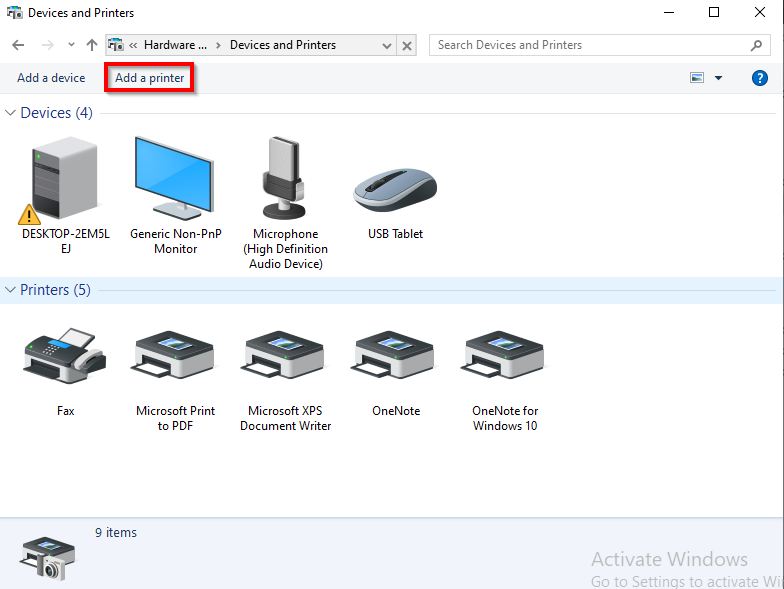
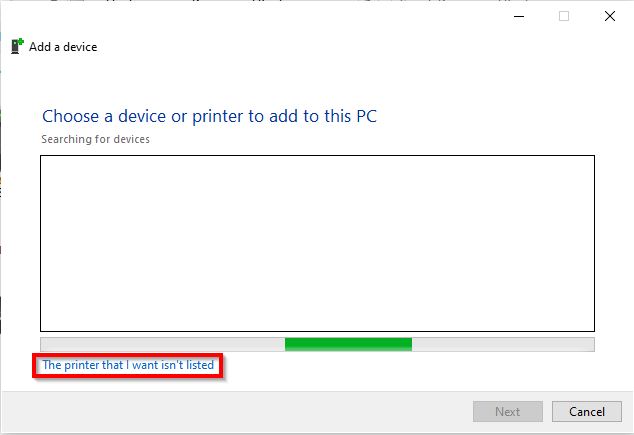
- Select Add a printer.
- Select The printer that i want isn’t listed.
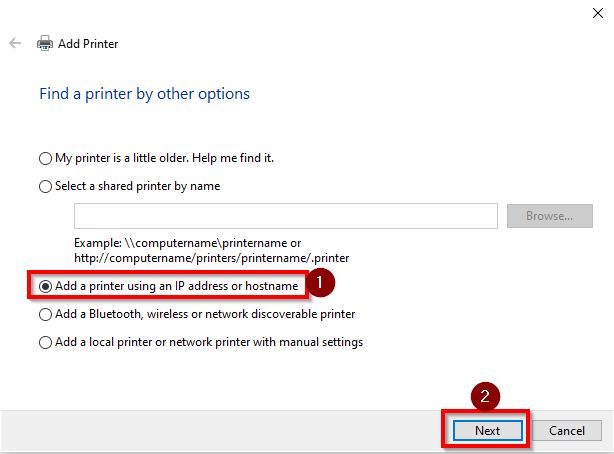
- Choose Add a printer using TCP/IP address or Hostname, then click on Next.
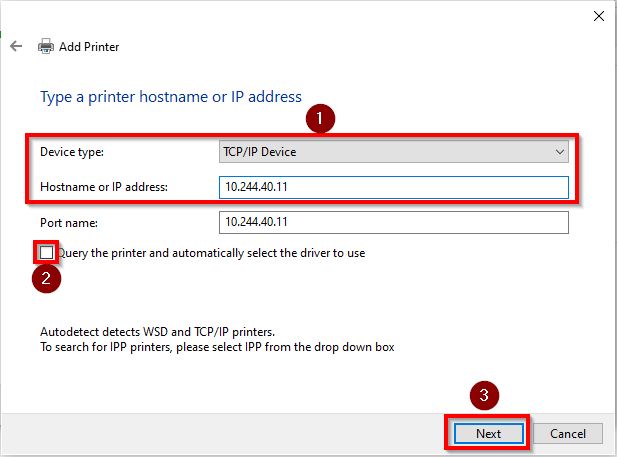
- Change Device Type to TCP/IP Device and Type in machine IP Address, and untick the Option Query the printer and automatically select the driver to use, proceed to select Next.
- Click on Have Disk, select Browse and select the Printer Driver previously that have been extracted.
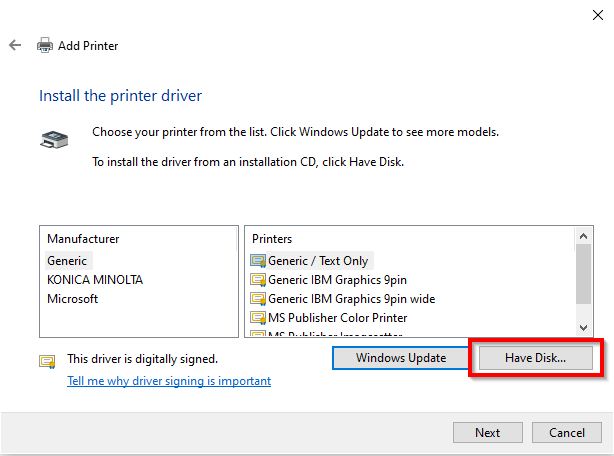

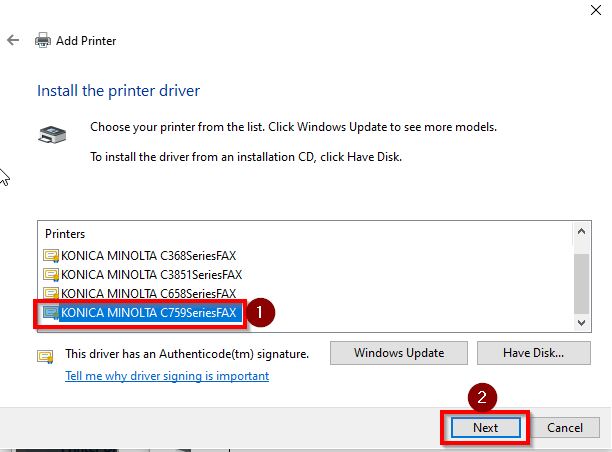
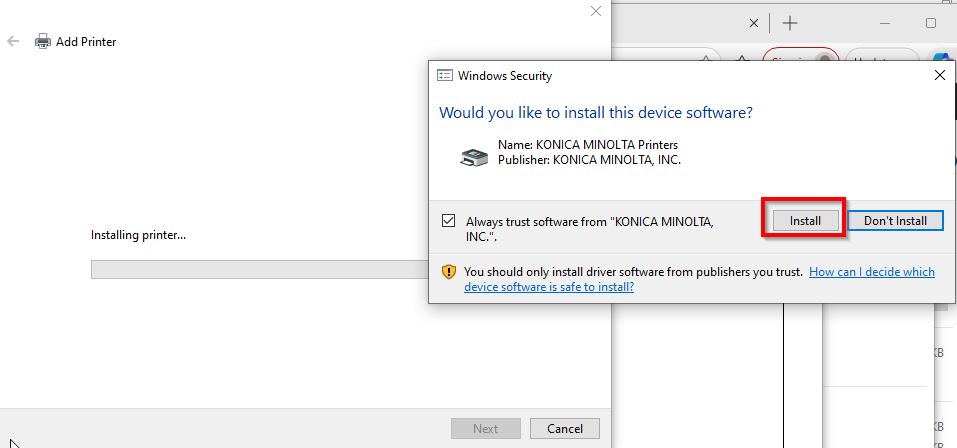
- Select Printer driver that is matching with the Konica Minolta machine and click next to install Printer Driver.
STEP 3 – Send a FAX from the PC/Laptop to test
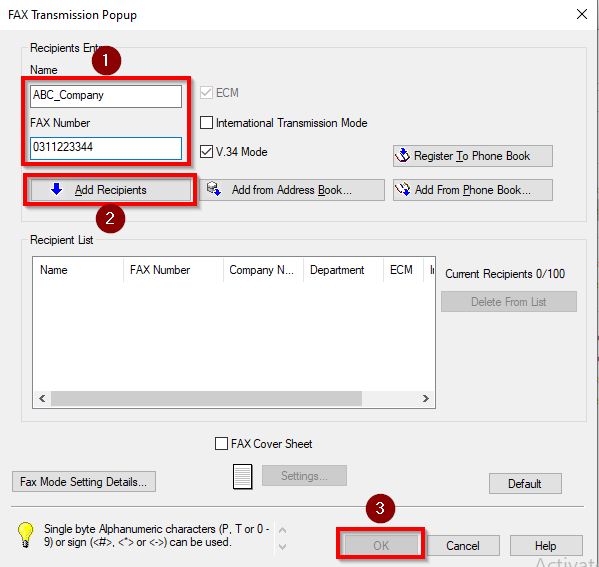
- Any Document that prints using this PC-Fax, it will prompt a dialog as shown below and need to key in info below before able to send fax from PC to recipient Fax Machine.
- Name: Company_Name_Recipient
- Fax Number: Receipient_Fax_Number
- Once key in for the Name and Fax Number, kindly proceed to click on Add Recipient and select OK to send out the fax from PC to the recipient by going through Konica Minolta machine.
For Window 11 installation (will using Universal Printer Driver instead of Windows 10 dedicated driver)
STEP 1 – Download and extract the PC-FAX Driver
- Download the printer driver by going to this link: Drivers & Downloads
- Select the Compatibility Operating System, choose the PC-Fax under Universal Printer Driverand select Download to download the driver.

- Tick License Agreement and Select Zip.File to download the Printer Driver to the PC.
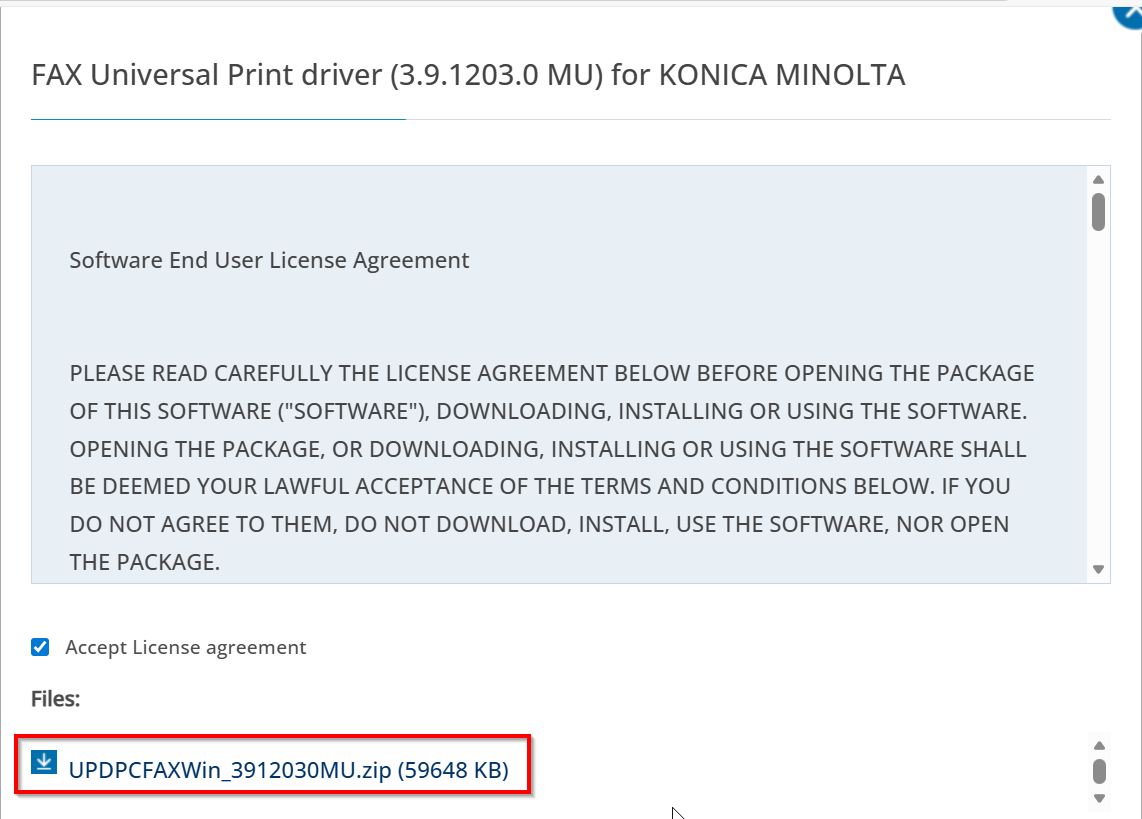
- Extract the Zip file after download and it will appear another folder on the same path, this will be used for Install Printer Driver later.

STEP 2 – Install the PC-FAX Driver on the PC/Laptop
- Go to Control Panel, Select Devices and Printers.
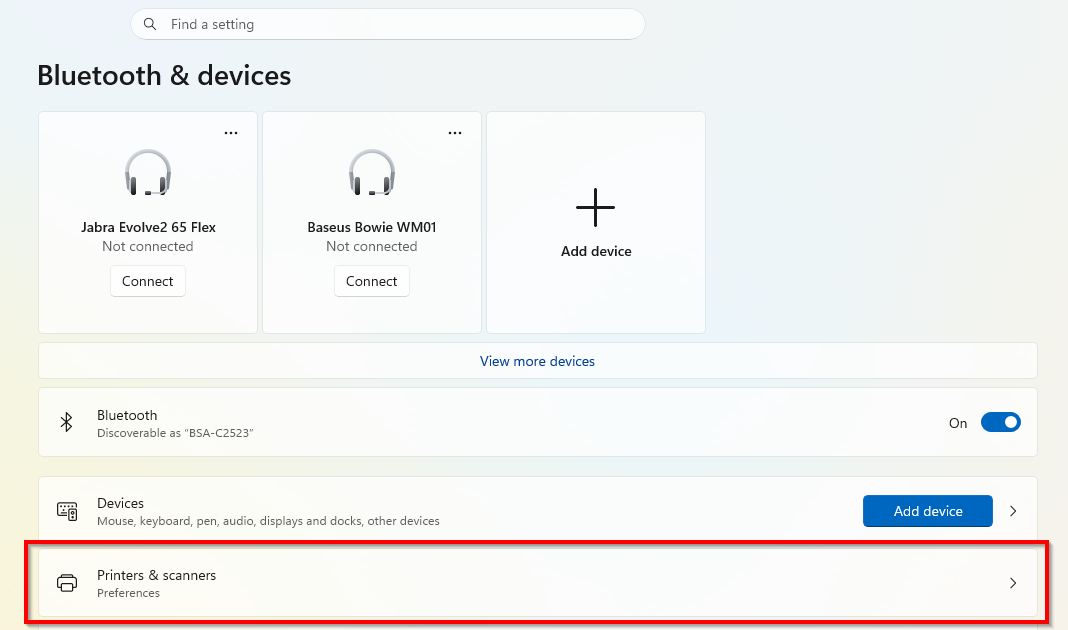
- Select Printers & scanners.
- Select Add a printer – Add a new device manually.


- Select The printer that i want isn’t listed.
- Choose Add a printer using TCP/IP address or Hostname, then click on Next.
- Change Device Type to TCP/IP Device and Type in machine IP Address, and untick the Option Query the printer and automatically select the driver to use, proceed to select Next.
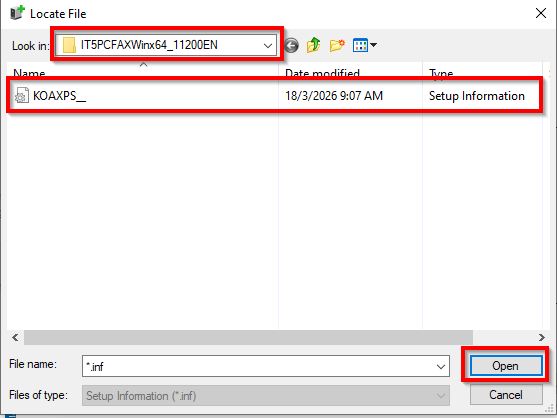
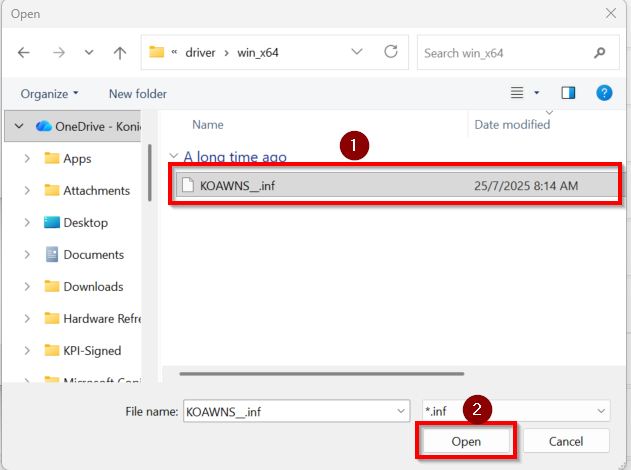
- Click on Have Disk, select Browse and locate for the Printer Driver folder path UPDPCFAXWin_3912030MU\driver\win_x64\KOAWNS__.inf file that you extracted previously.
- Select Konica Minolta Universal Fax and click next to install Printer Driver.

STEP 3 – Send a FAX from the PC/Laptop to test
- Any Document that prints using this PC-Fax printer driver, it will prompt a dialog as shown below and need to key in info below before able to send fax from PC to recipient Fax Machine.
- Name: Company_Name_Recipient
- Fax Number: Receipient_Fax_Number
- Once key in for the Name and Fax Number, kindly proceed to click on Add Recipient and select OK to send out the fax from PC to the recipient by going through Konica Minolta machine.