Guide on change the IP Address from the Control Panel
For The Older Machine Series / Non I-Series Machine
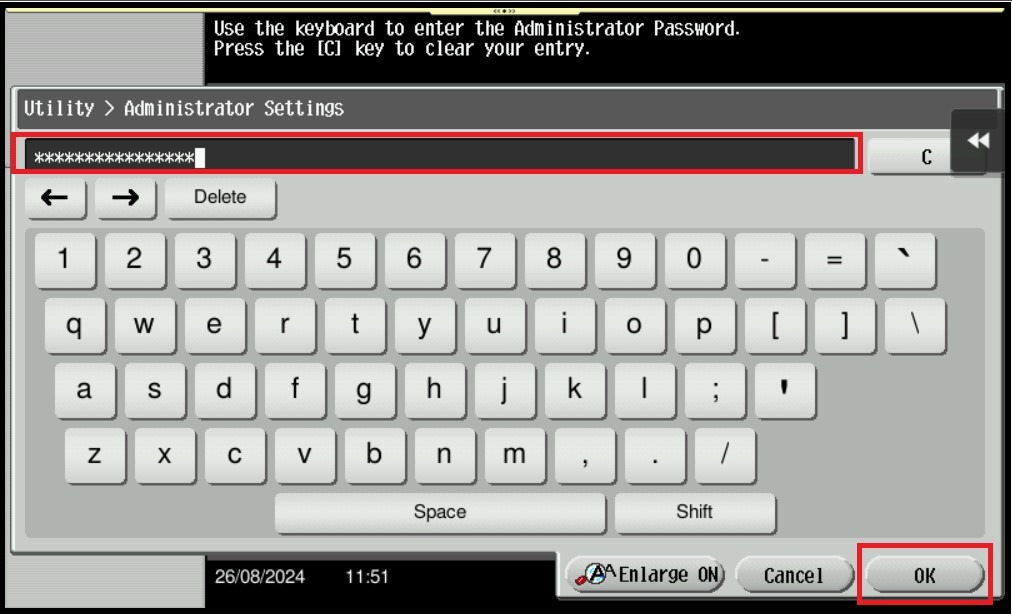
STEP 1 – On the Konica Minolta machine, click on [Menu] button, Select [Utility] from Control Panel.
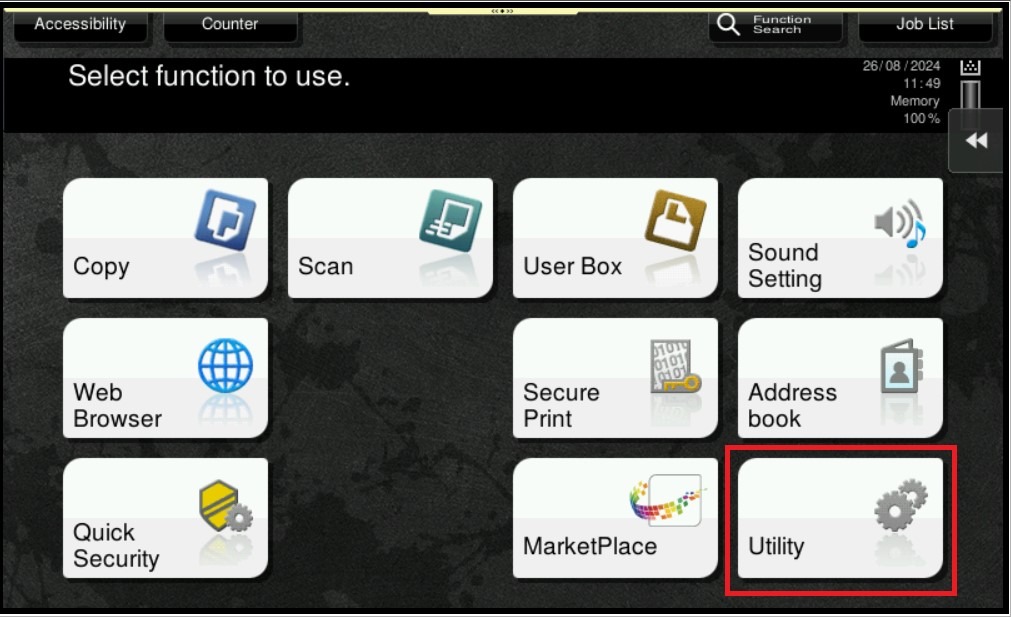
STEP 2 – Select [Administrator Settings].
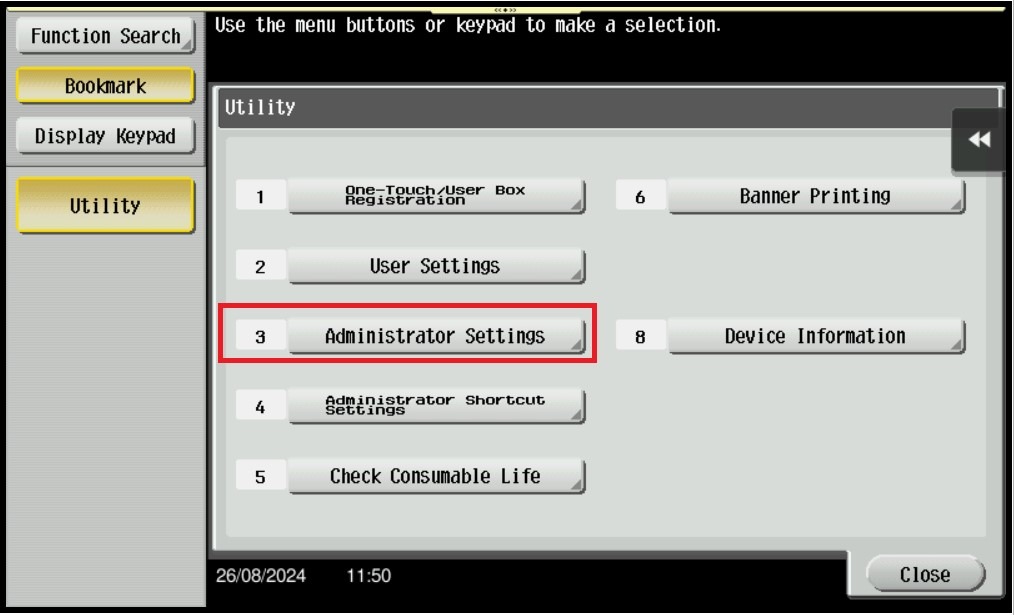
STEP 3 – Key in Administrator password and [OK] to login.
Default administrator password:
[7801261178012611] or [1234567812345678] or [12345678] or [12341234].
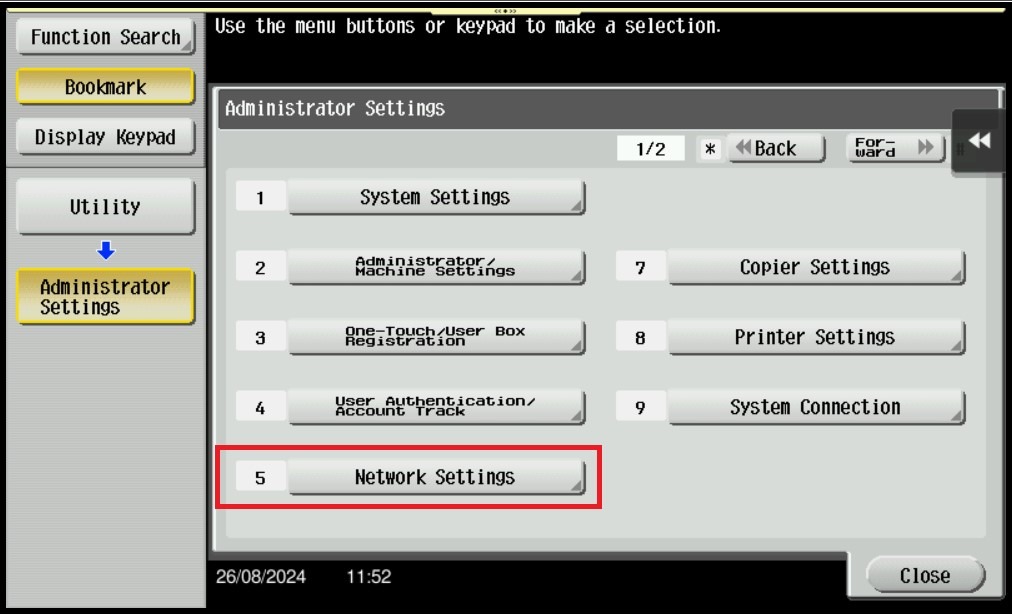
STEP 4 – Select [Network Settings].
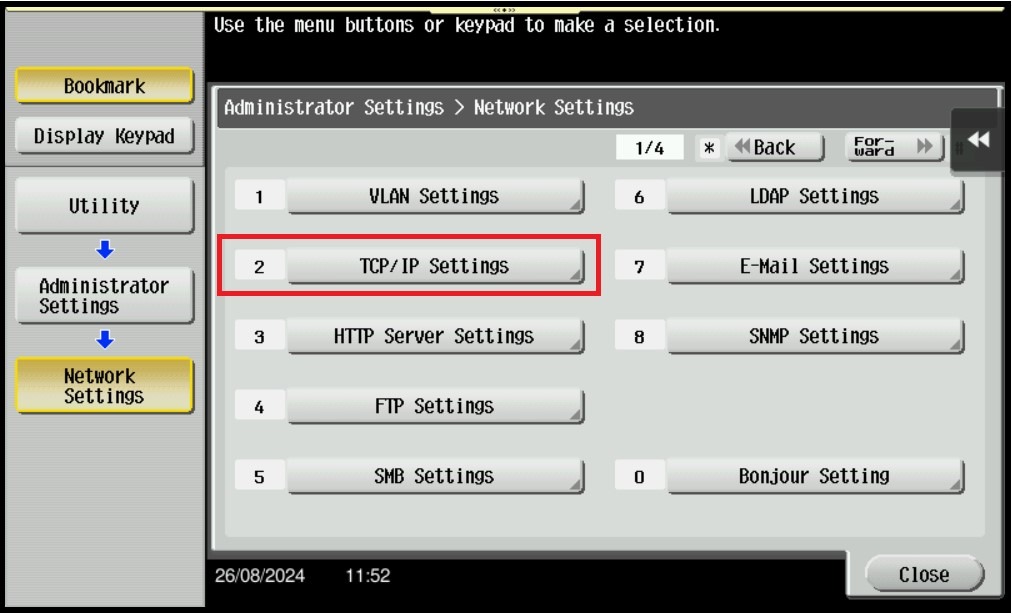
STEP 5 – Select [TCP/IP Settings].
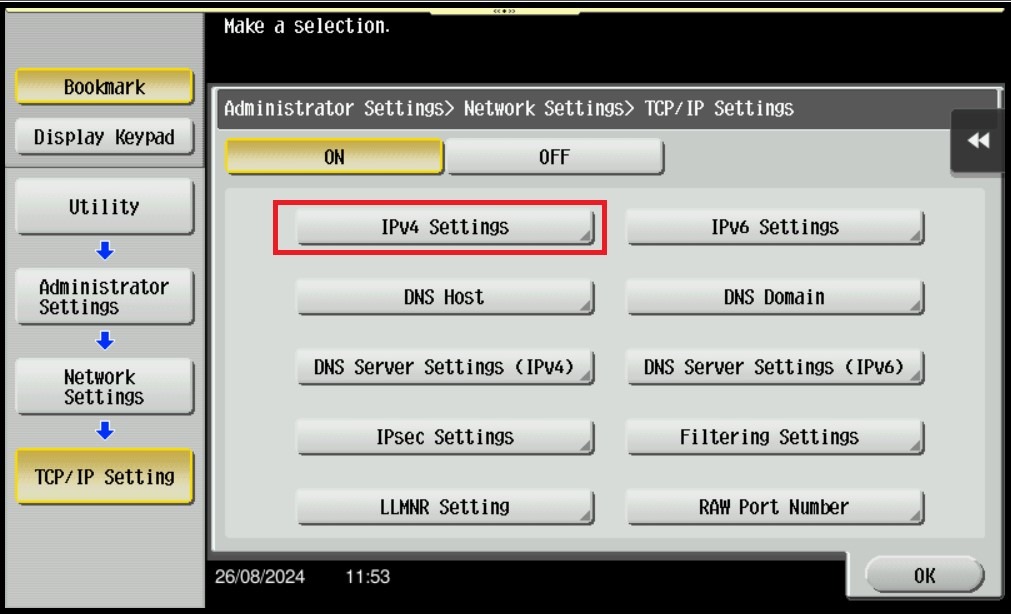
STEP 6 – Select [IPV4 Settings].
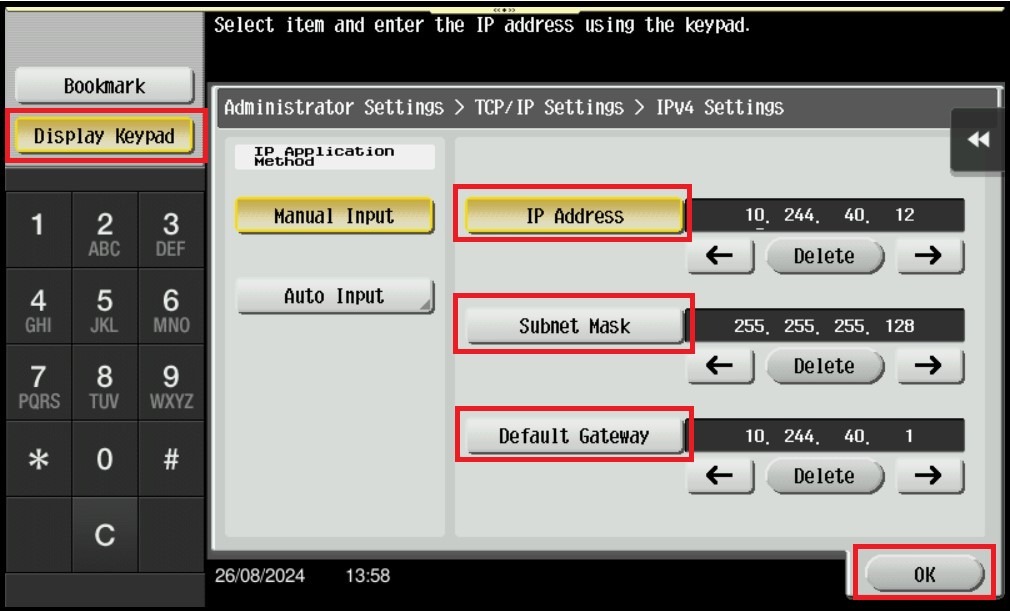
STEP 7 – Select IP Address, Subnet Mask or Default Gateway and click on the [Display Keypad] to start changing the IP Address on the specific field, then click OK to save the New IP Address of the machine.
For The Newer Machine Series / I-Series Machine
STEP 1 – On the Konica Minolta machine, click on [Home] icon, Select [Utility] from Control Panel.
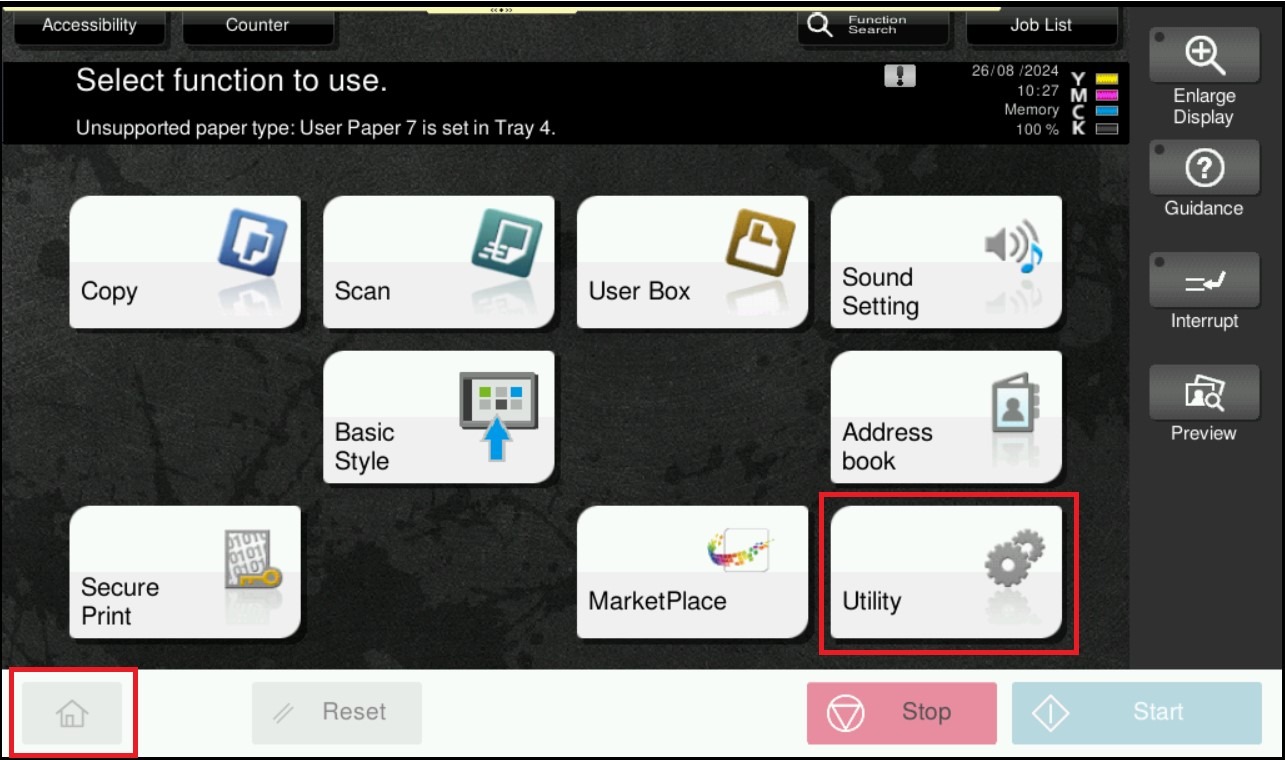
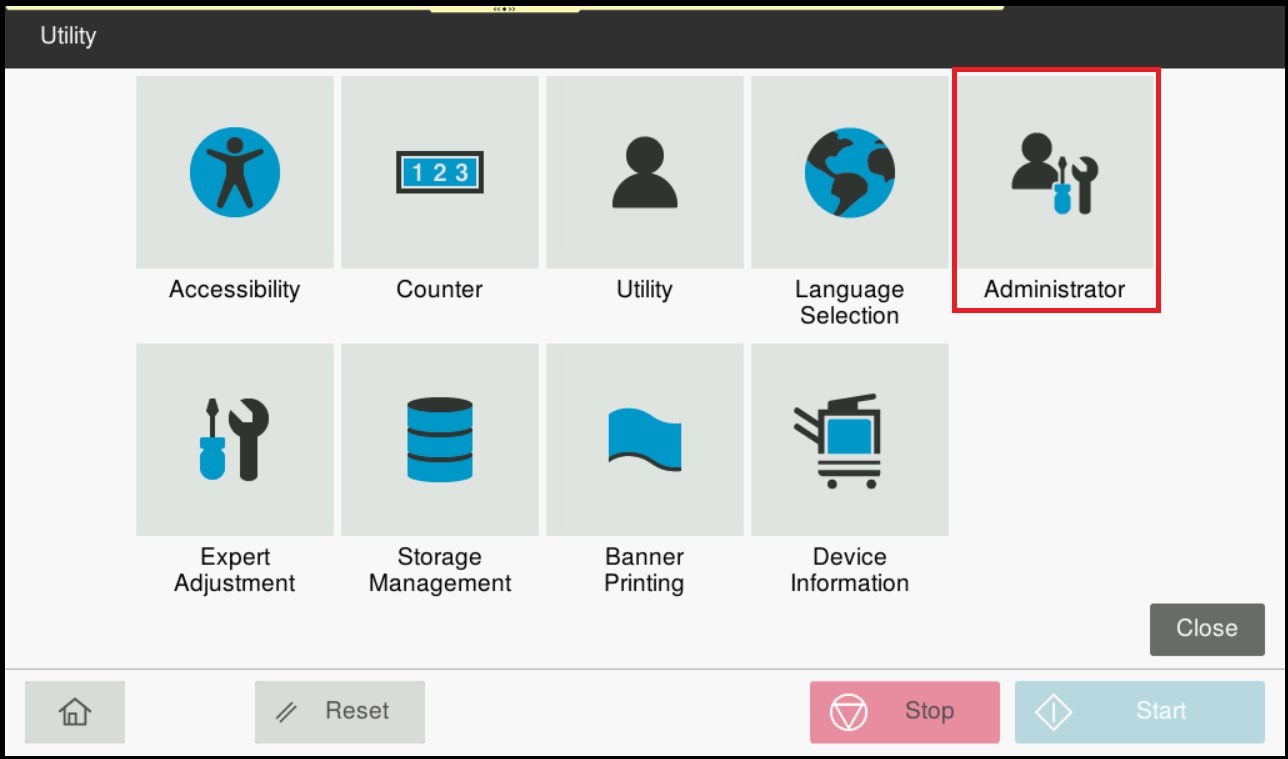
STEP 2 – Select [Administrator].
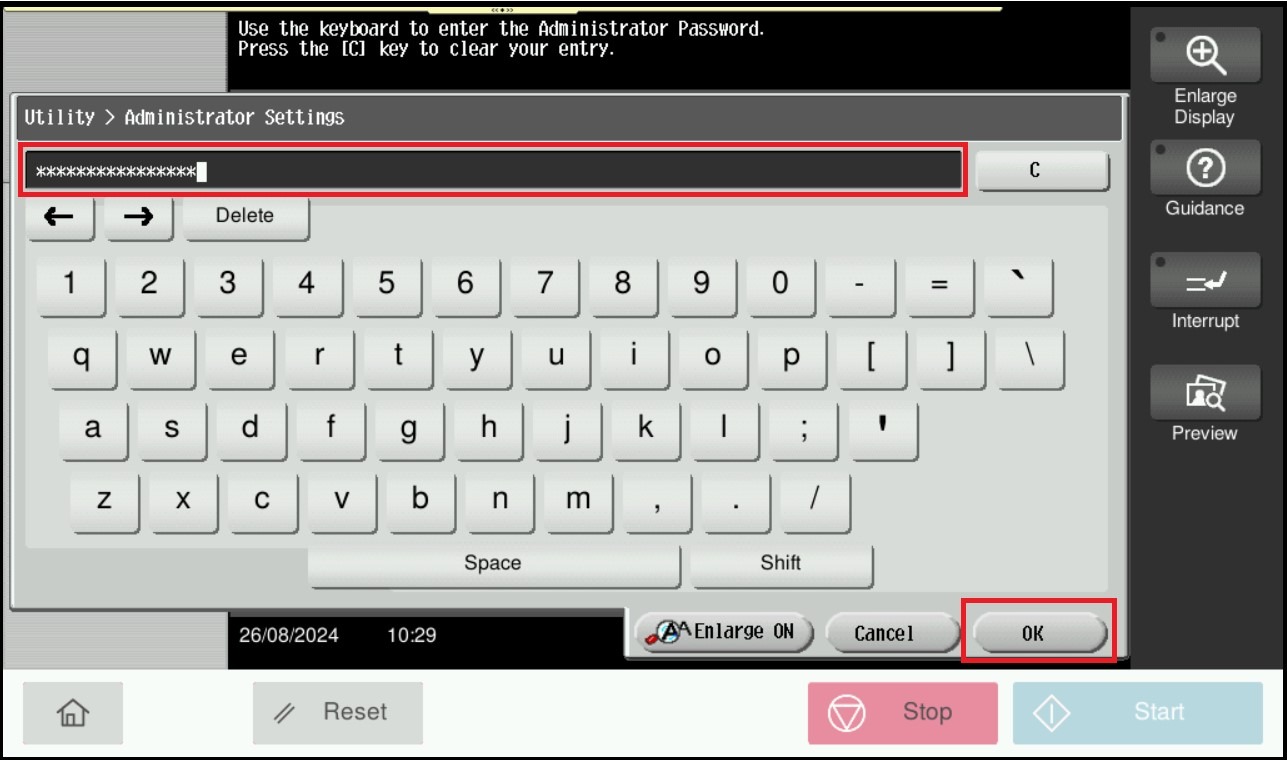
STEP 3 – Key in Administrator password and [OK] to login.
Default administrator password:
[7801261178012611] or [1234567812345678] or [12345678] or [12341234].
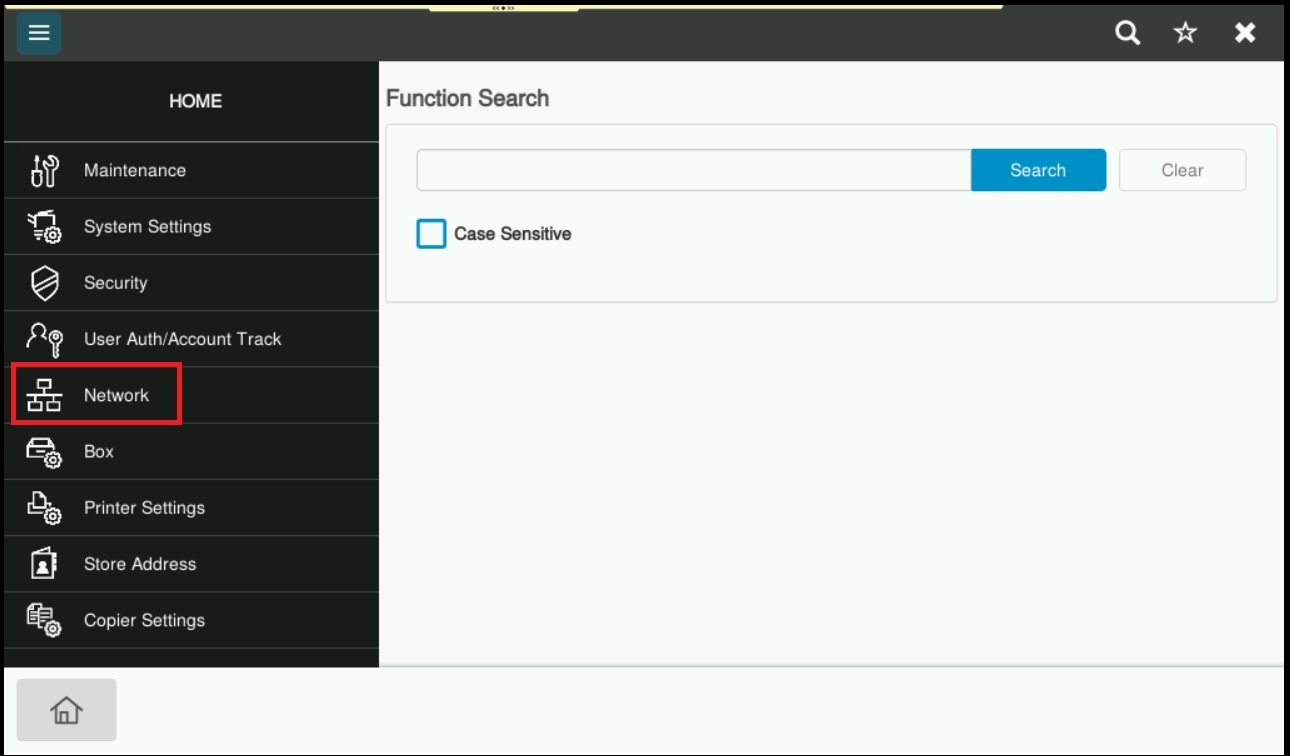
STEP 4 – Select [Network].
STEP 5 – Select [TCP/IP Setting].
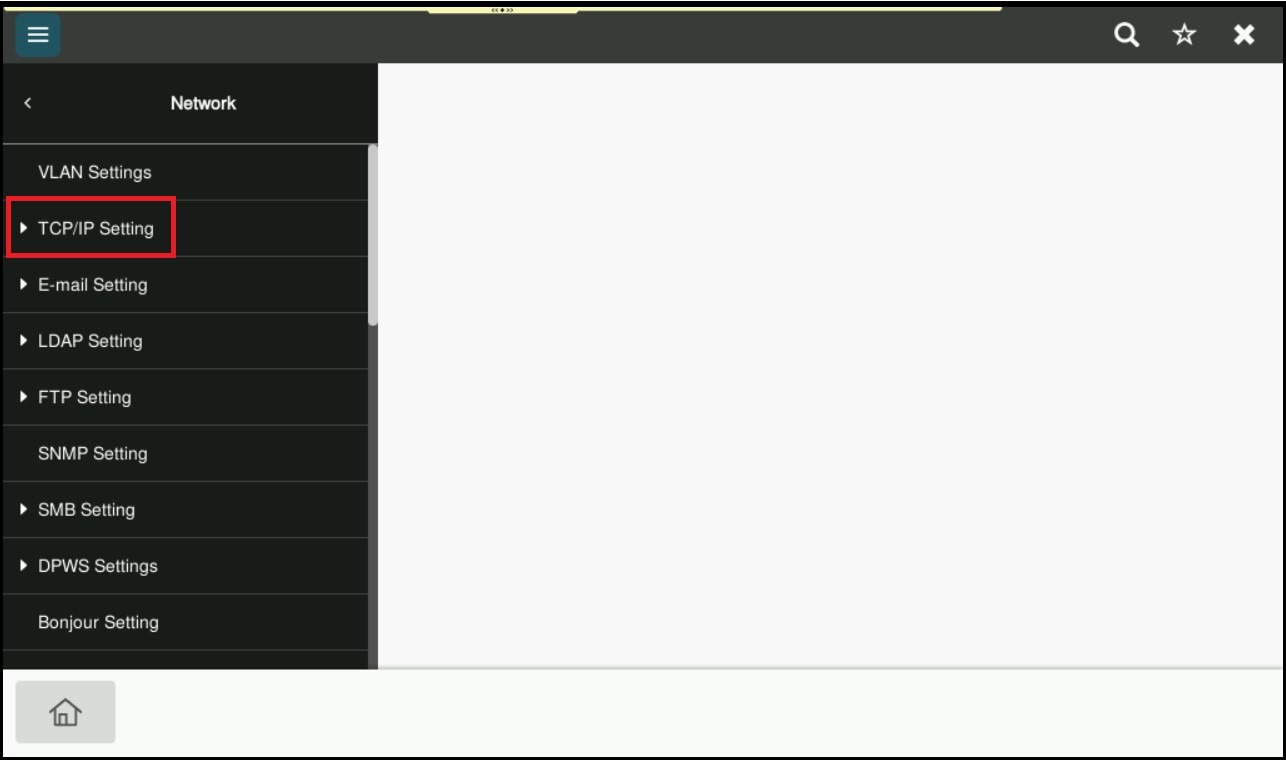
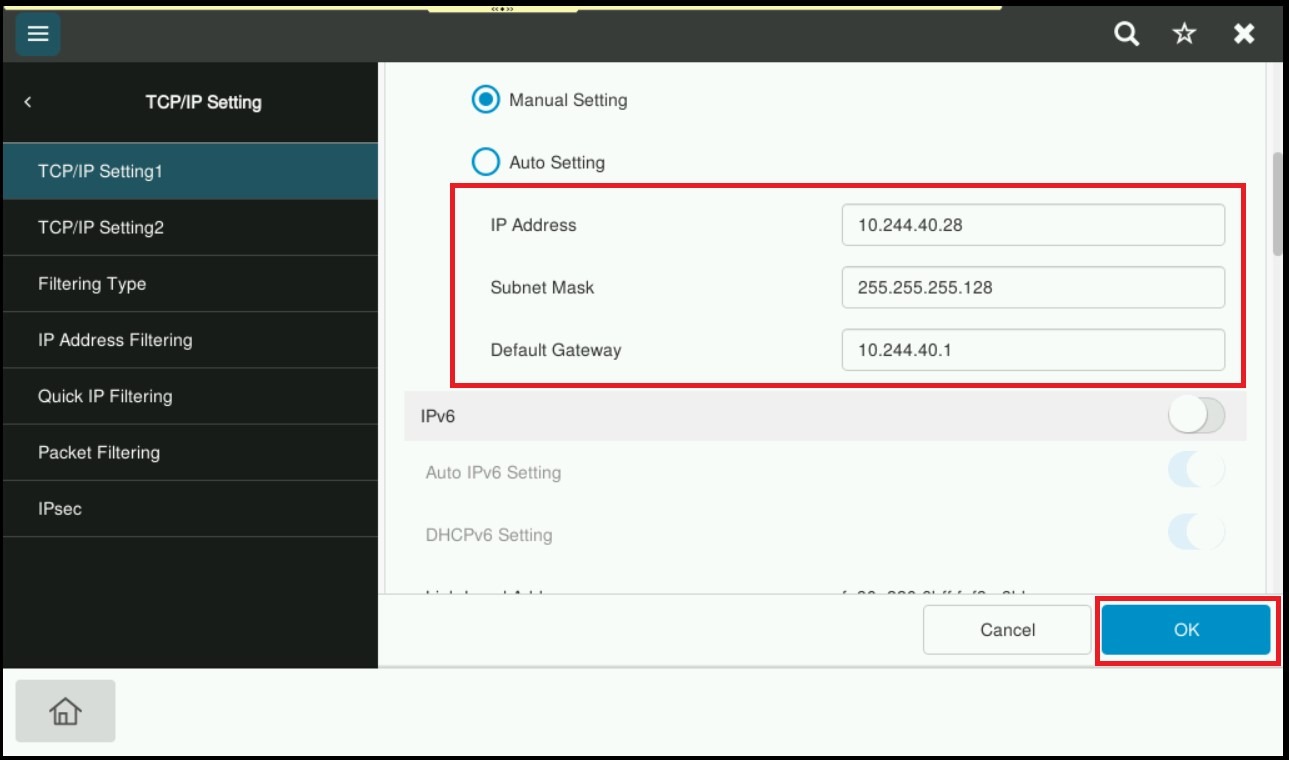
STEP 6 – Select [TCP/IP Setting 1].
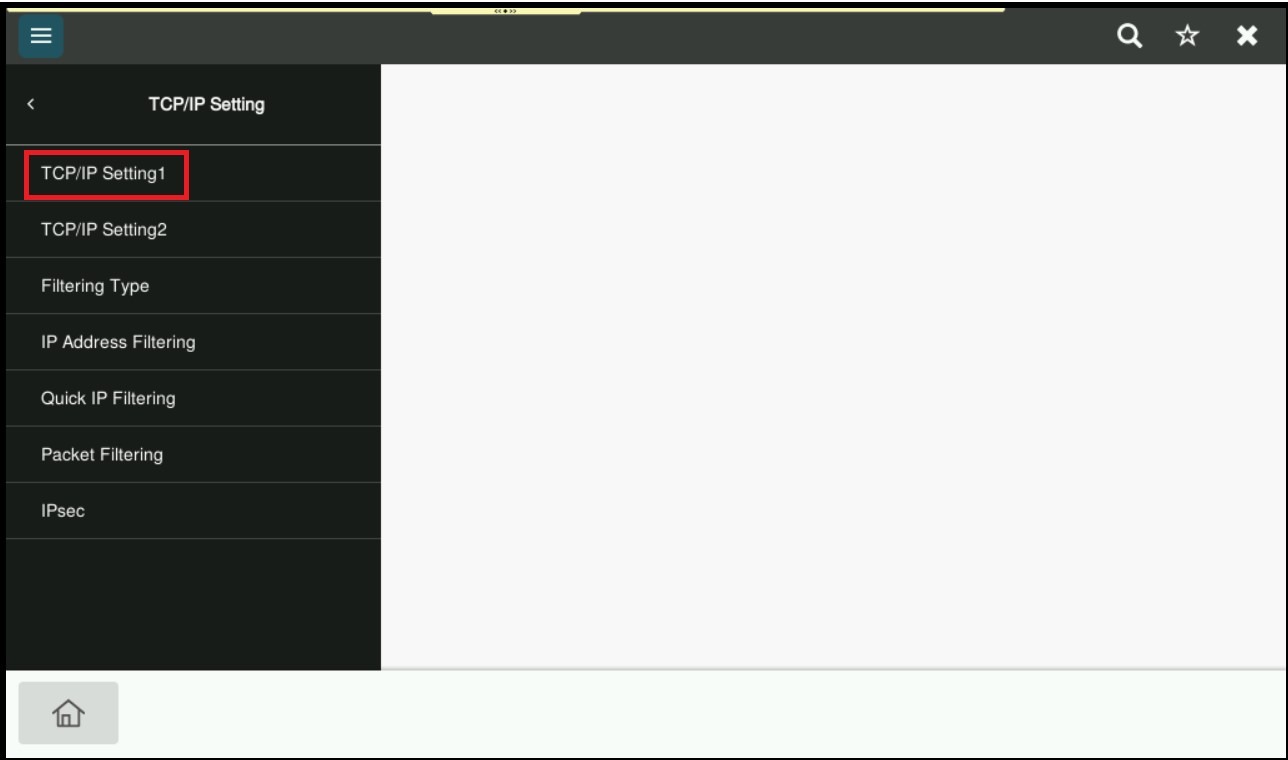
STEP 7 – Select IP Address, Subnet Mask or Default Gateway, to start changing the IP Address on the specific field, then click OK to save the New IP Address of the machine.