Guide on how to resolved the issue auto printing gibberish on the photocopier machine.
When printing from a computer to the photocopier, the printed output may appear as random symbols or gibberish text instead of the actual document.
In some cases, the photocopier may also automatically print gibberish pages repeatedly even when no one is printing.
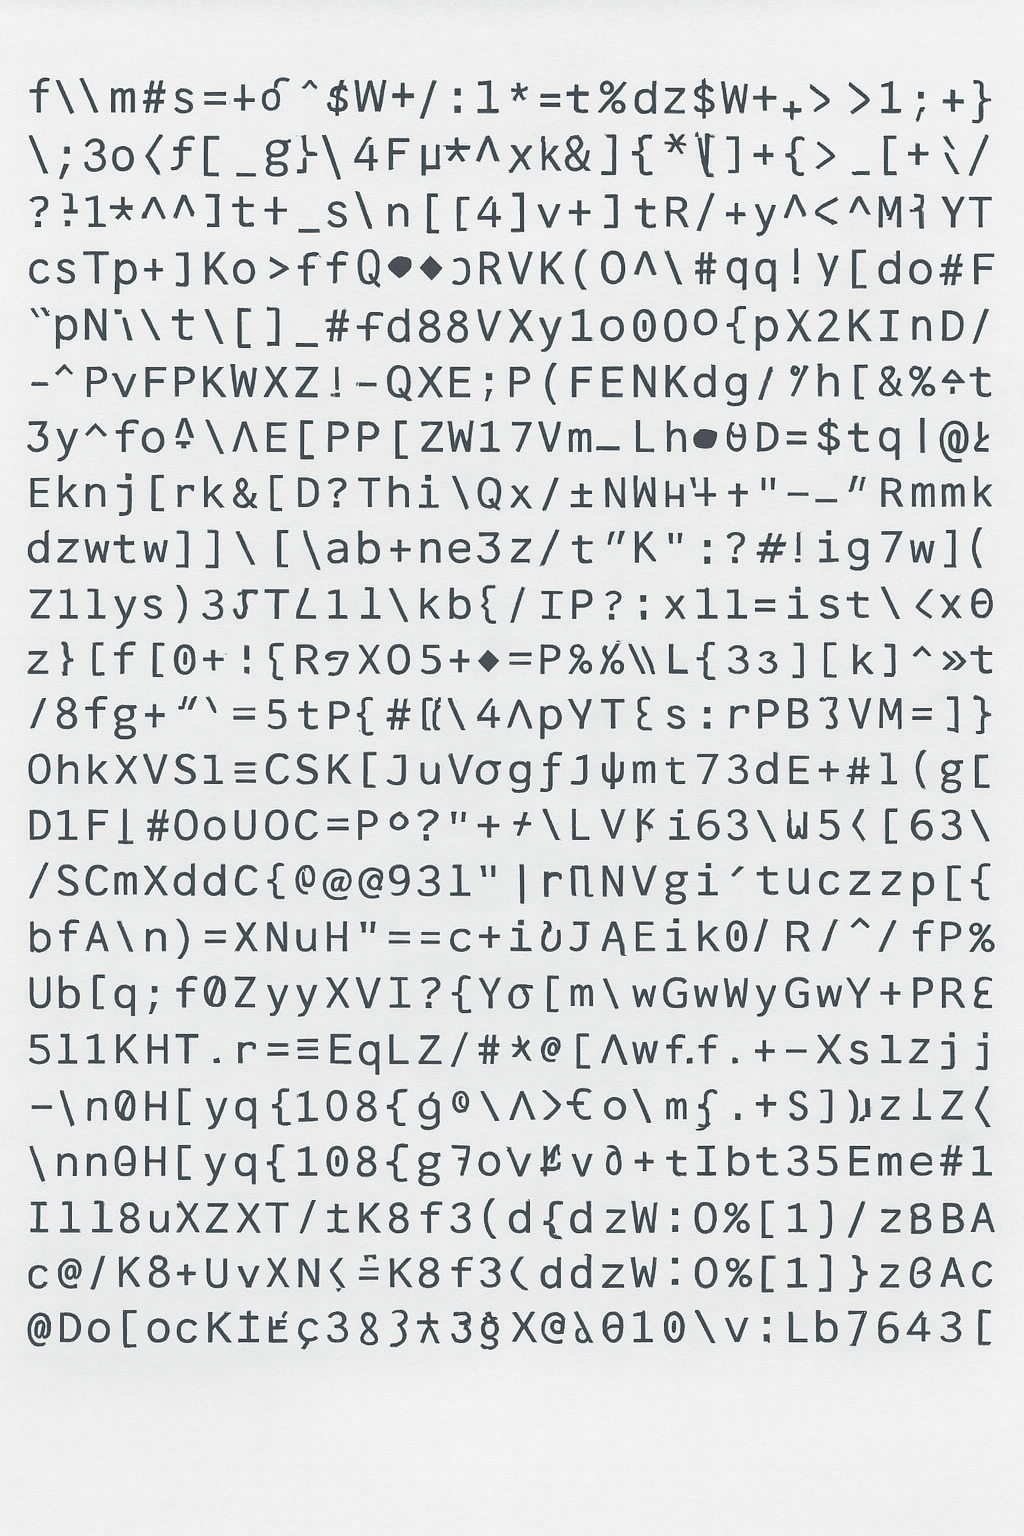
The attachment below shows an example of the gibberish printout, where the photocopier prints random letters and symbols instead of the actual document.
Possible Causes
A. Incorrect or incompatible printer driver installed
The wrong printer driver may cause the machine to receive unreadable data, resulting in gibberish printouts.
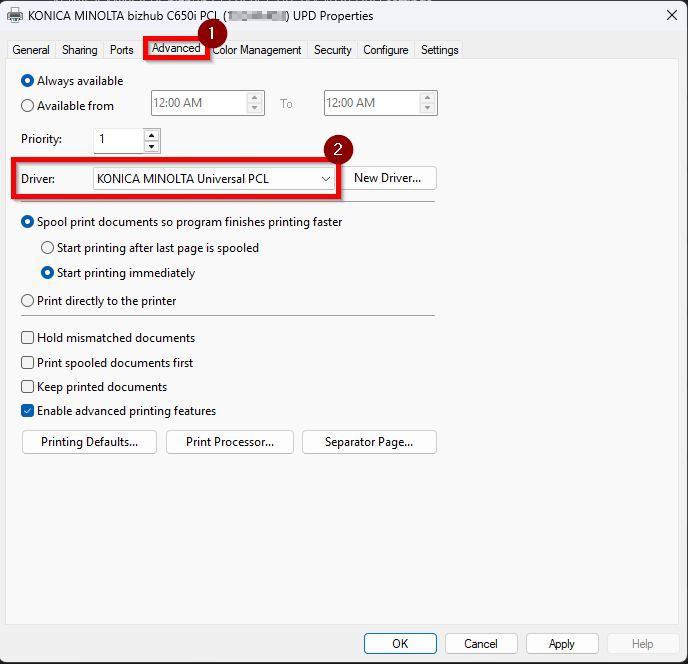
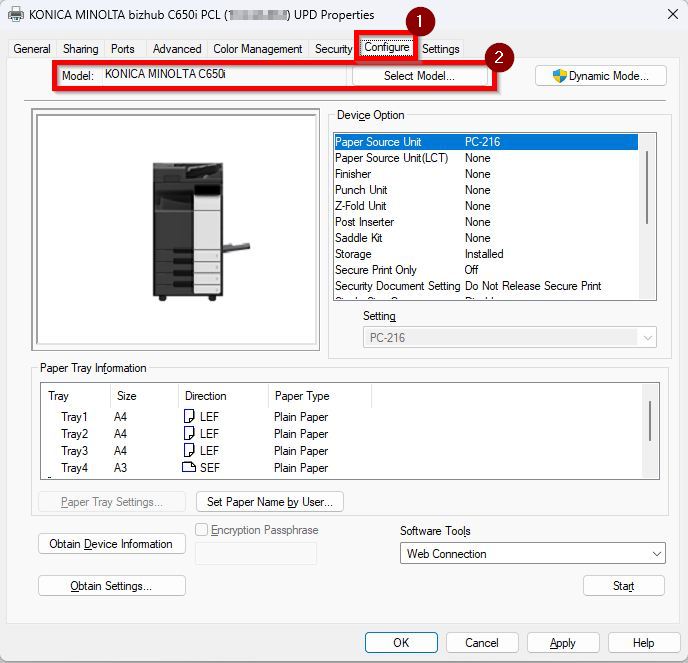
Verify that the correct printer driver is installed by opening the [Control Panel] – [View Devices and Printers] –[Printers and Scanners], click on the printer and select [Printer Properties] and go to [Advanced] and [Configure] tab reviewing the printer driver/model. If the wrong driver is installed, reinstall the correct one.
Download the correct Konica Minolta driver:
- Click Here On How to Download the Universal Printer Driver from the Download Centre
- Click Here On How To Install Universal Printer Driver PS On Windows OS
- Click Here On How To Download The Universal Printer Driver V4 From The Download Centre
B. PDL (Page Description Language) setting not set to PS
If the printer’s PDL setting is not using PS (PostScript), certain documents or print jobs may not be processed correctly and causing random letters and symbols to print.
For The Older Machine Series / Non I-Series Machine
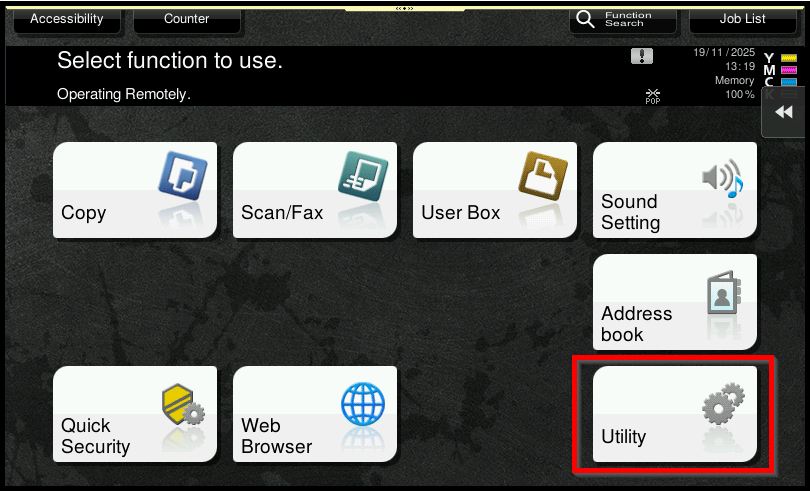
STEP 1 – On the Konica Minolta machine, click on [Menu] button, Select [Utility] from Control Panel.
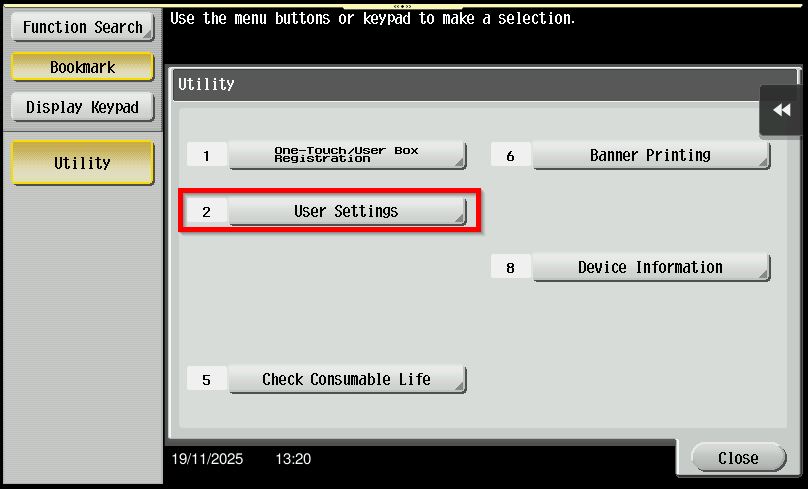
STEP 2 – Select [User Settings].
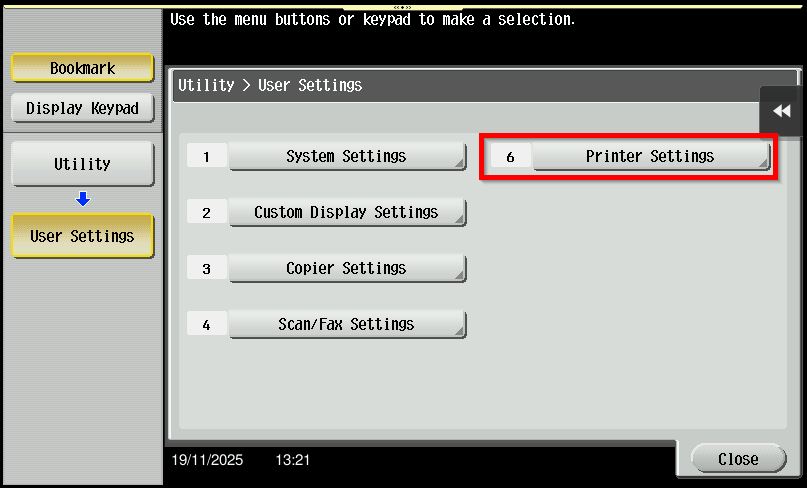
STEP 3 – Go to [Printer Settings].
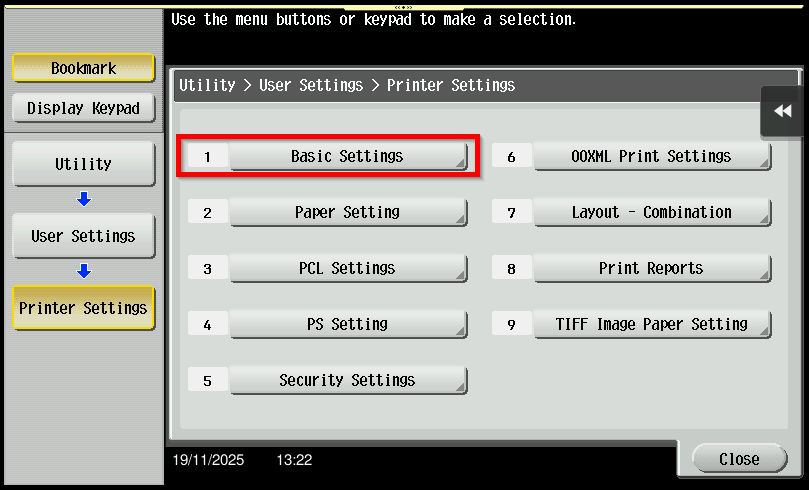
STEP 4 – Select [Basic Settings].
STEP 5 – Select [PDL Setting] – [PS], Click [OK] to save the setting and exit from admin mode.
**Via Web Connection
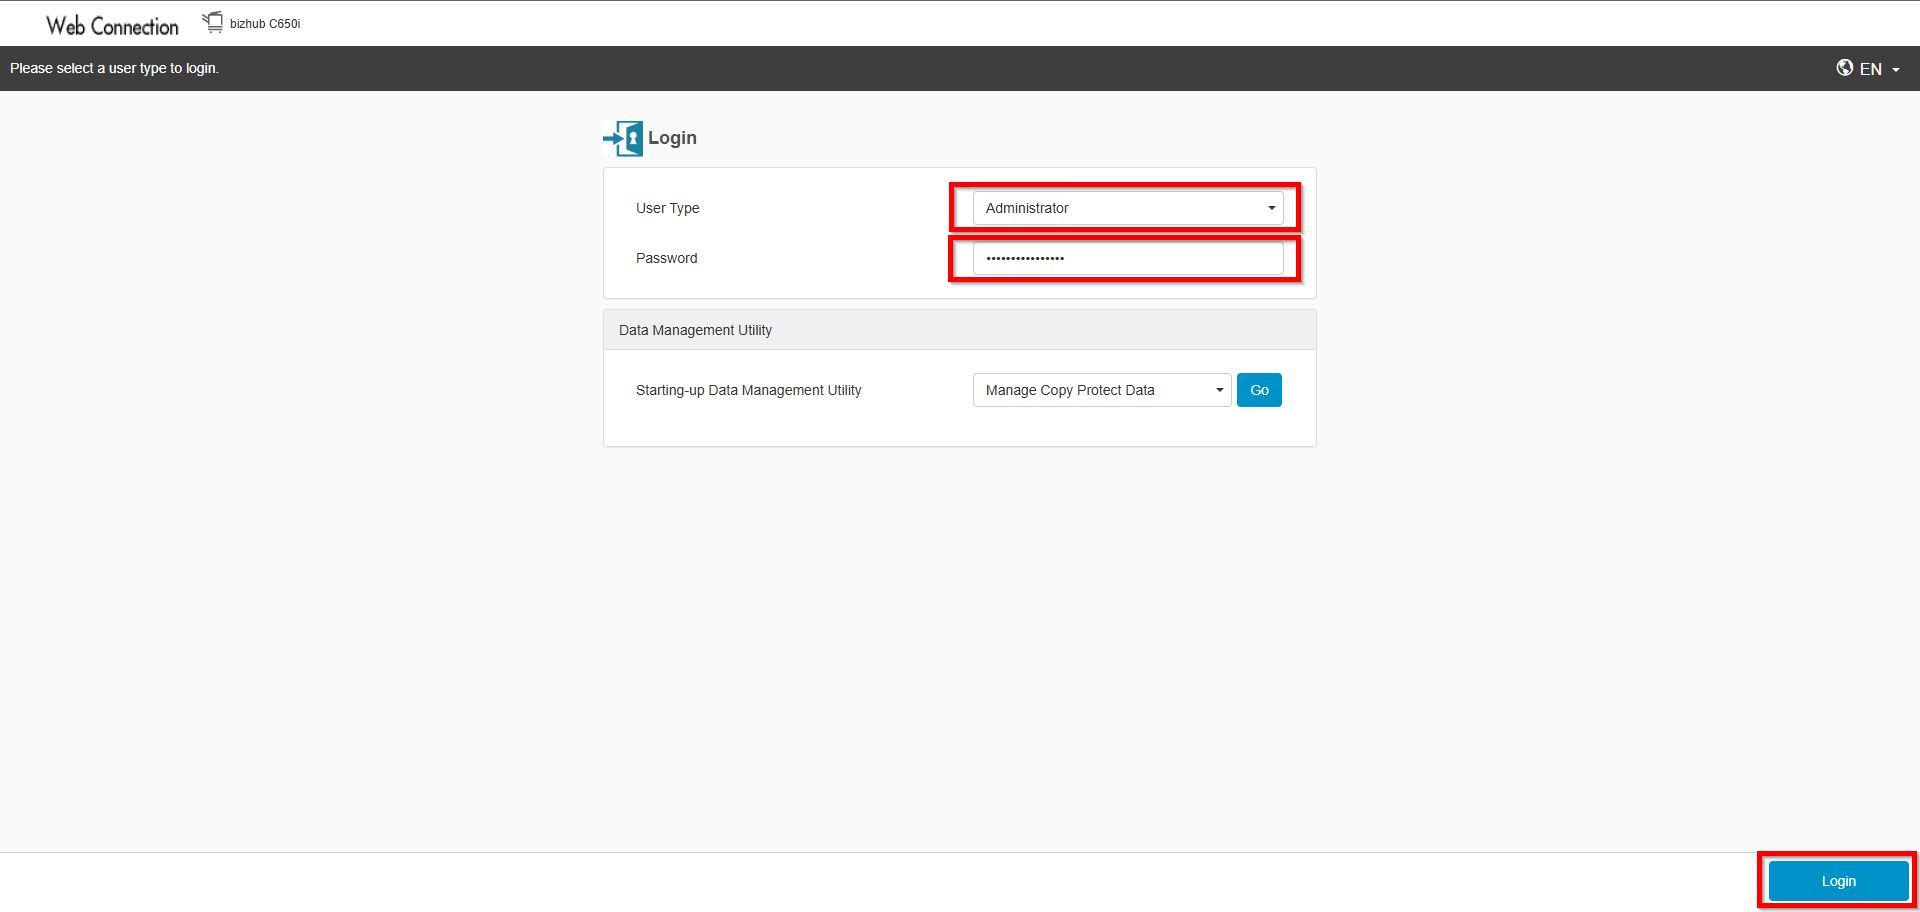
STEP 1 – Select [Administrator] and click on [Login] button.
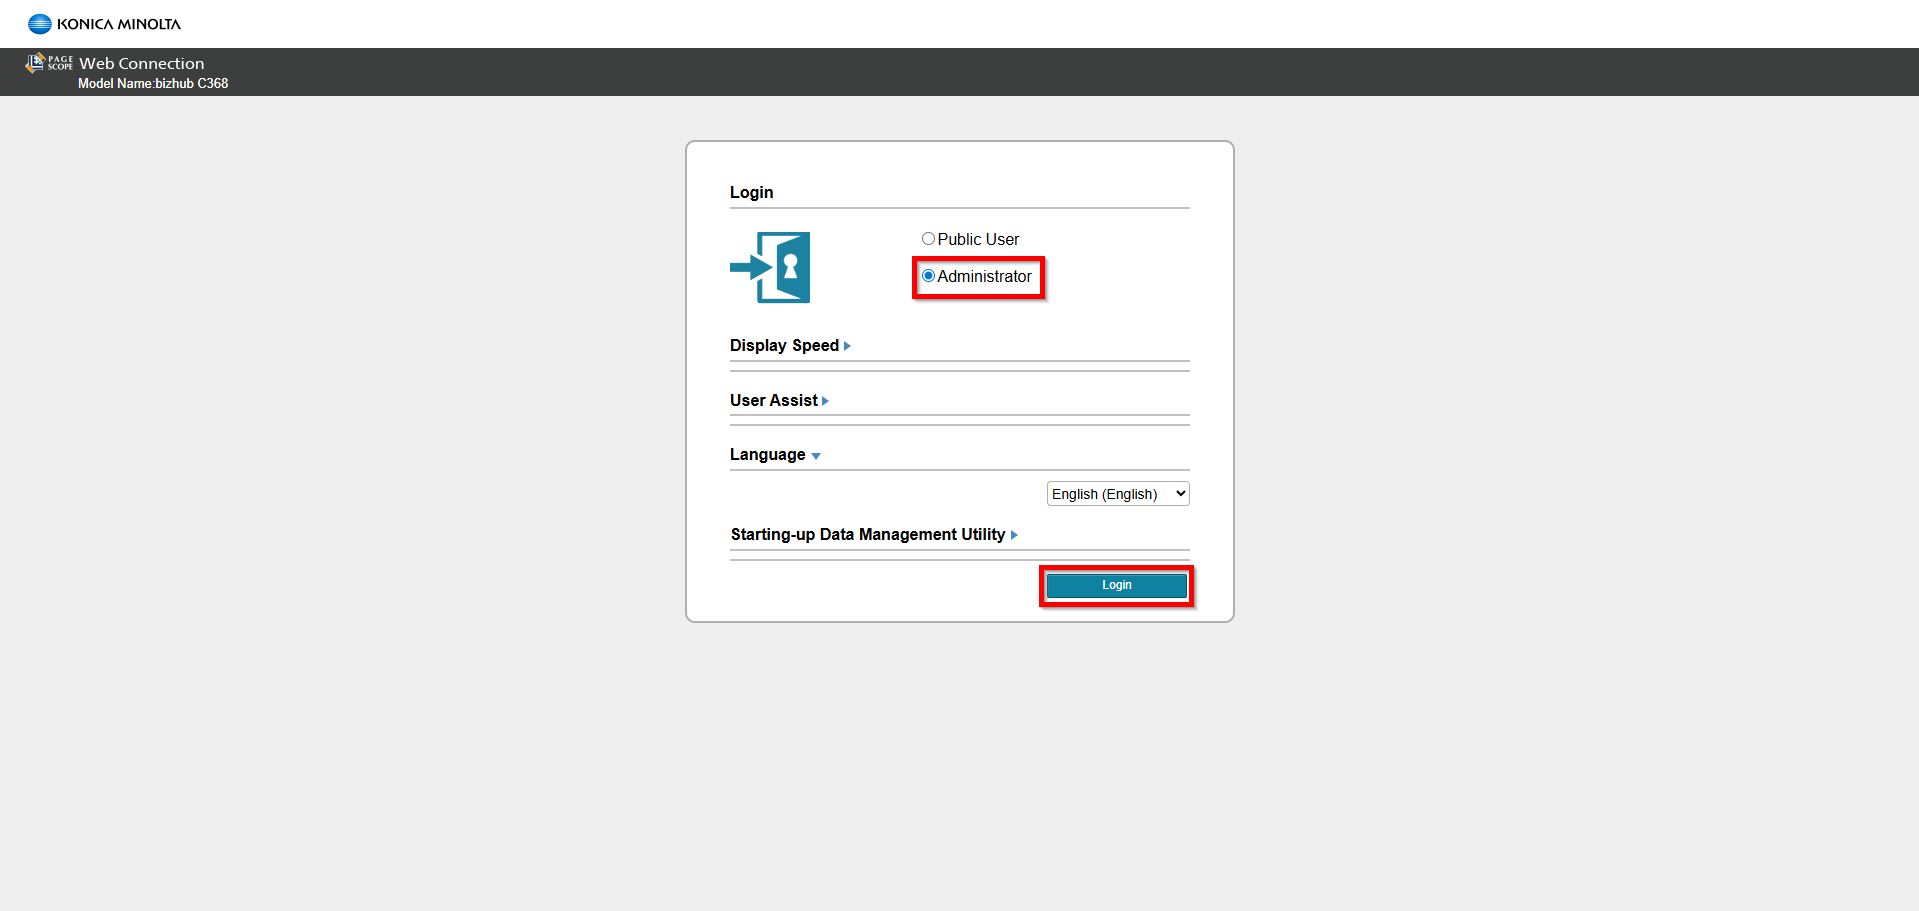
**You may access to web connection via machine IP Address. Click on this to check how to get the IP Address from machine, then key in Konica Minolta Machine IP Address at web browser and log in as admin the Web Connection.
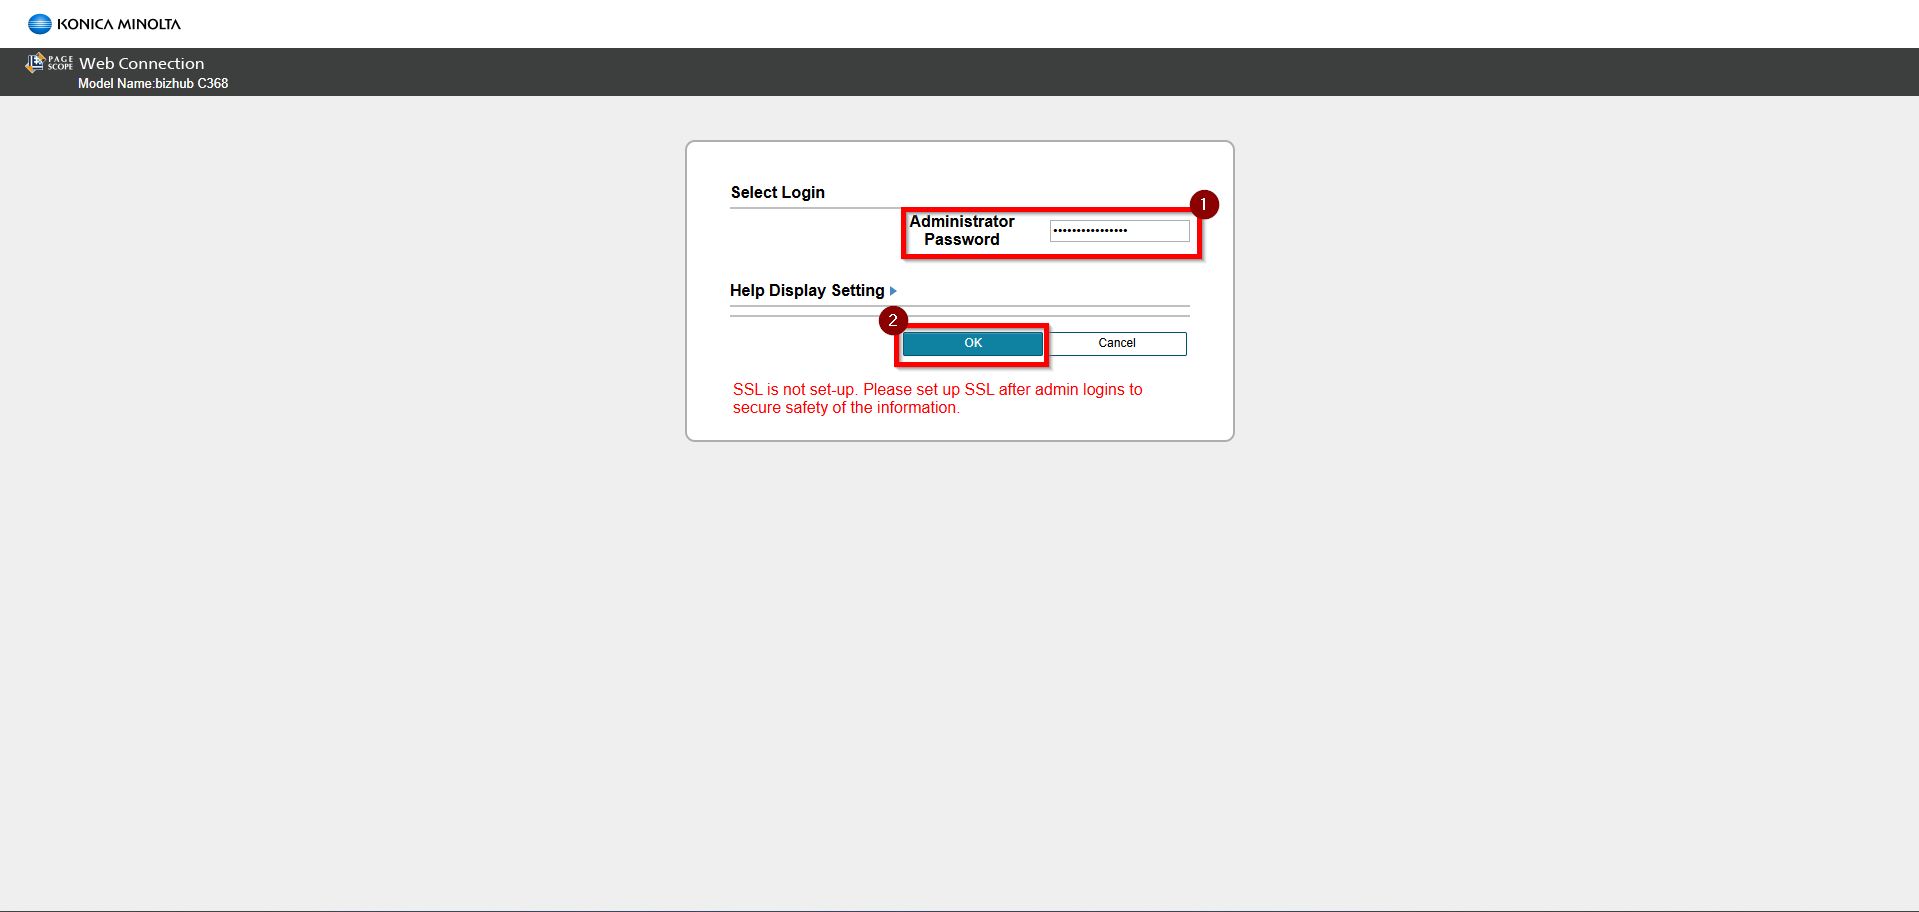
STEP 2 – Key in the default administrator password and click [OK] button.
Default administrator password: [7801261178012611] or [1234567812345678] or [12345678] or [12341234].
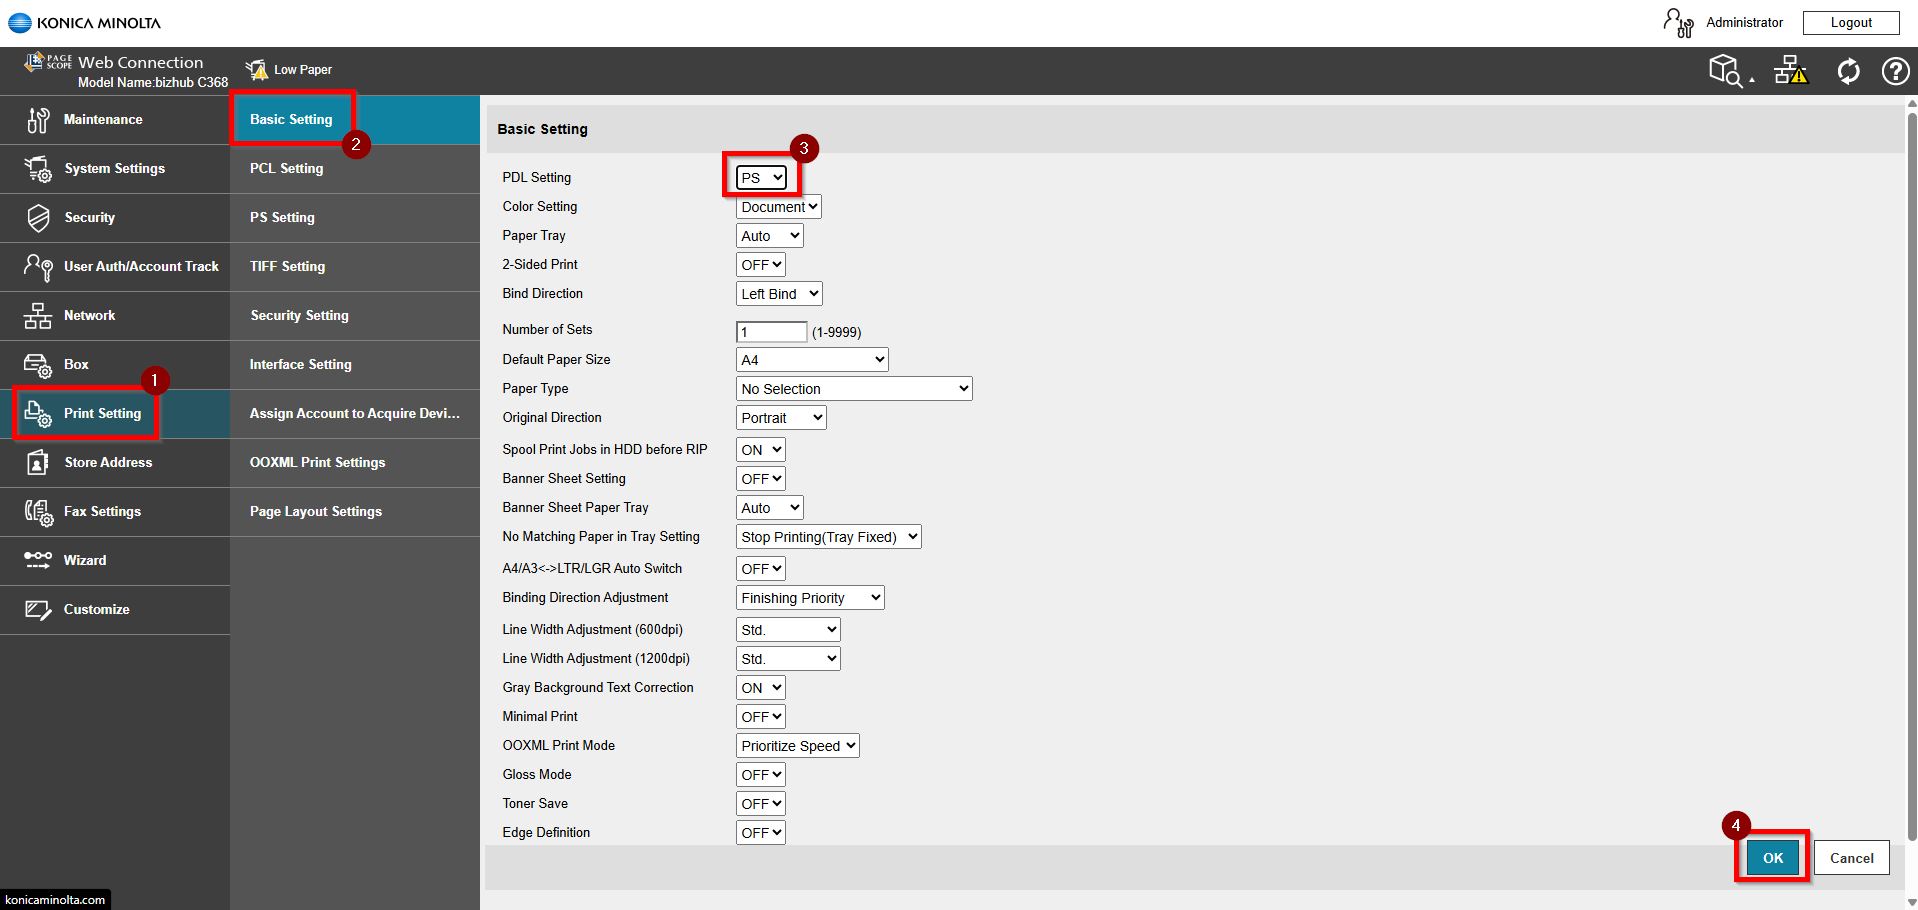
STEP 3 – Select [Print Setting] – [Basic Setting], select [PS] under PDL Setting and click [OK] to save.
Default administrator password: [7801261178012611] or [1234567812345678] or [12345678] or [12341234].
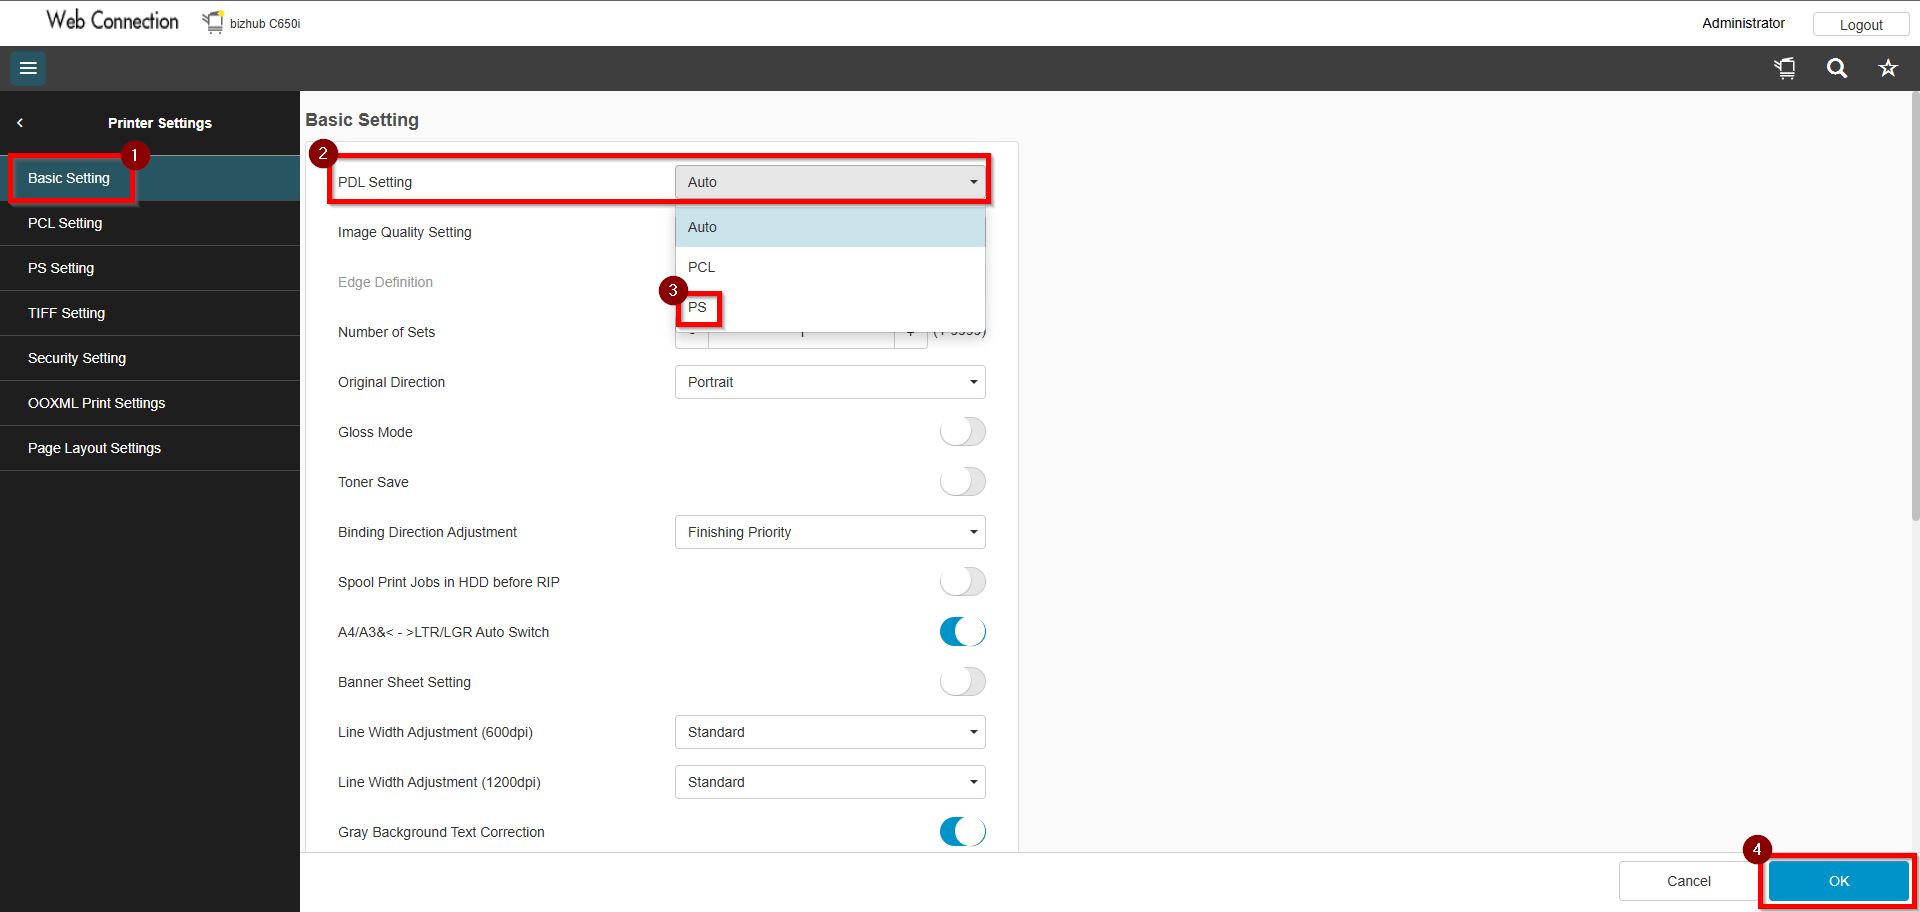
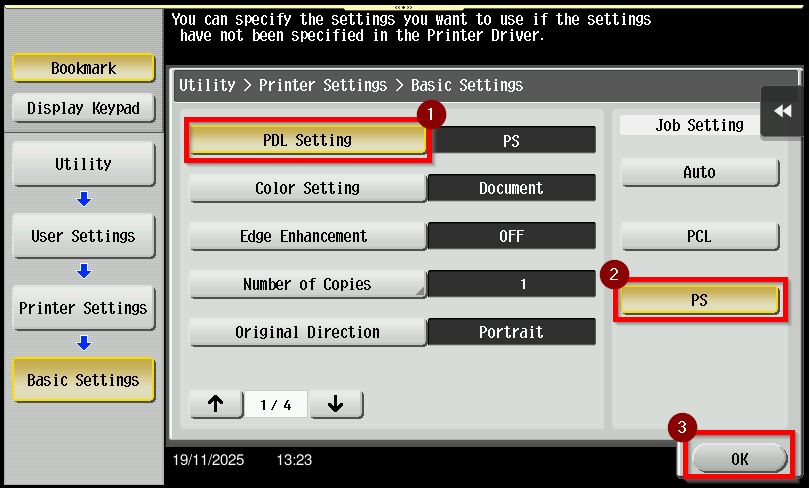
For the Newer Machine series / I-Series Machine
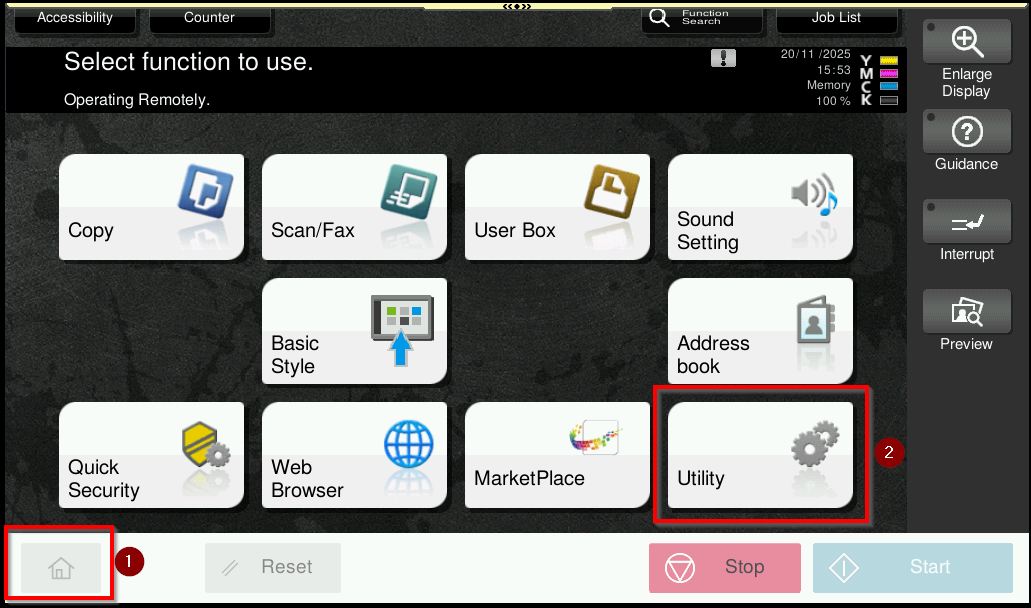
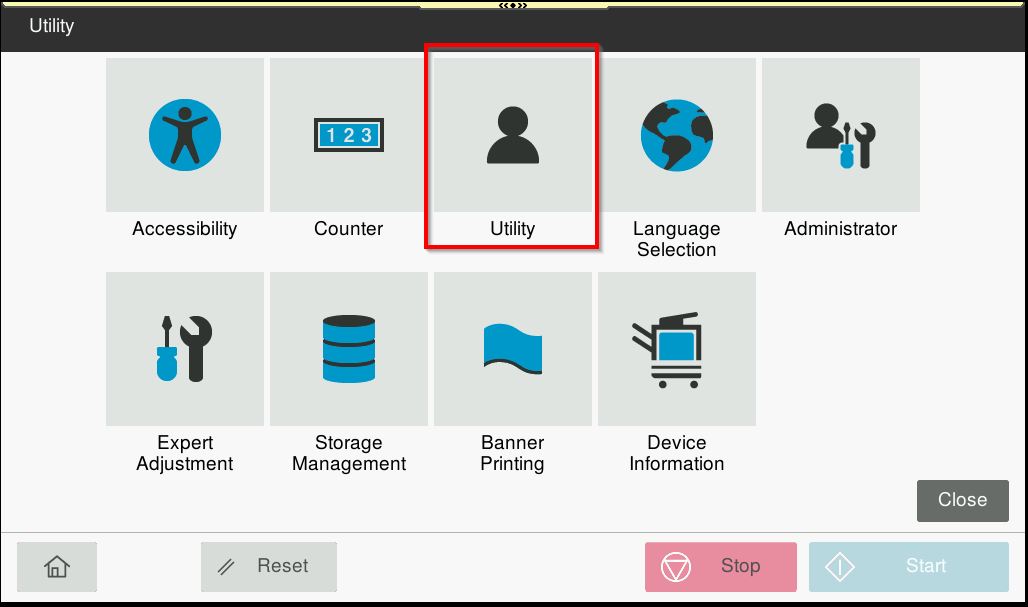
STEP 1 – On the Konica Minolta machine, click on [Home] button, select [Utility] – [Utility] from Control Panel.
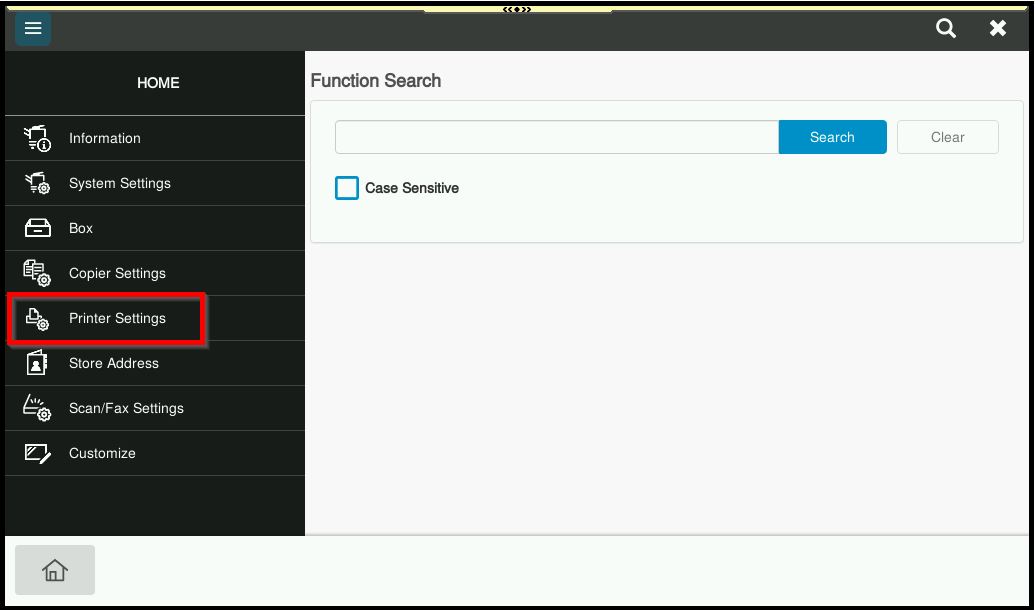
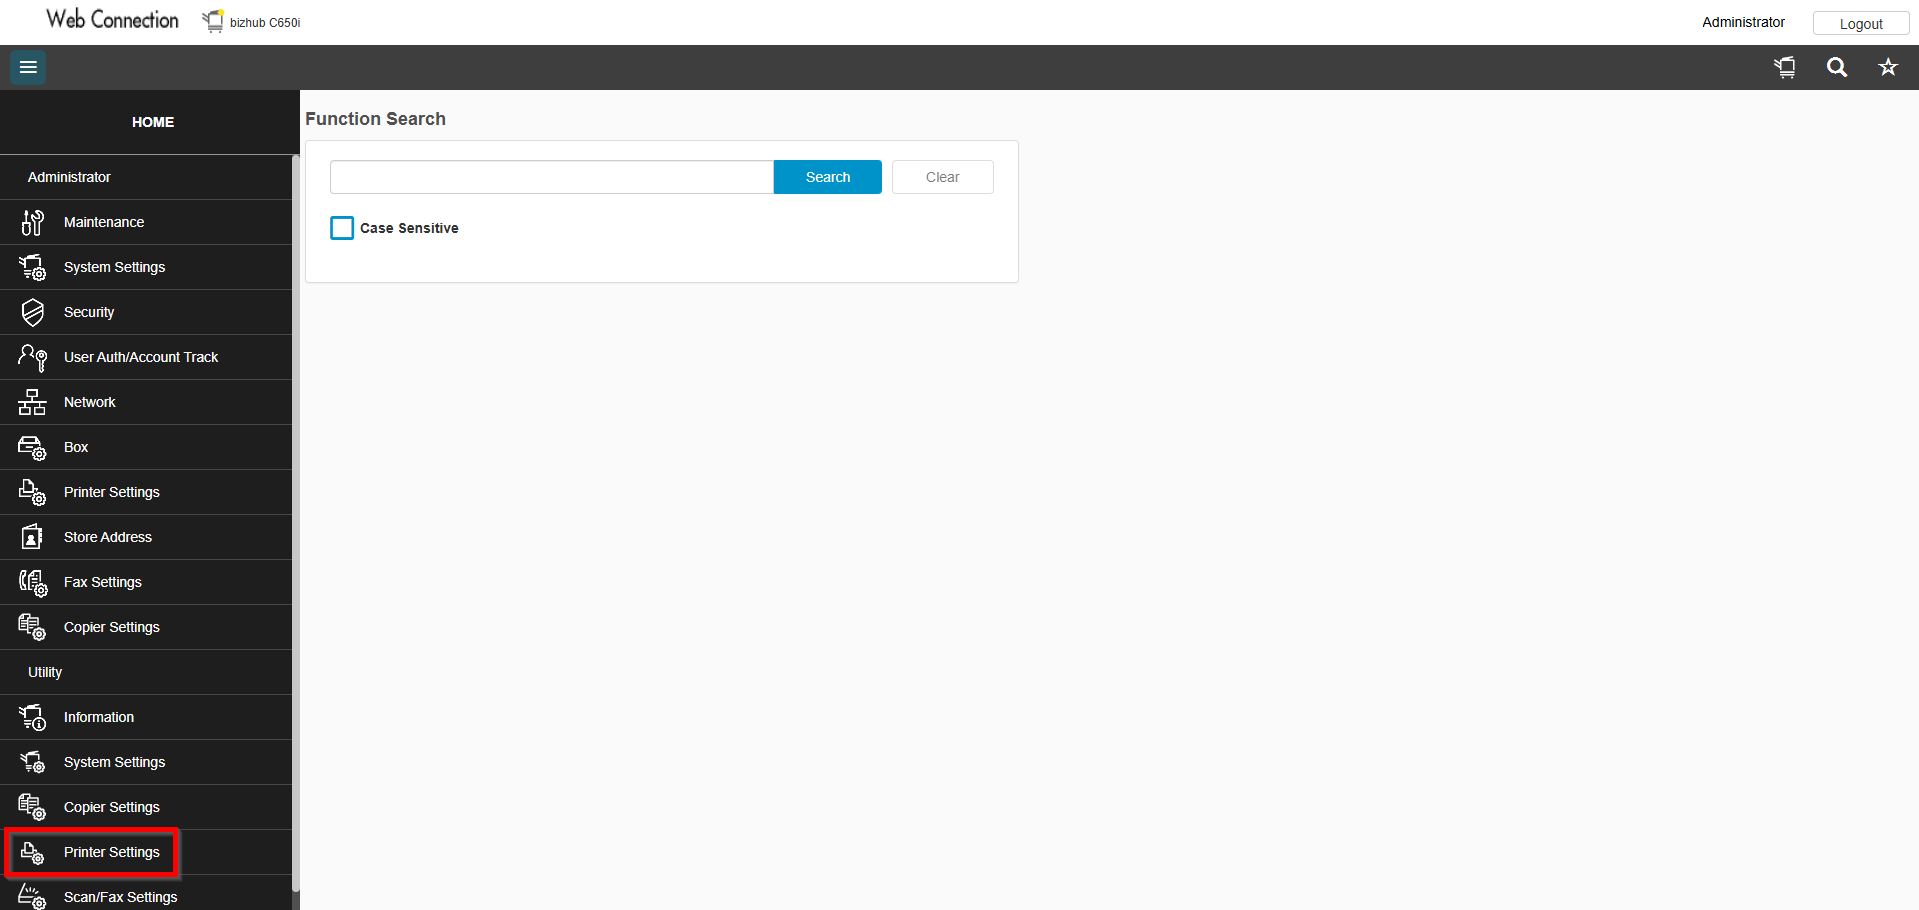
STEP 2 – Select [Printer Settings].
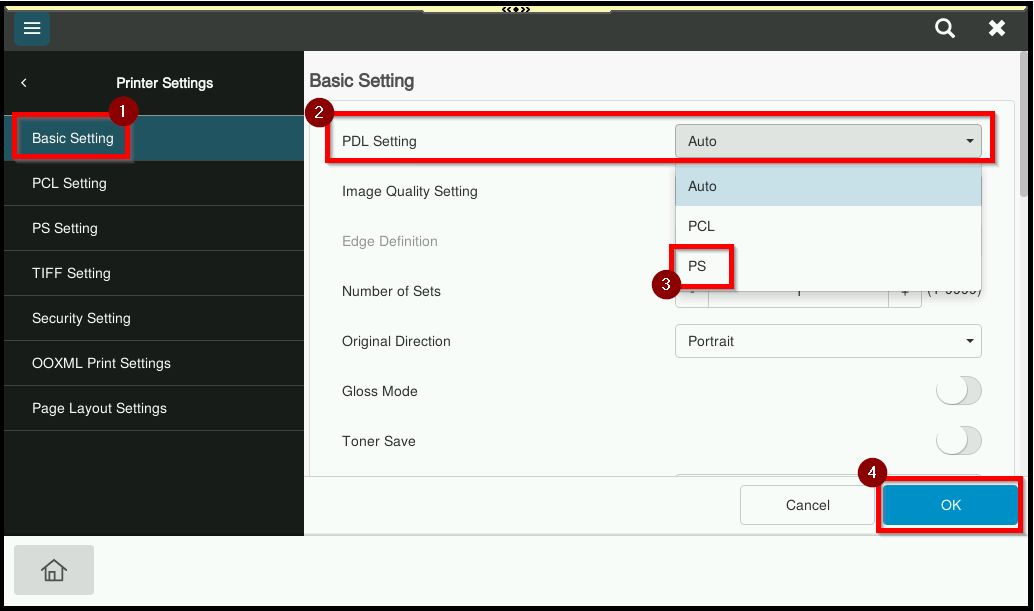
STEP 3 – Go to [Basic Setting] and select [PS] under PDL Setting and click [OK] to save button.
**Via Web Connection
STEP 1 – Select [Administrator], key in the default administrator password and click [Login] button.
Default administrator password: [7801261178012611] or [1234567812345678] or [12345678] or [12341234].
**You may access to web connection via machine IP Address. Click on this to check how to get the IP Address from machine, then key in Konica Minolta Machine IP Address at web browser and log in as admin the Web Connection.
STEP 2 – Select [Printer Settings].
STEP 3 – Go to [Basic Setting], select [PS] under PDL Setting and click [OK] to save.