
Guide on how to Key-in the User Authentication or Account Track details On the Universal Printer Driver for Windows Operating System.
User Authentication Password On Printer Driver
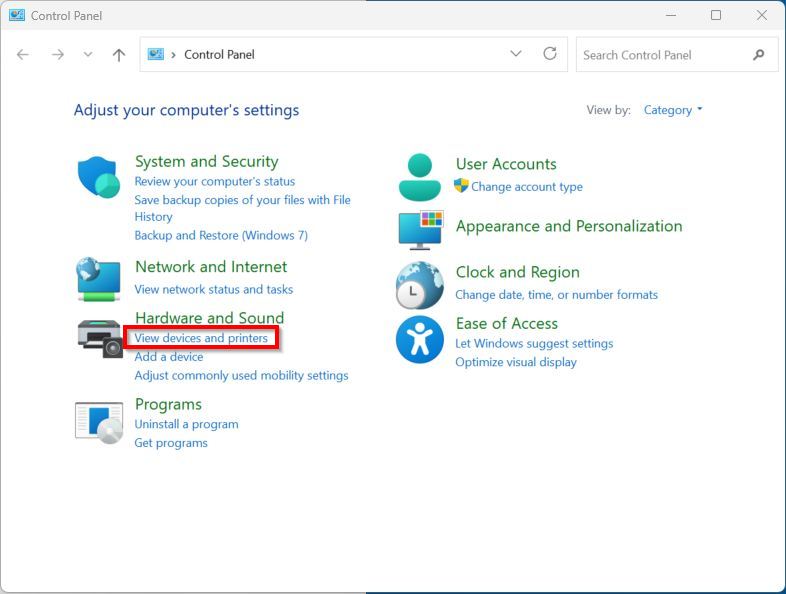
STEP 1 – Go to the PC Control Panel and select Devices and Printers.
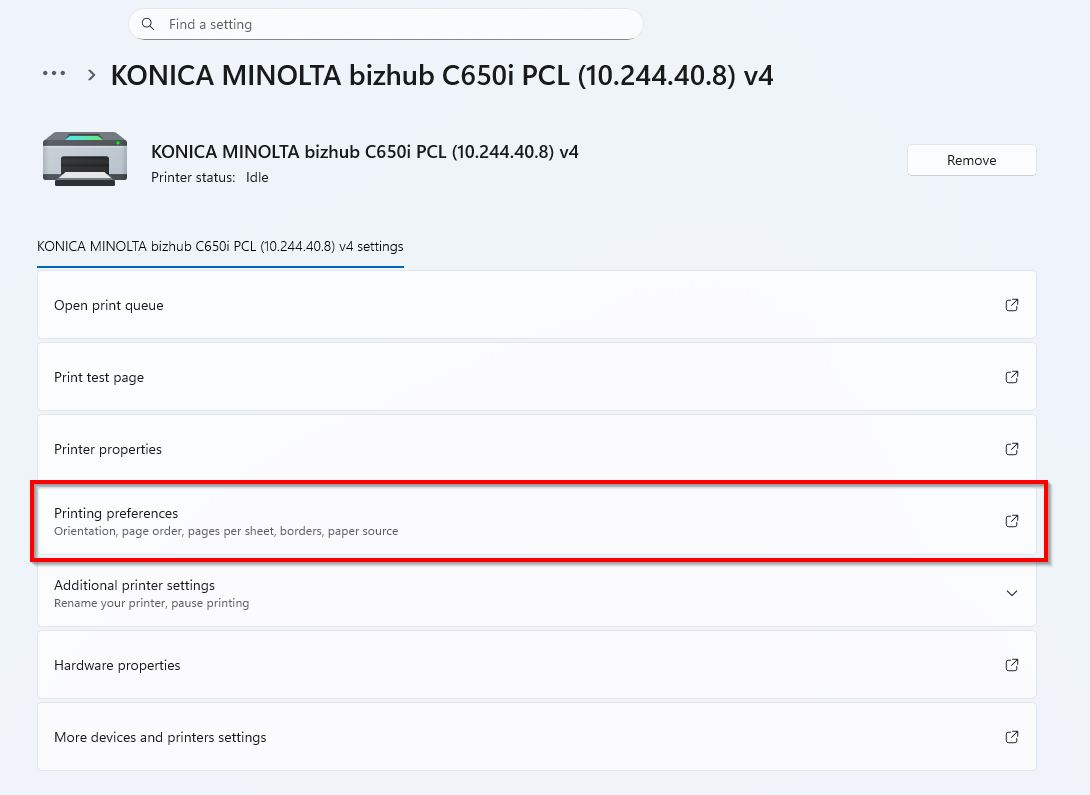
STEP 2– Right click on the Universal Konica Minolta V4 printer and select Printing Preferences. For Window 11, kindly select [Printer and scanner] – [Universal Konica Minolta V4]-[Printing preferences].
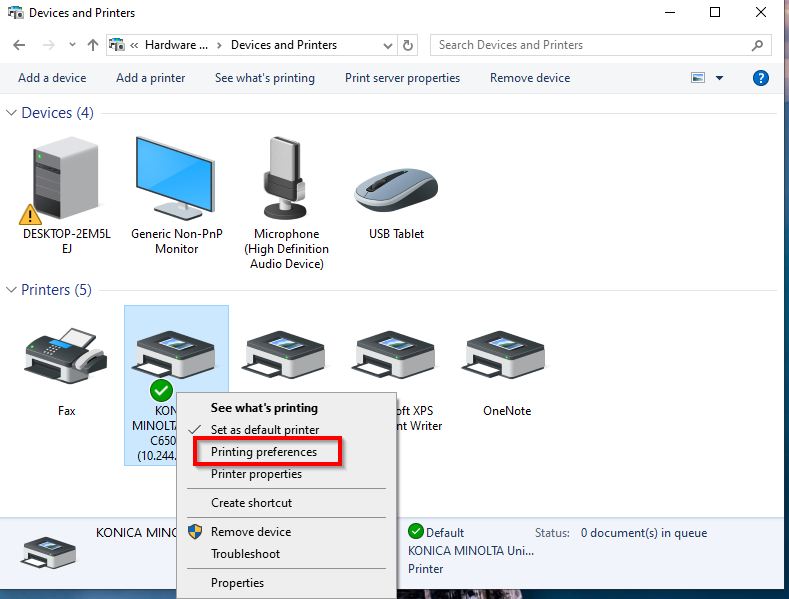
*Window 10
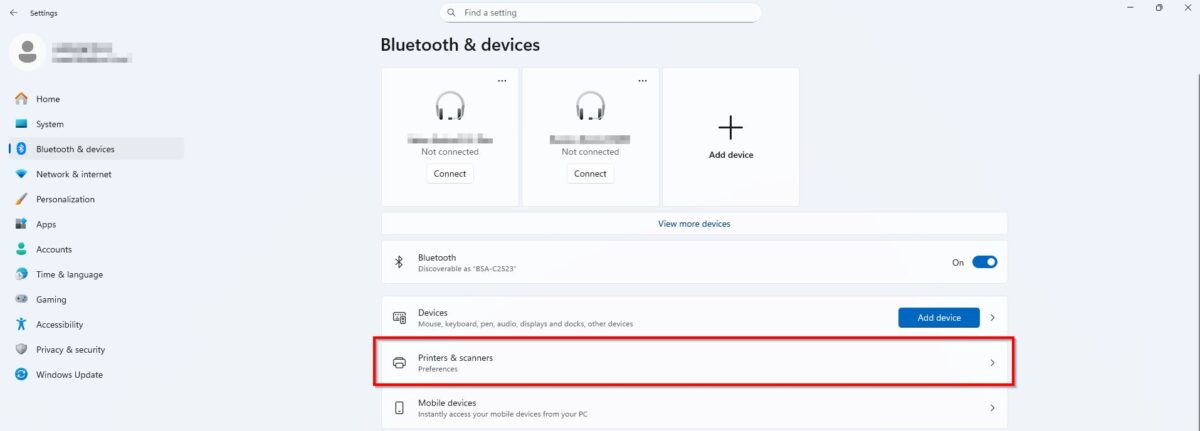
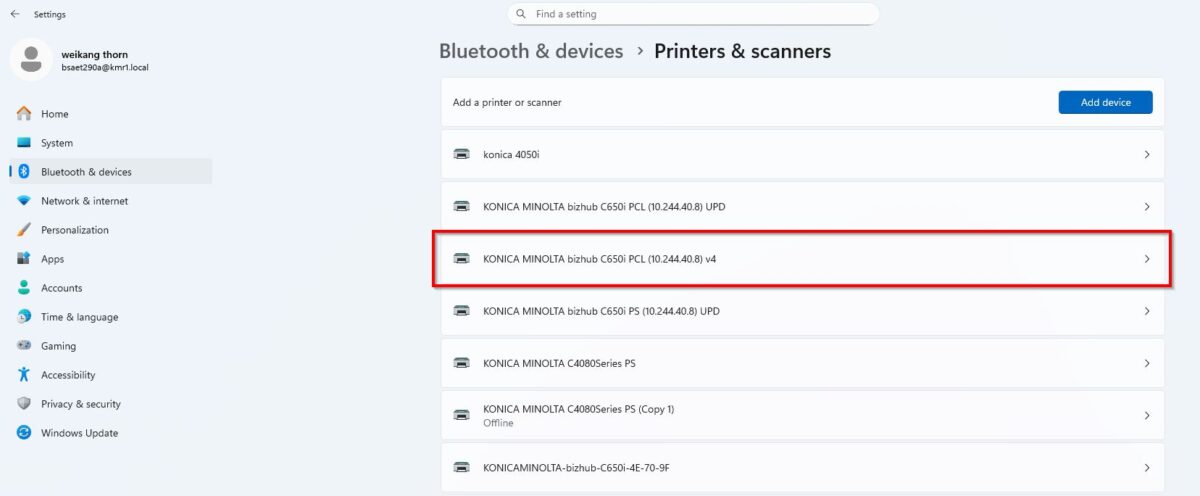
*Window 11
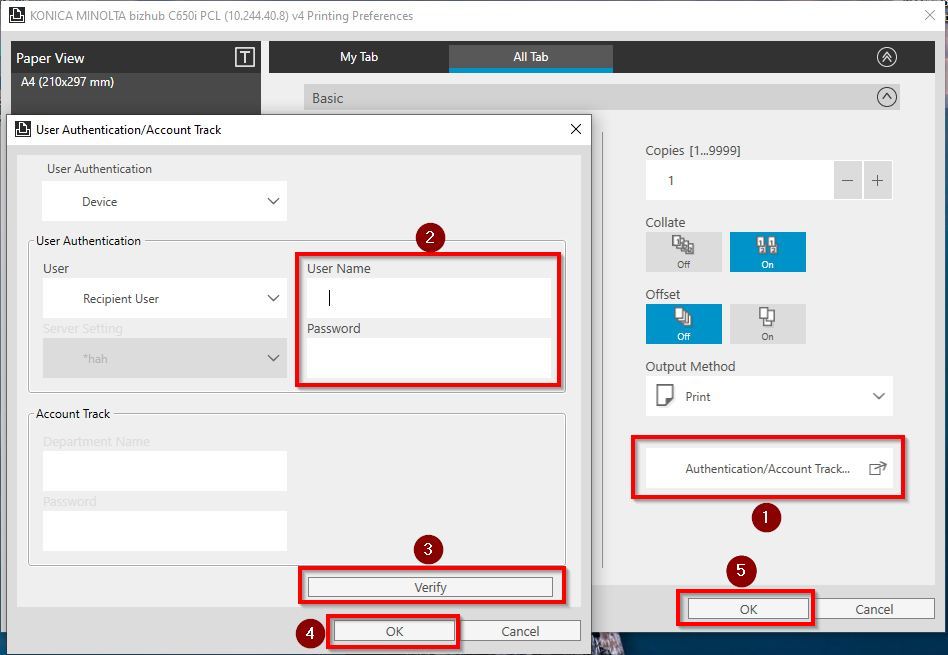
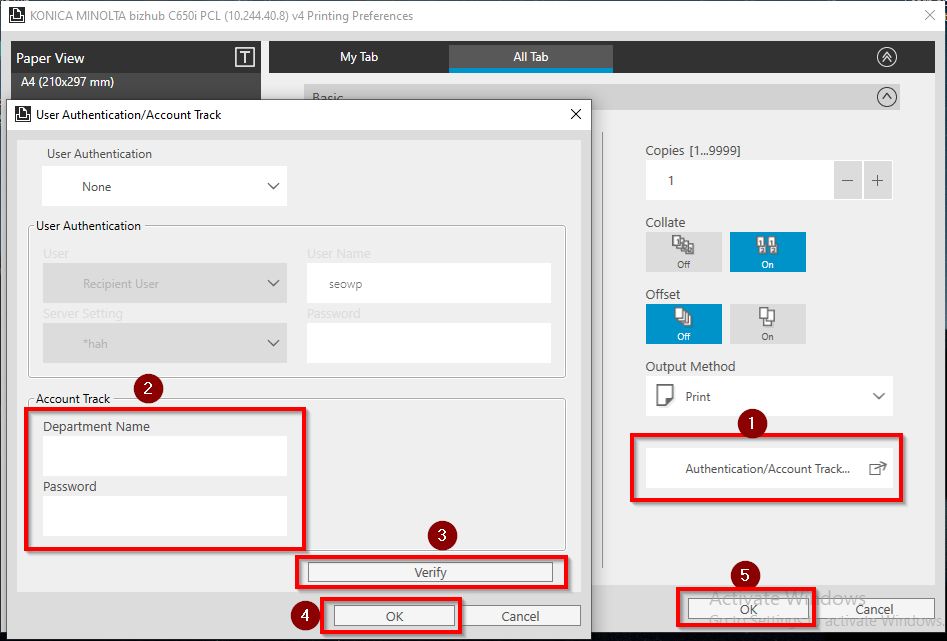
STEP 3 – Proceed to go to [All Tab] – [Basic] – [Authentication/Account Track], proceed to key in User Authentication, click verify and proceed to select [OK] twice.
*In case unable to see the option [Authentication/Account Track], kindly proceed to STEP 3(a) to readjust model setting before proceeding to this step.
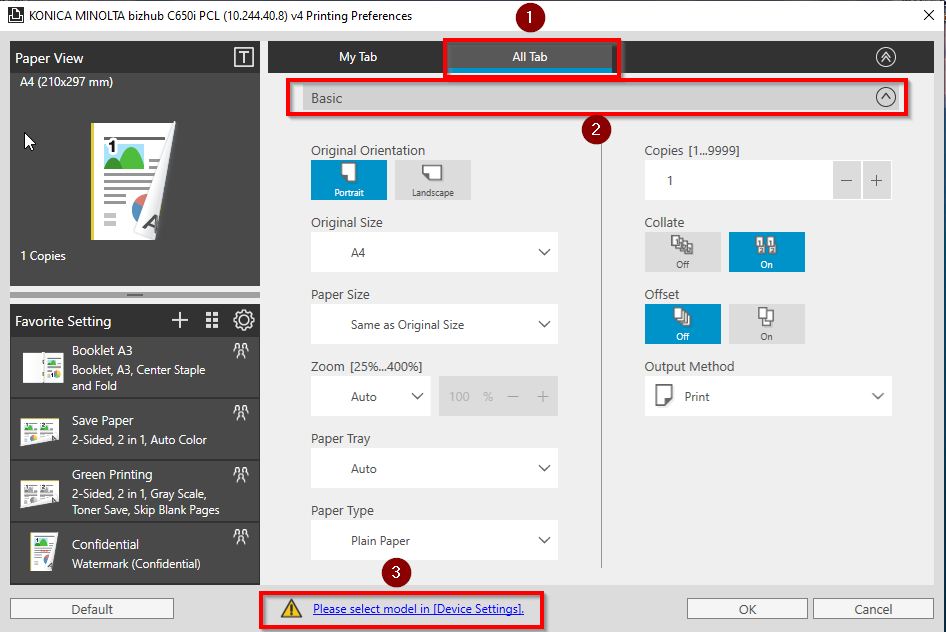
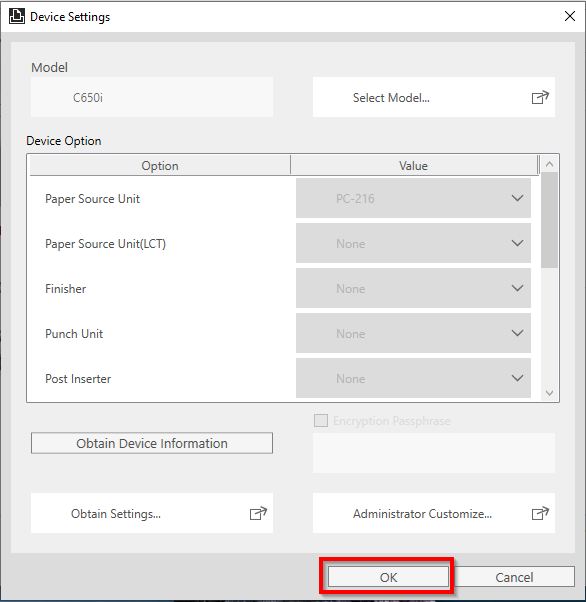
STEP 3(a) Incase [Authentication/Account Track] on STEP 3 is unable to seen as below, kindly proceed to select an option [Please select model in [Device Settings] to adjust machine setting.
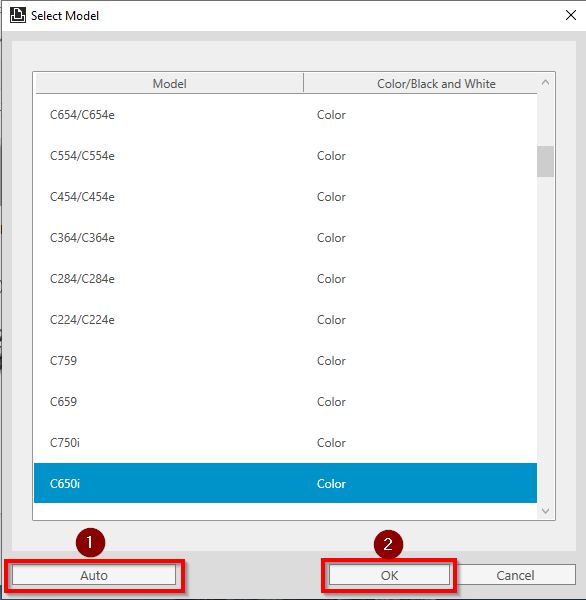
STEP 3(b) Select [Auto] – [OK], make sure the Printer Model is correct under Model then proceed to select [OK] again. Proceed go back to STEP 3 again to key in user authentication. Then click [OK] to save the setting before printing.
Account Track Password On Printer Driver
STEP 1 – Go to the PC Control Panel and select Devices and Printers.
STEP 2– Right click on the Universal Konica Minolta V4 printer and select Printing Preferences. For Window 11, kindly select [Printer and scanner] – [Universal Konica Minolta V4]-[Printing preferences].
*Window 10
*Window 11
STEP 3 – Proceed to go to [All Tab] – [Basic] – [Authentication/Account Track] to key in Account Track password, click verify and proceed to select [OK] twice.
*In case unable to see the option [Authentication/Account Track], kindly proceed to STEP 3(a) to readjust model setting before proceeding to this step.
STEP 3(a) Incase [Authentication/Account Track] on STEP 3 is unable to seen as below, kindly proceed to select an option [Please select model in [Device Settings] to adjust machine setting.
STEP 3(b) Select [Auto] – [OK], make sure the Printer Model is correct under Model then proceed to select [OK] again. Proceed go back to STEP 3 again to key in user authentication. Then click [OK] to save the setting before printing.