
Guide on how to edit or delete User Authentication settings on the machine.
When to edit or delete user for User Authentication on the Machine
When the user wants to edit or delete a registered user in User Authentication on the Machine, it can be done via Web Connection or Machine panel directly, this is useful when required updating user information or removing users who are no longer required access.
For Older Machine series / Non I-Series Machine (From Machine Control Panel)
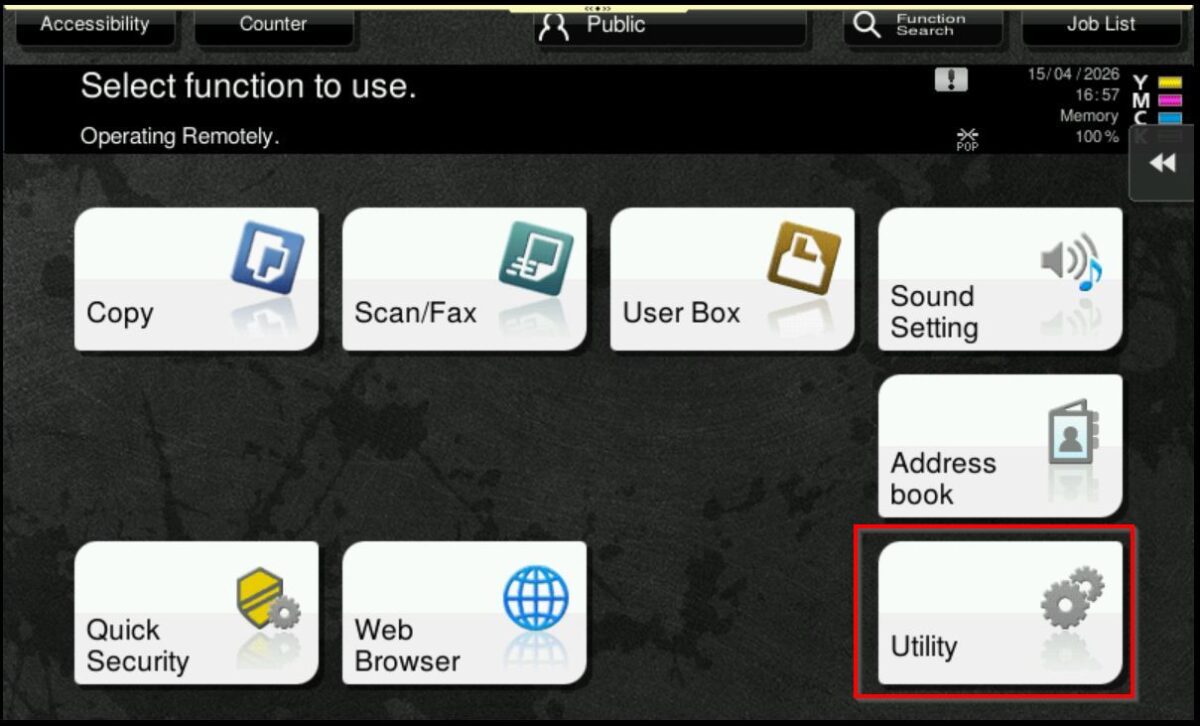
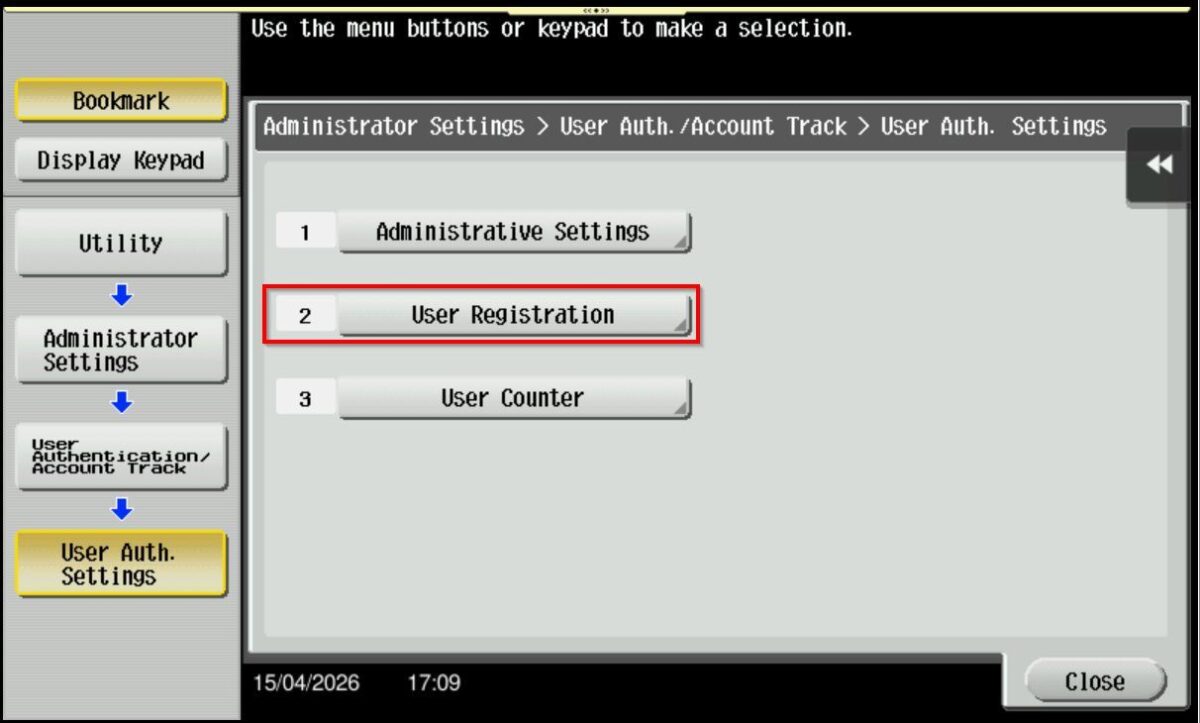
STEP 1 – On the machine Control Panel, click [Menu] button – [Utility] – [Administrator Settings].
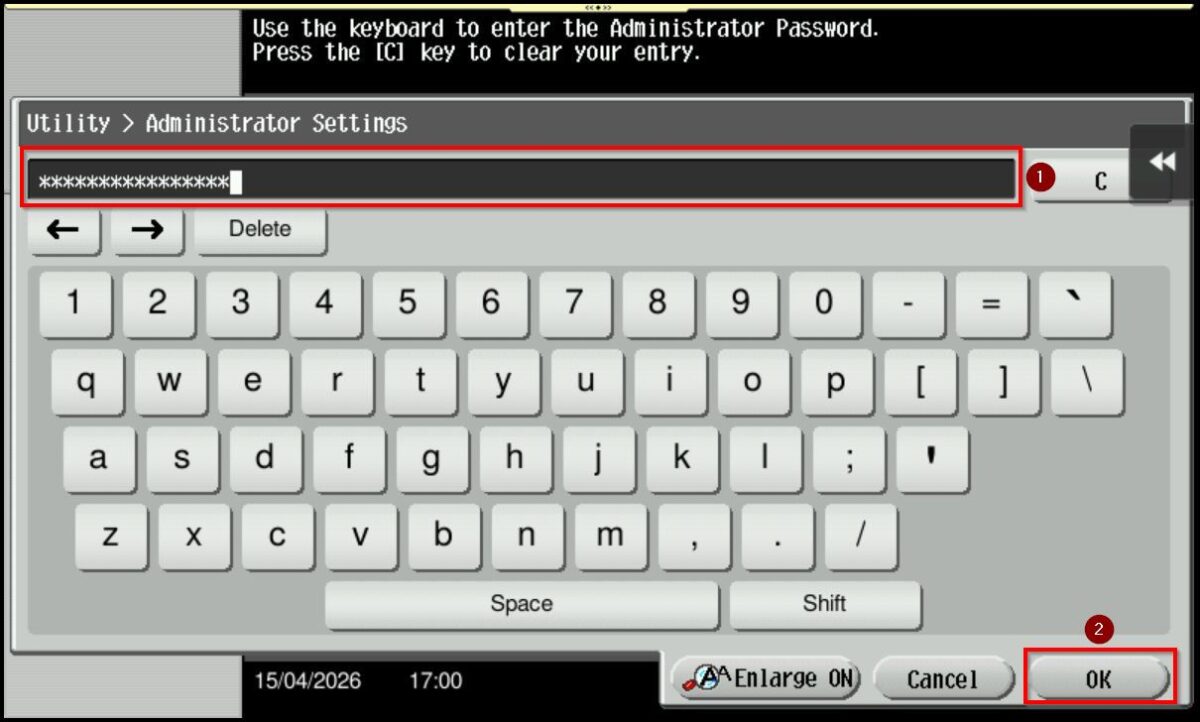
STEP 2 – Key in administrator password then proceed to select [OK], default administrator password: [7801261178012611] or [1234567812345678] or [12345678] or [12341234].
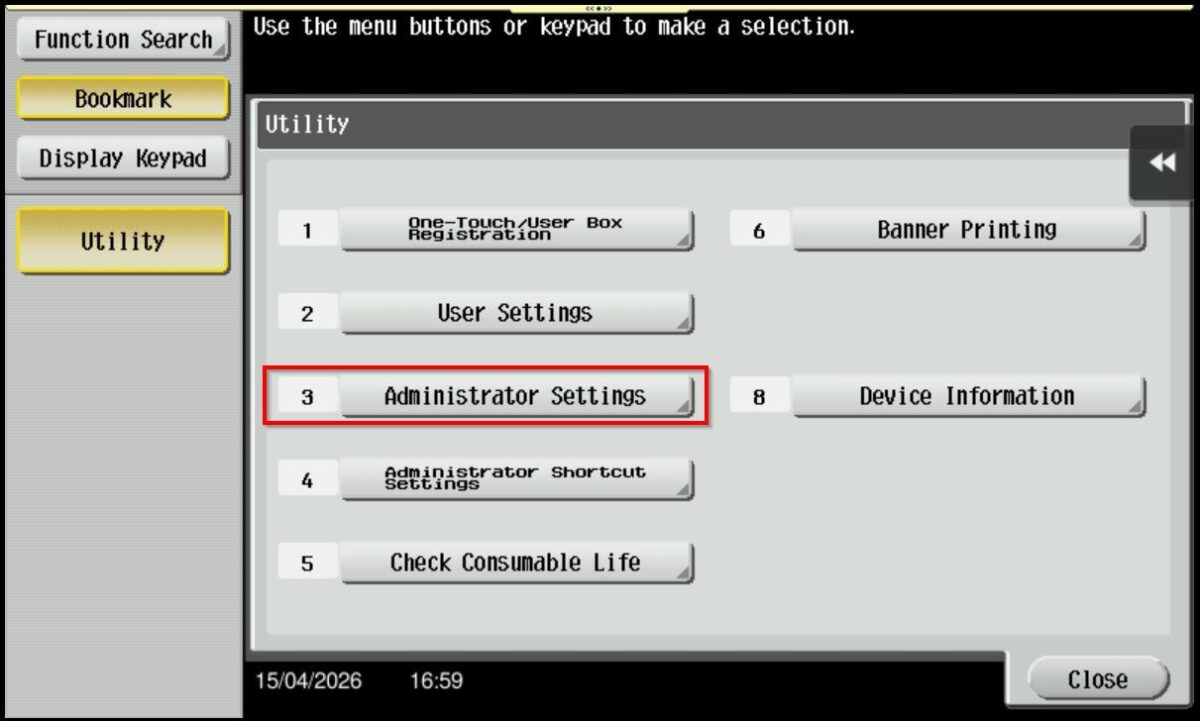
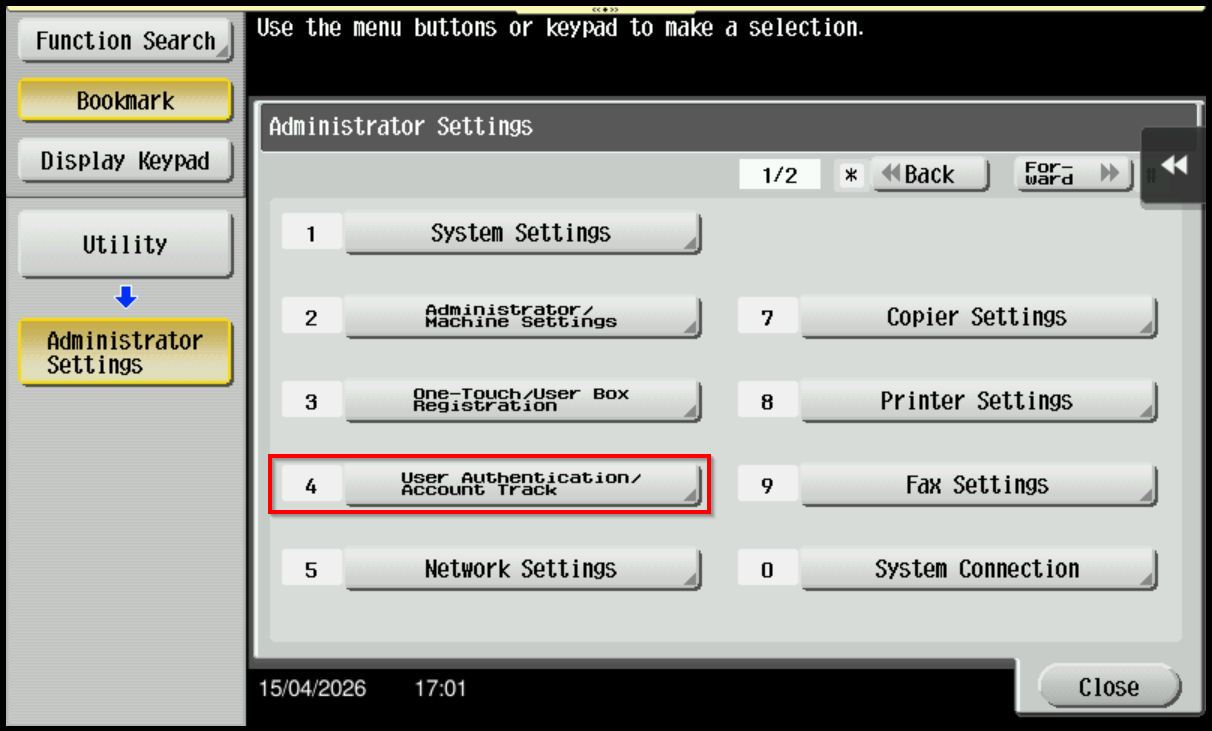
STEP 3 – Select [User Authentication/Account Track] – [User Registration Settings].

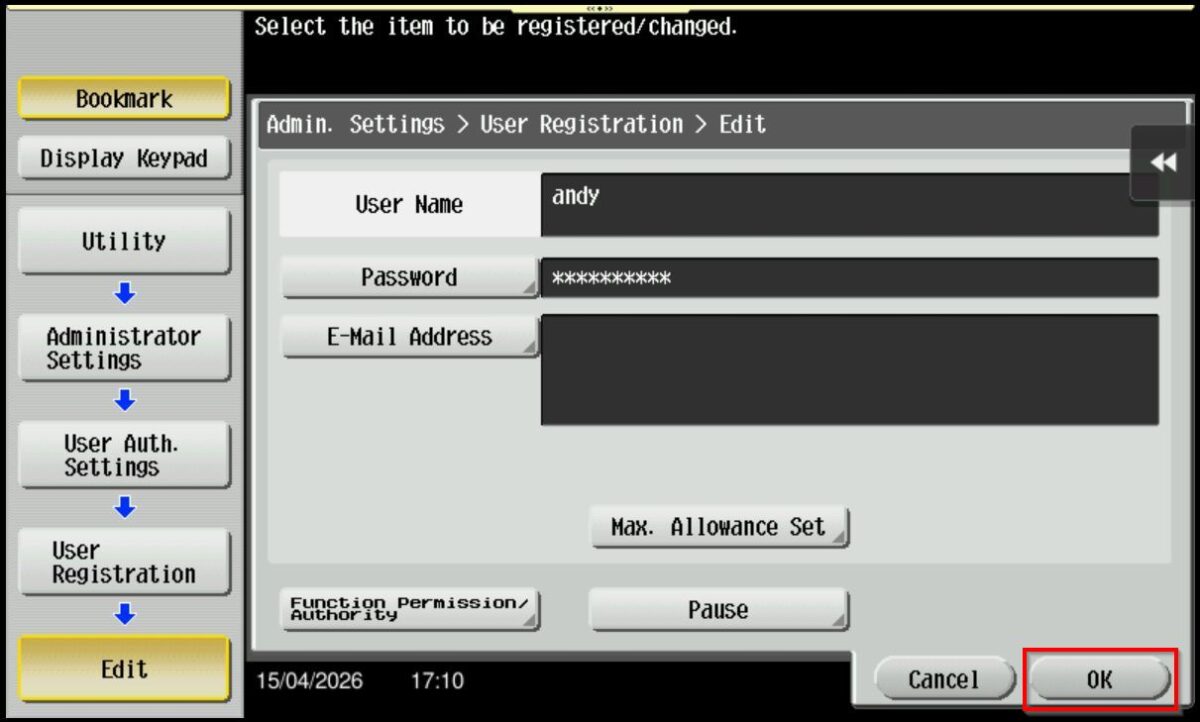
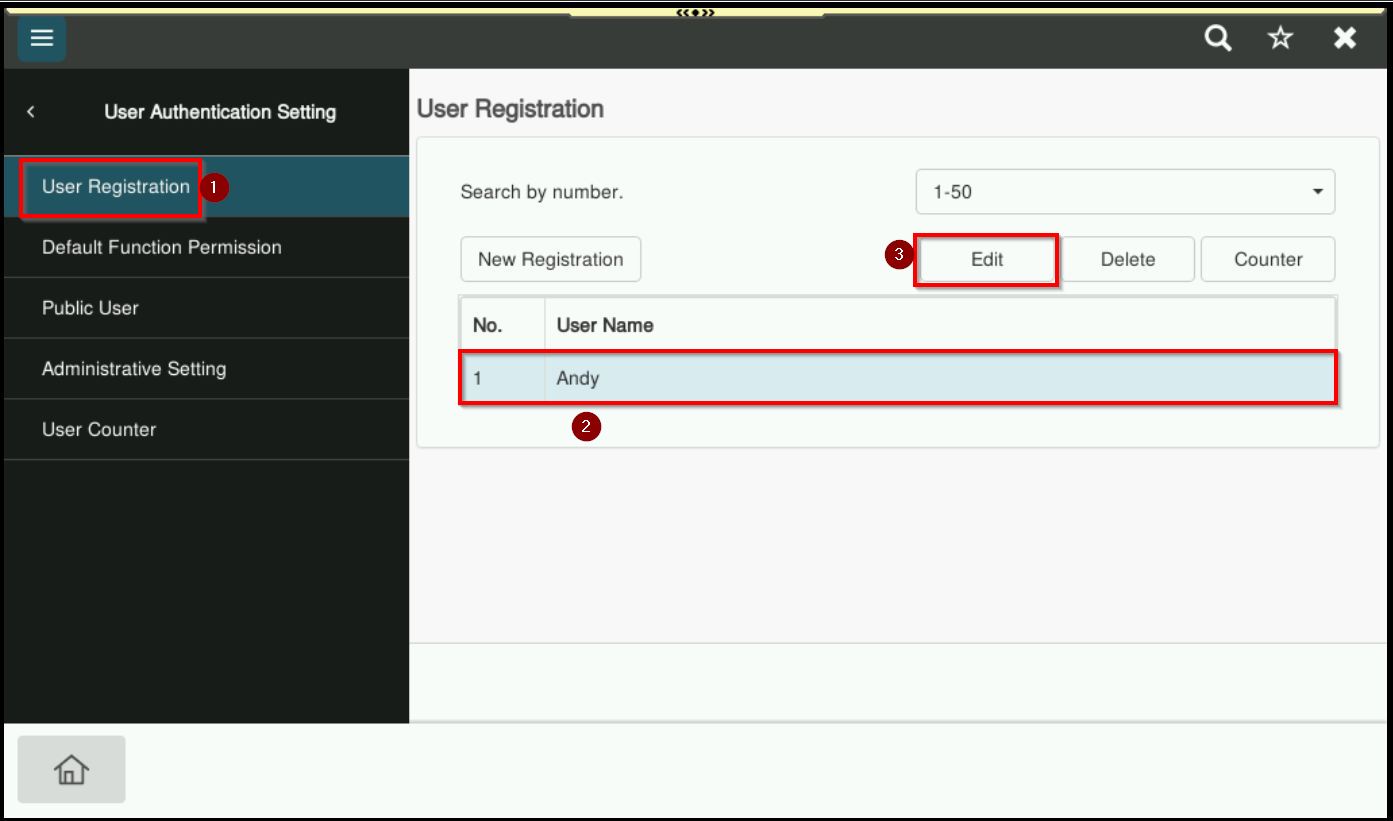
STEP 4 – Select [User Registration], choose the registered user that want to change password, click on [Edit].
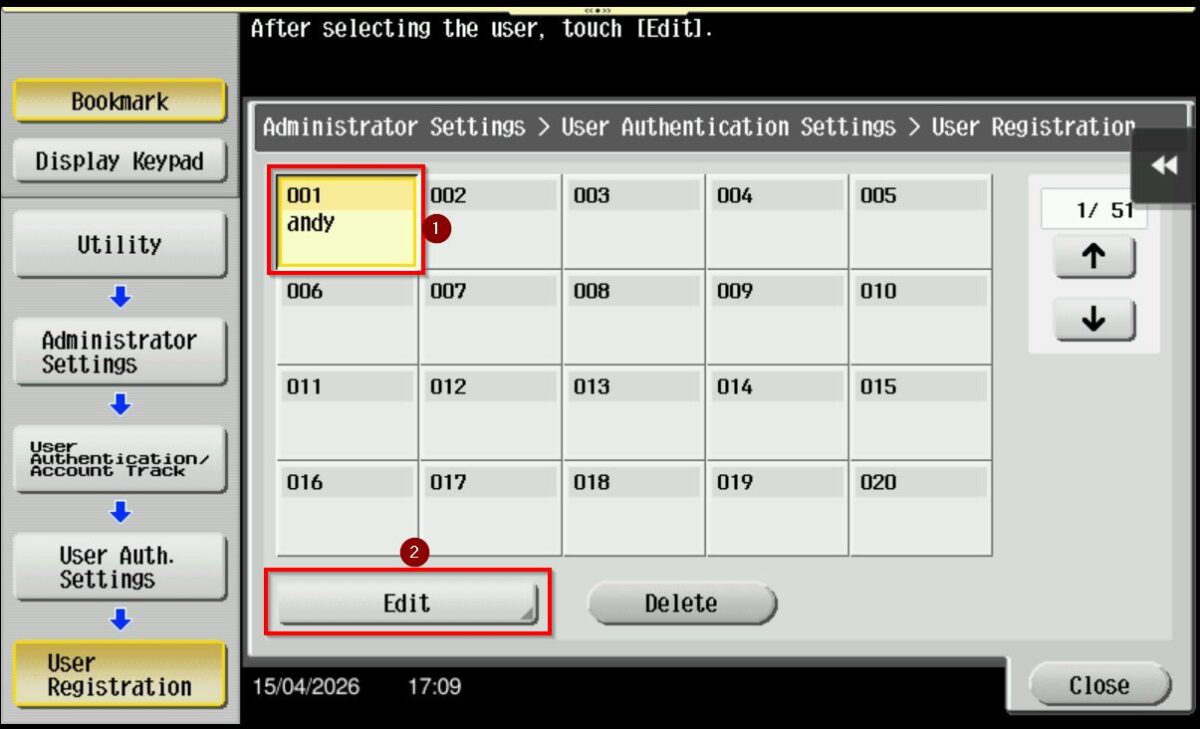
*To change the password for registered user
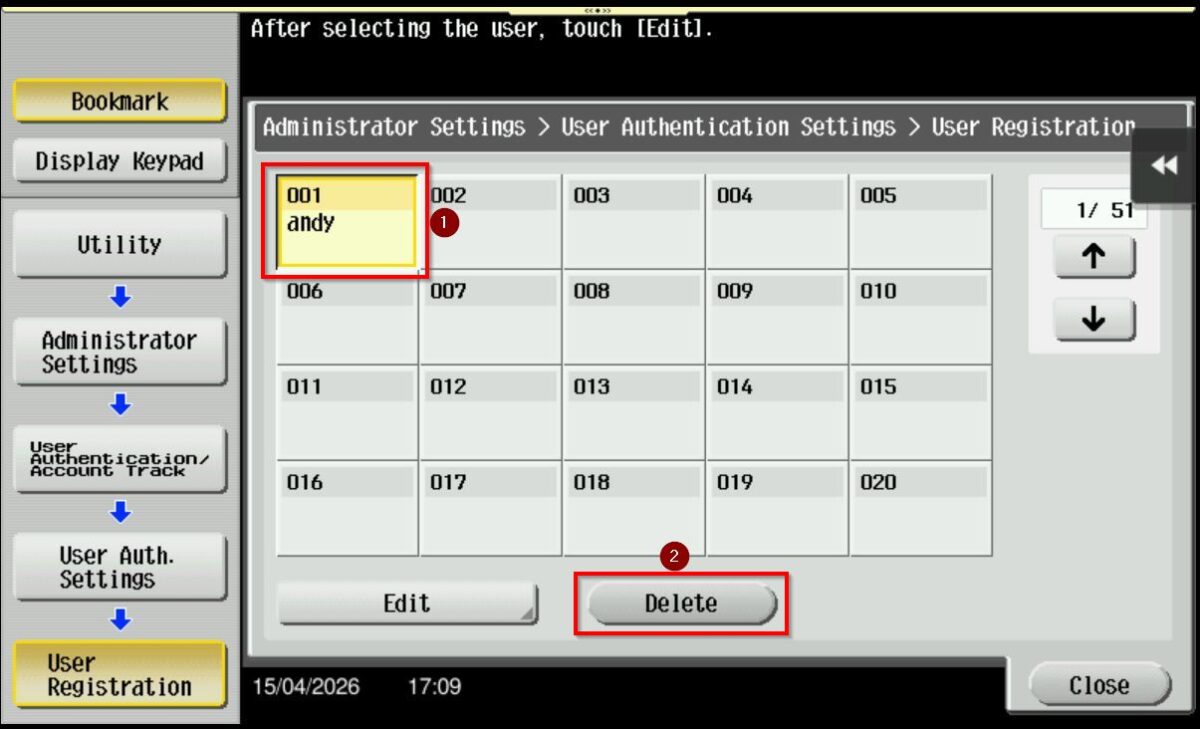
*To delete registered user
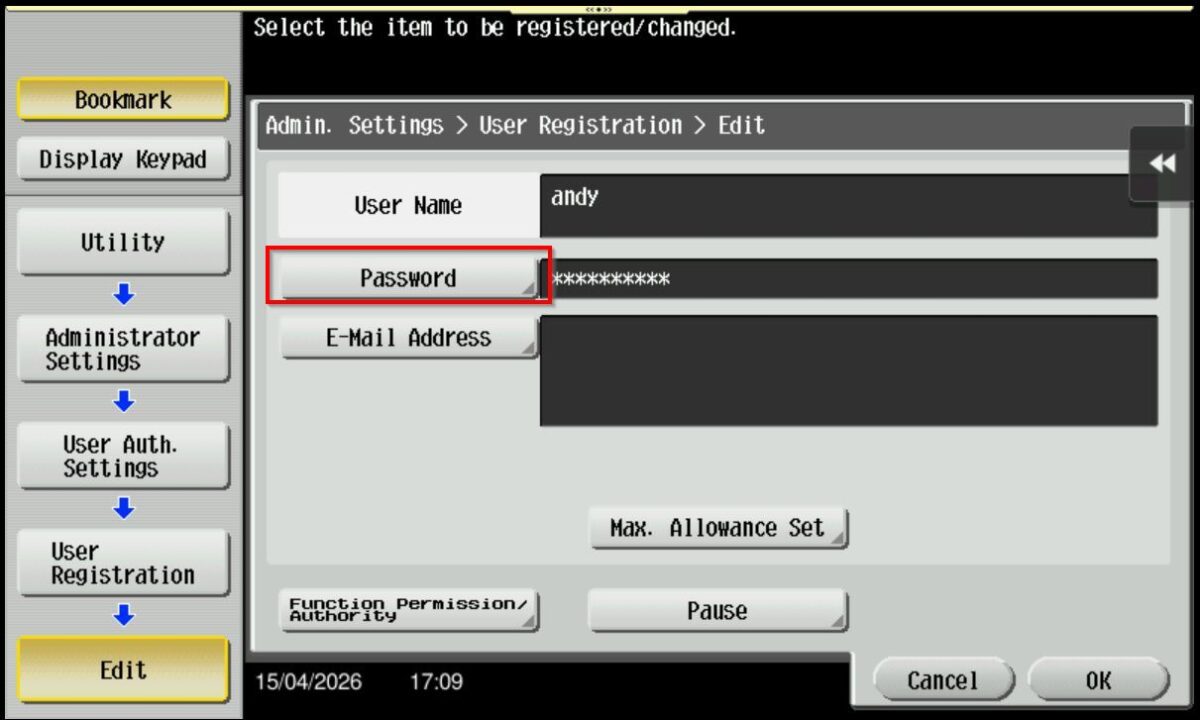
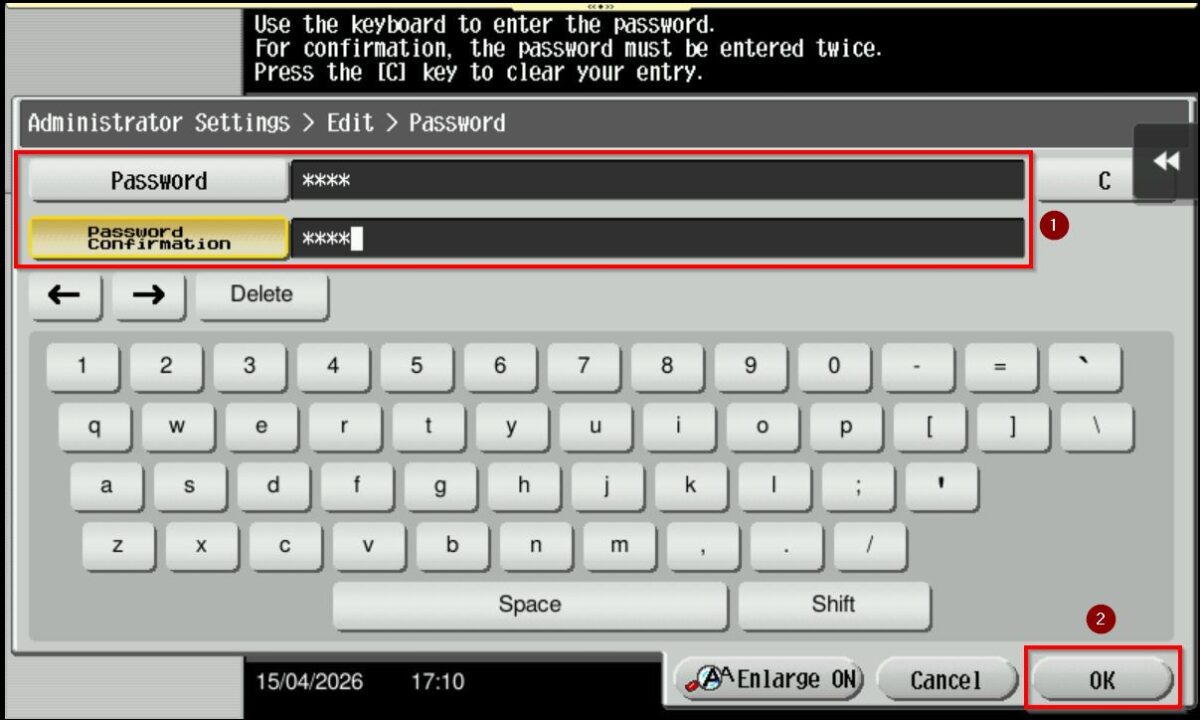
STEP 5 – Click on the [Password], update the [new password] that is desired, then click on [OK] twice to save the setting.
STEP 6 – Once password has been updated, users should be able to use the username and new password to access the machine. Please refer to this LINK on how to update the username and password on the printer driver for Windows OS or this LINK for MAC OS.
For Older Machine series / Non I-Series Machine (From Web Connection)
STEP 1 – Access the machine Web Connection. Click this LINK to check on how to get the IP Address from the Konica Minolta machine.
STEP 2 – Access the machine Web Connection from the PC browser. Click this LINK on how to access Web Connection from the browser.
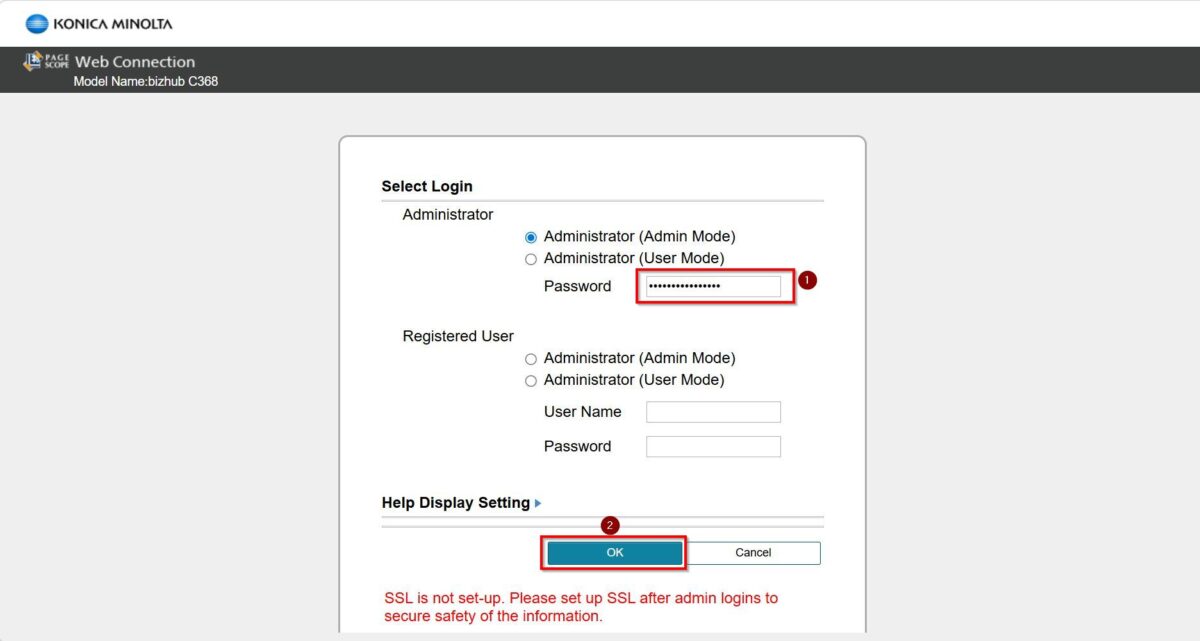
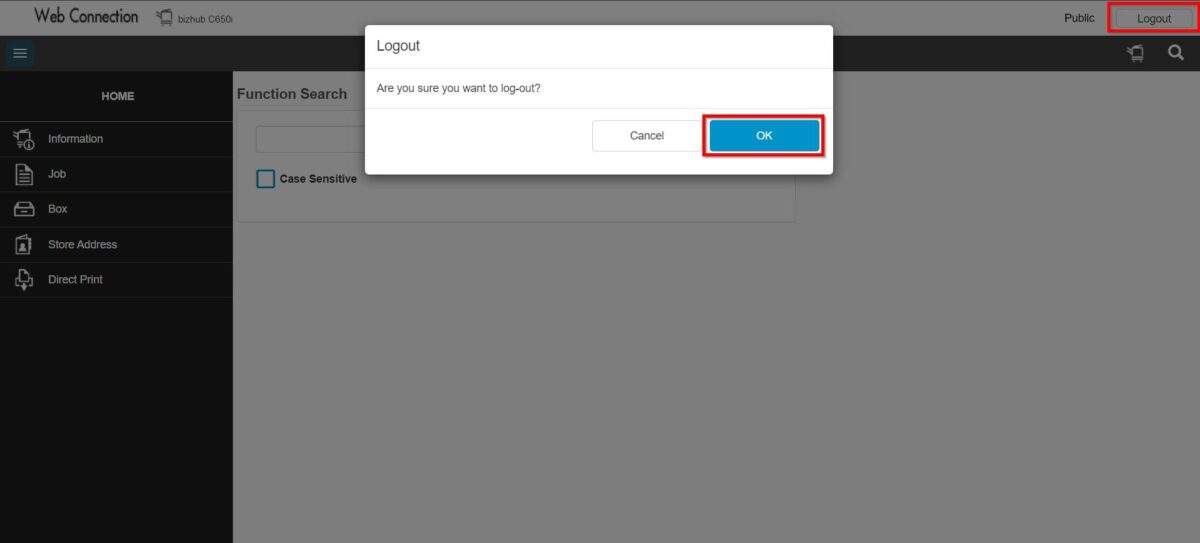
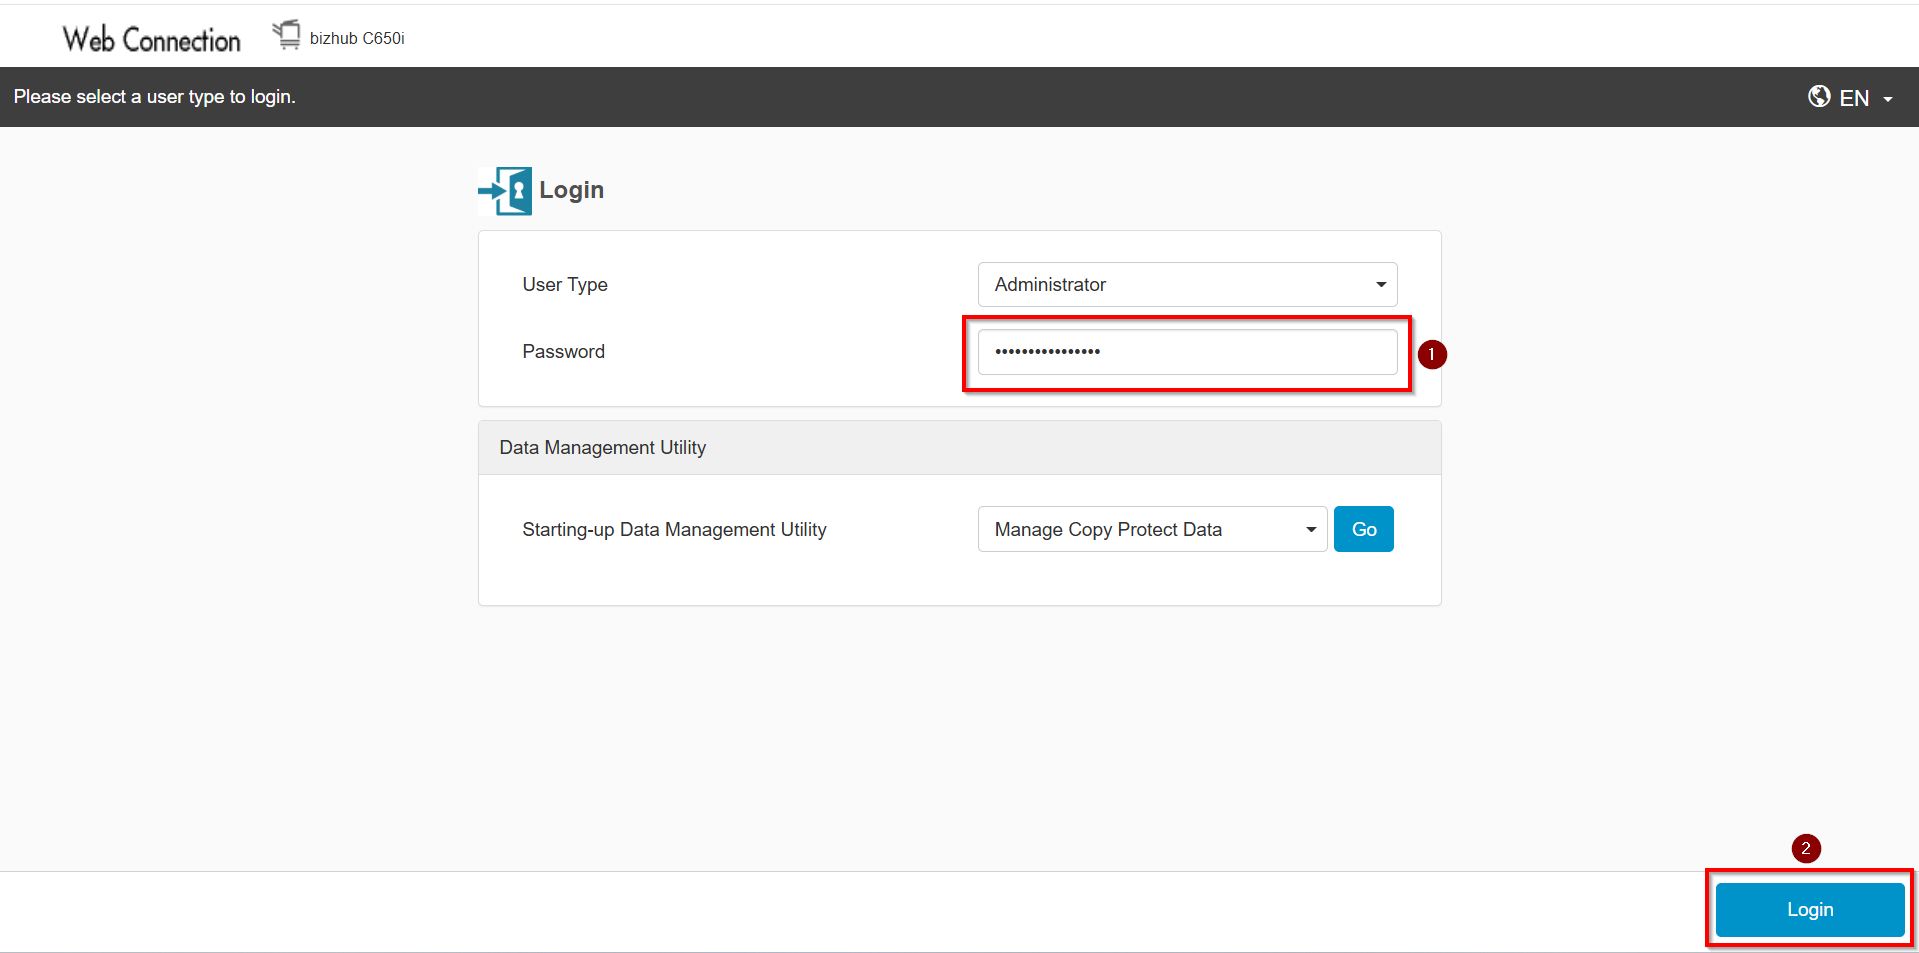
STEP 3 – Logout from public then login as Administrator, default administrator password: [7801261178012611] or [1234567812345678] or [12345678] or [12341234].
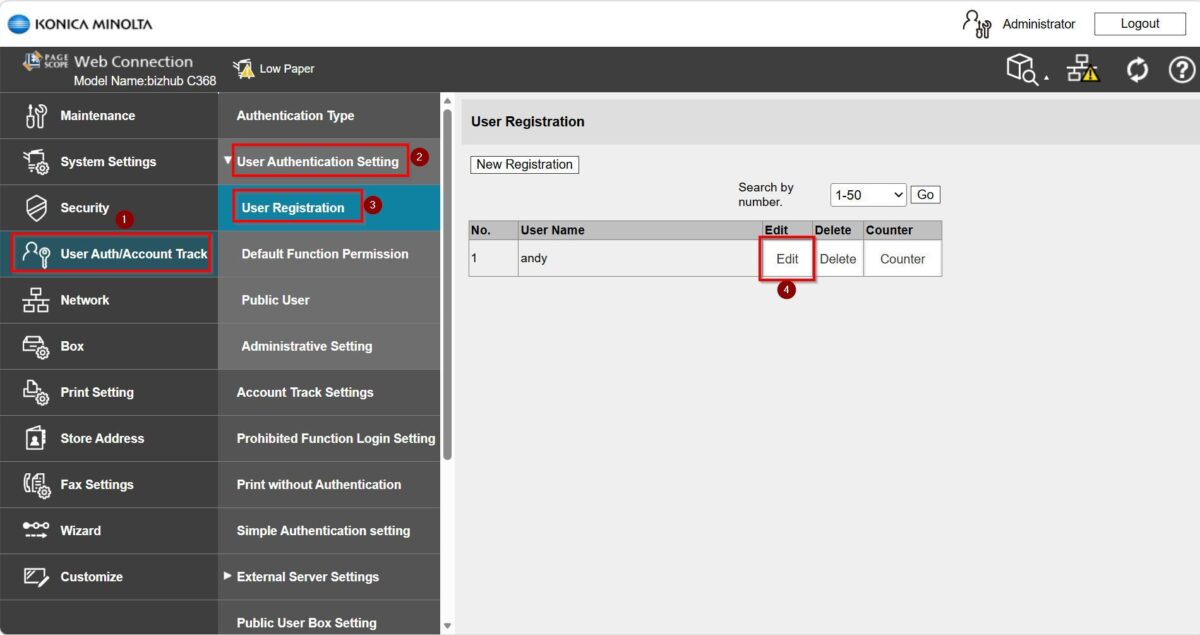
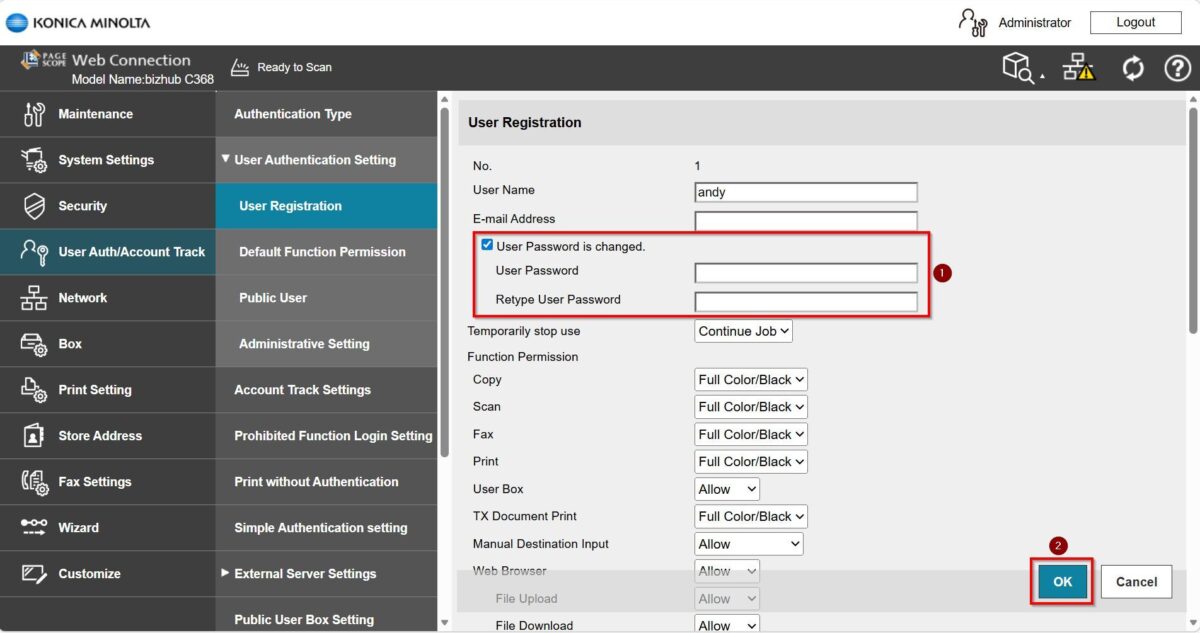
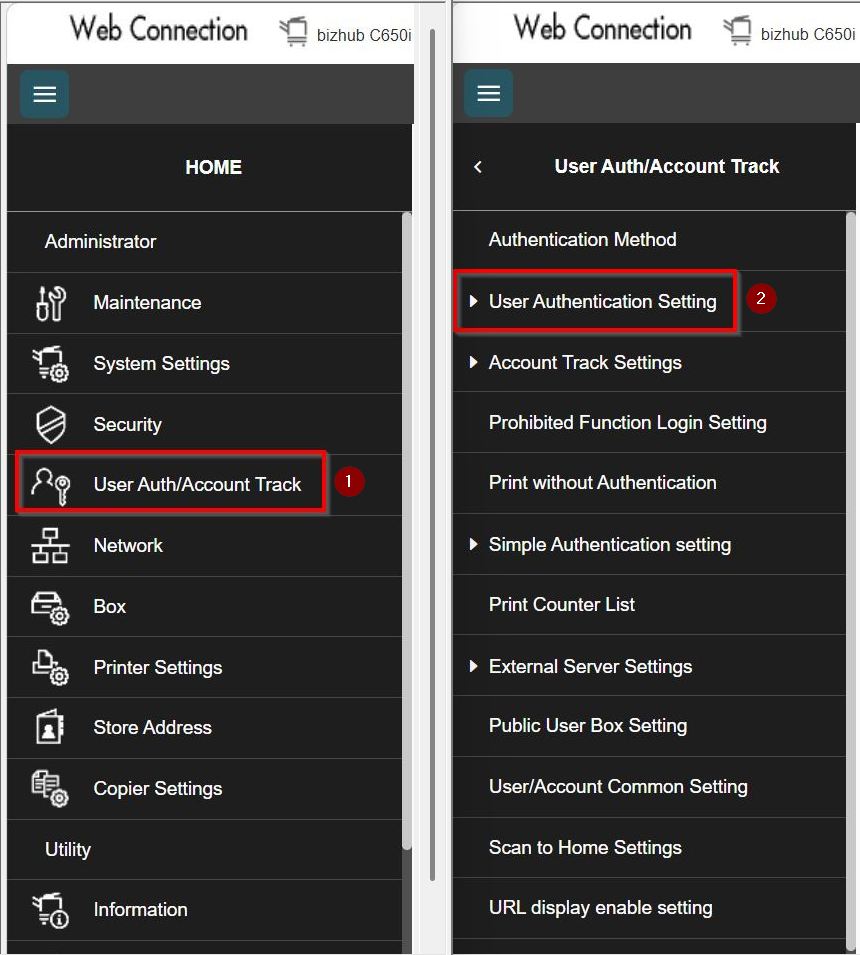
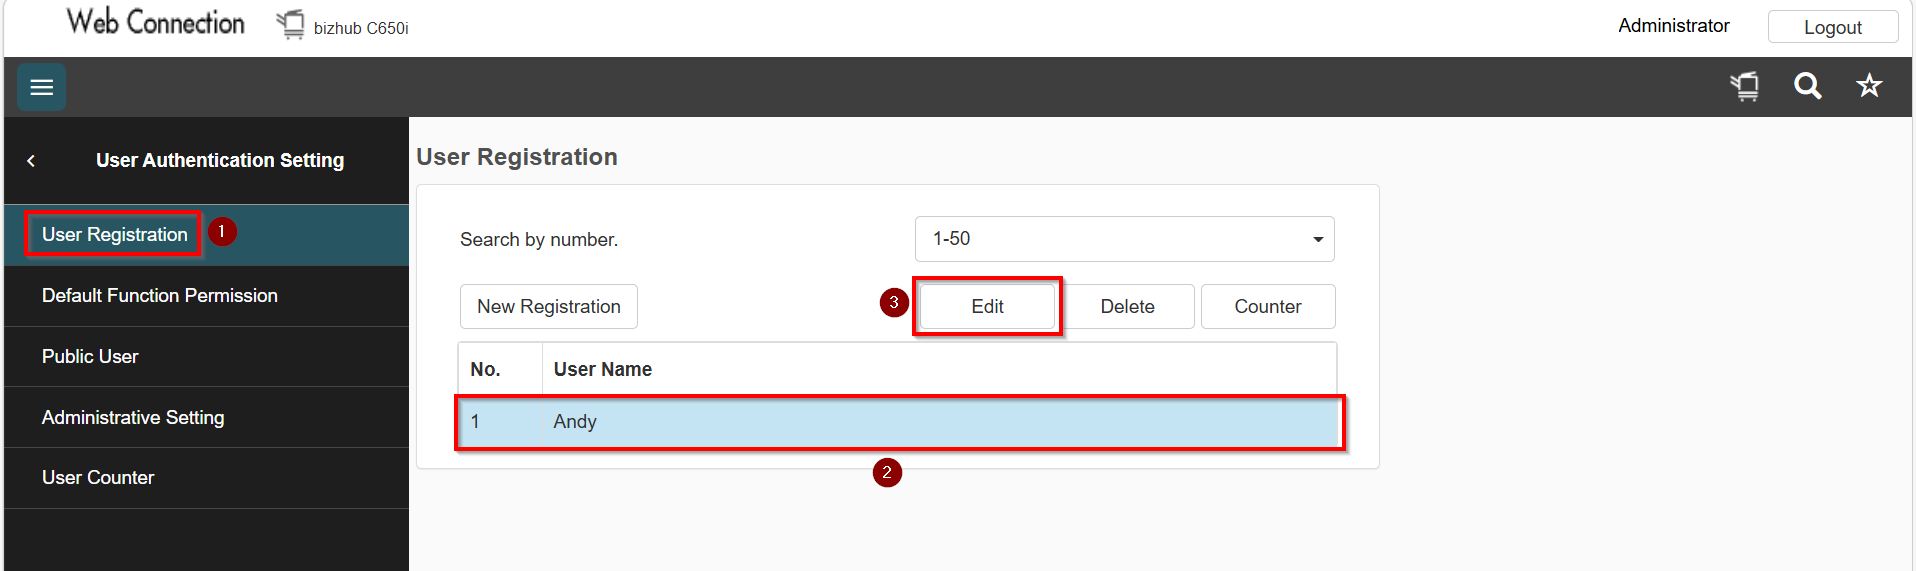
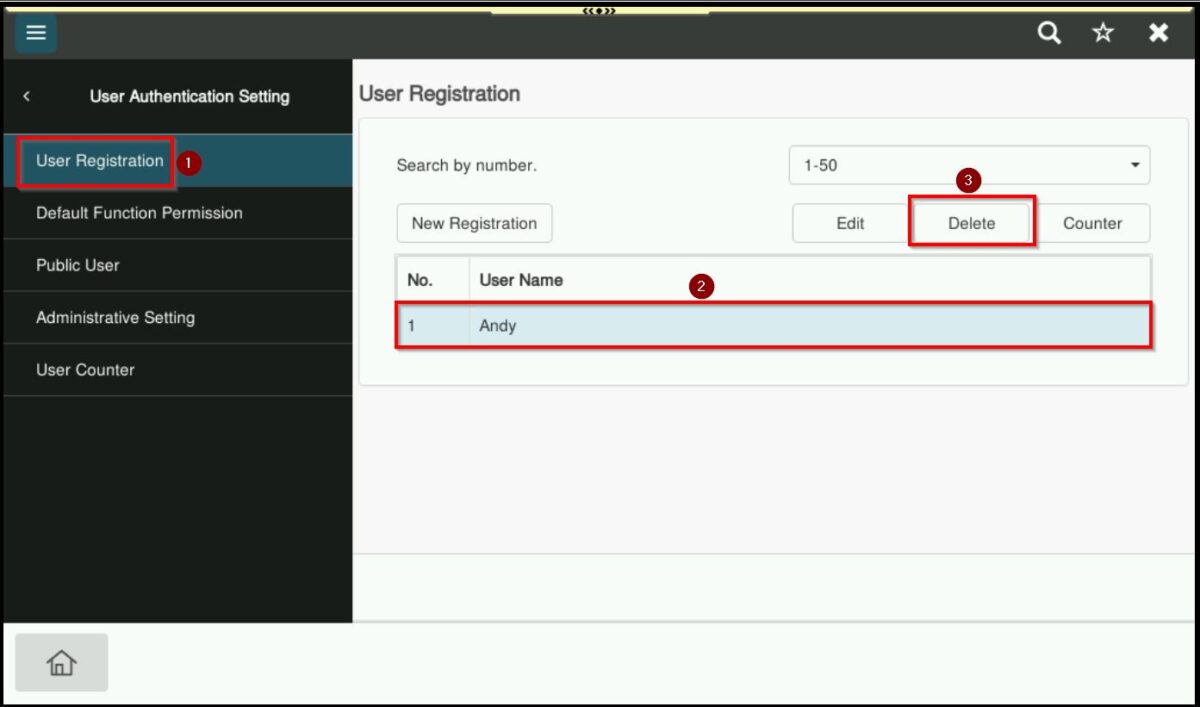
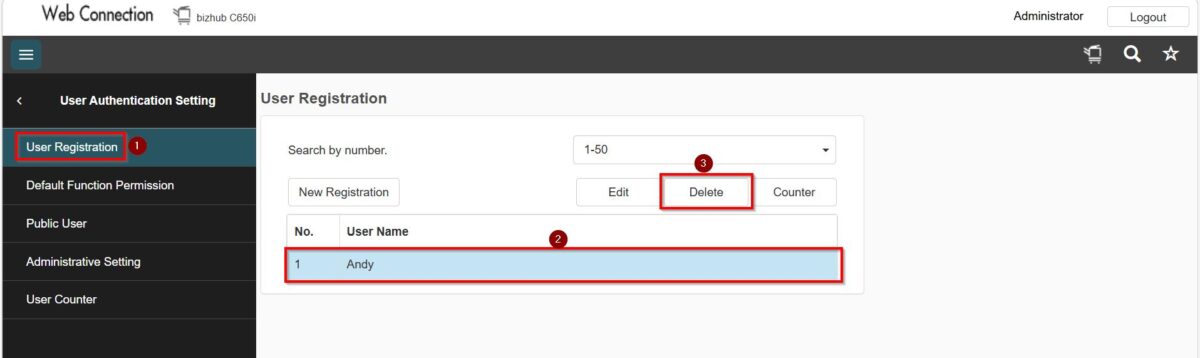
STEP 4 – Go to [User Auth/Account Track] – [User Authentication Setting – [User Registration], select the registered user that you want to edit if want to edit the username or user password by click on [Edit]. Select [Delete] if you want to delete a registered user that no longer need access.
*Edit a registered user

*Delete a registered user
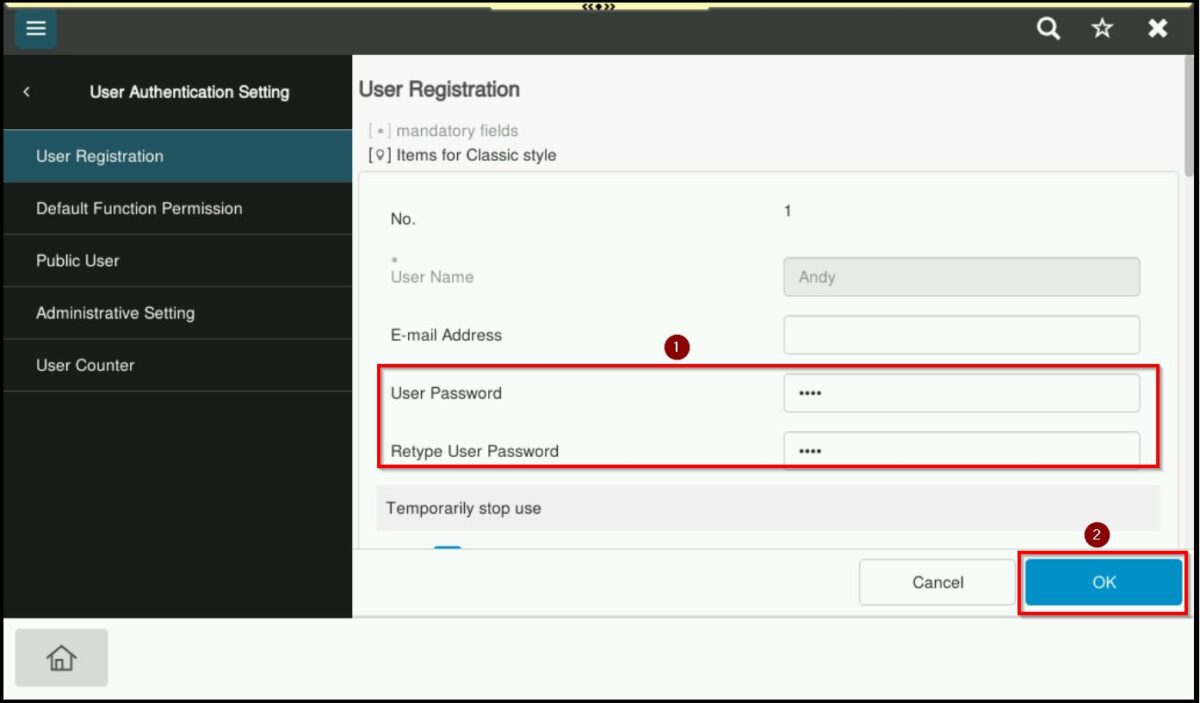
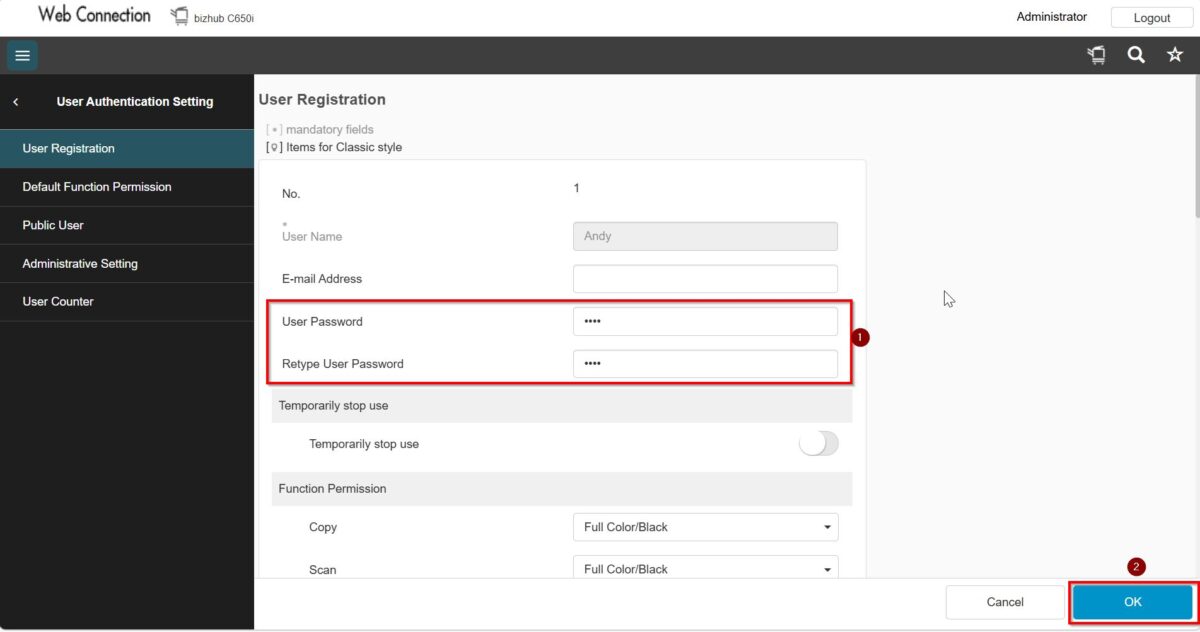
STEP 5 – Set the new password by tick [User Password is changed] and key in new password under [User Password] & [Retype User Password], then click on [OK] to save the changes.
For Newer Machine series / I-Series Machine (From Machine Control Panel)
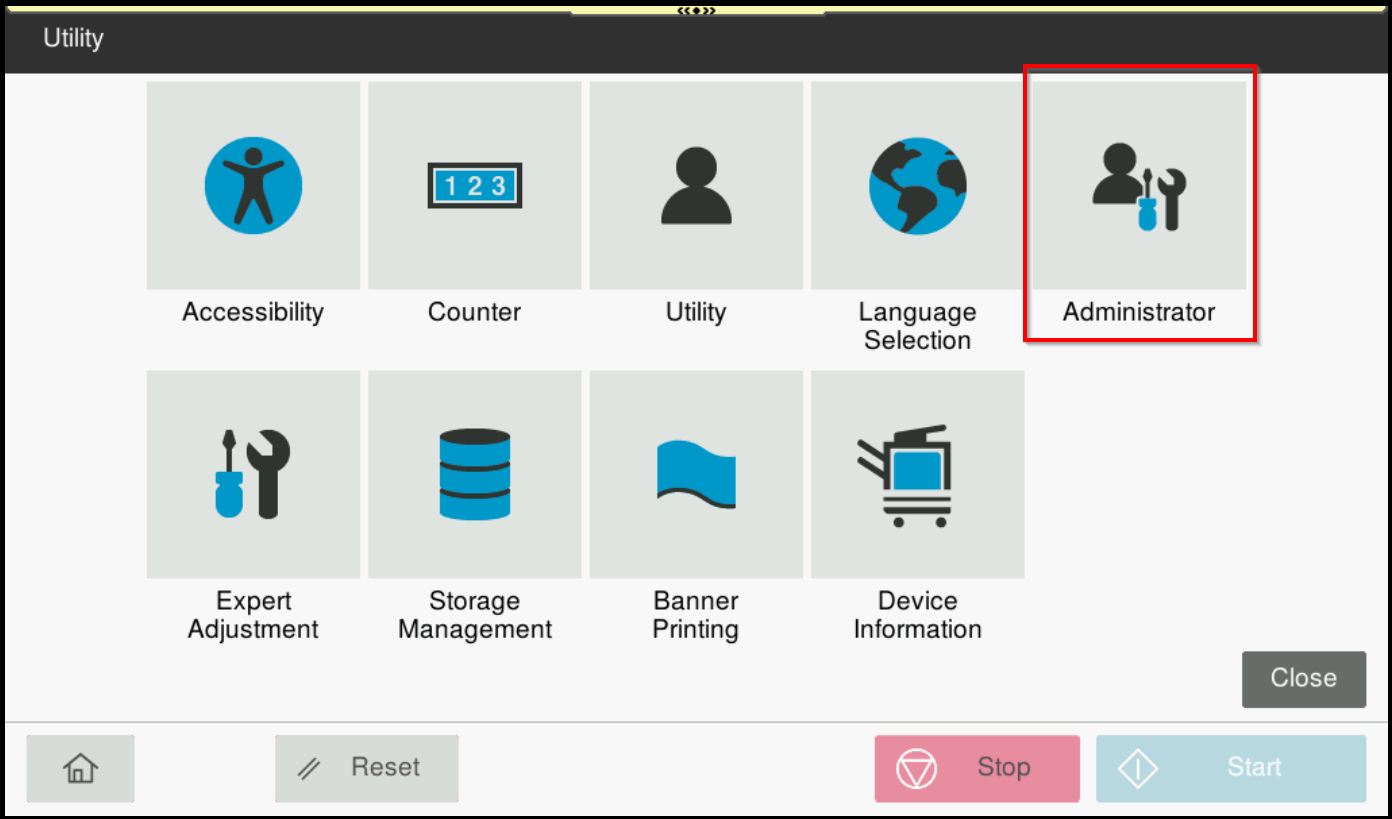
STEP 1 – Select [Home] – [Utility].

**You may access to web connection via machine IP Address. Click on this to check how to get the IP Address from machine, then key in Konica Minolta Machine IP Address at web browser and log in as admin the Web Connection.
STEP 2 – Select [Administrator].
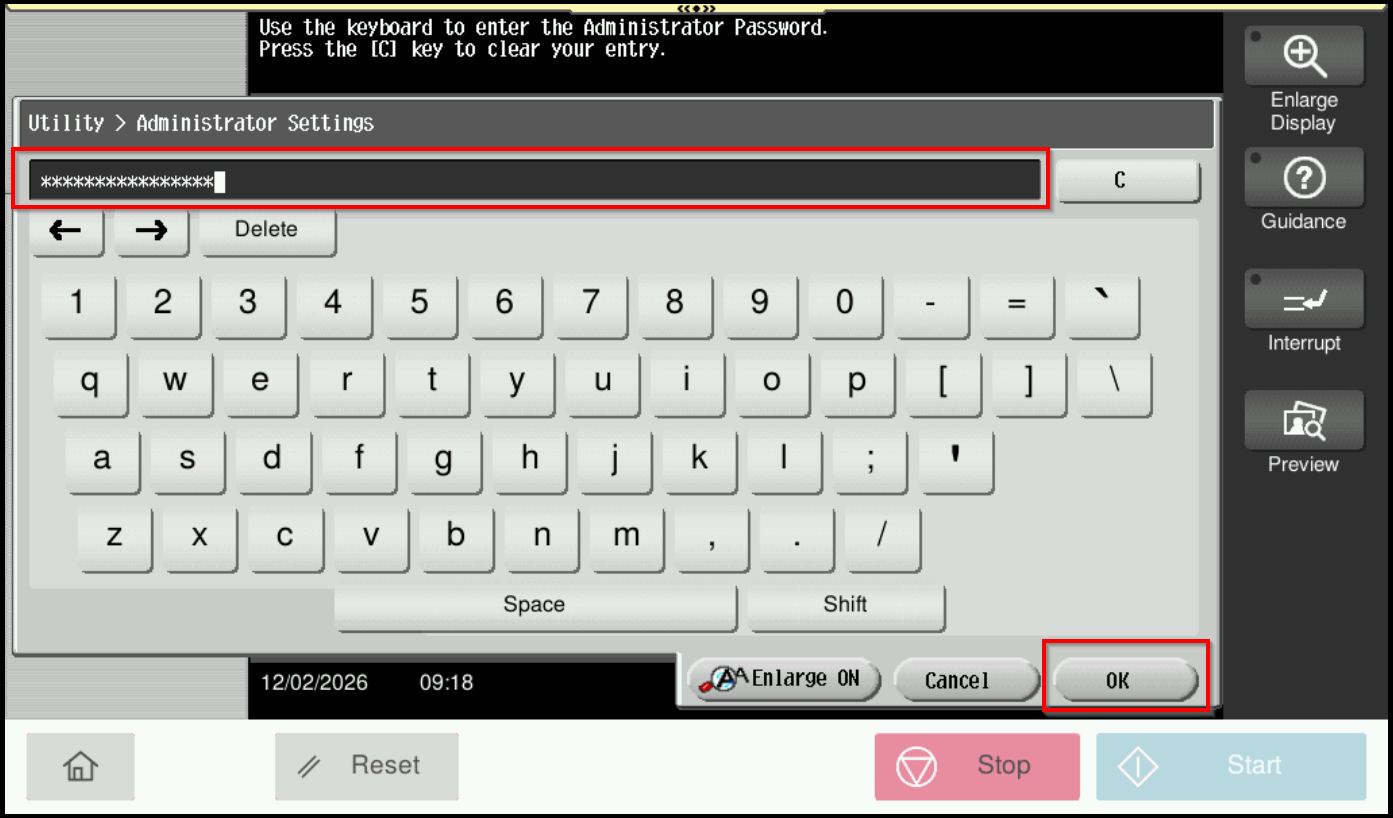
STEP 3 – Key in the default administrator password and click [OK] button.
Default administrator password: [7801261178012611] or [1234567812345678] or [12345678] or [12341234].
**On Web Connection login as admin mode by key in administrator password accordingly. The next step will be same option on below to change administrator password.
STEP 4 – Go to [User Auth/Account Track] – [User Authentication Setting].

STEP 5 – Select [User Authentication] – [Highlight] the user – [Edit].
*On the Machine Panel when editing user
*On the Web Connection when editing user
*On the Machine Panel when delete user
*On the Web Connection when delete user
STEP 6 – Key in new password under [User Password & Retype User Password], then proceed to select [OK] to save the setting.
STEP 7 – Once registered, users should be able to use the username and new password to access the machine. Please refer to this LINK on how to update the username and password on the printer driver for Windows OS or this LINK for MAC OS.