
Guide on set quota limits for User Authentication
When to set quota limits for User Authentication
Management can set copy quota limits for each account based on machine usage. This encourages users to be more aware of costs while helping to reduce overall operating expenses.
For Older Machine series / Non I-Series Machine (From Machine Control Panel)
Video Tutorial
The video tutorial below provides detailed instructions and a complete demonstration of the configuration steps.
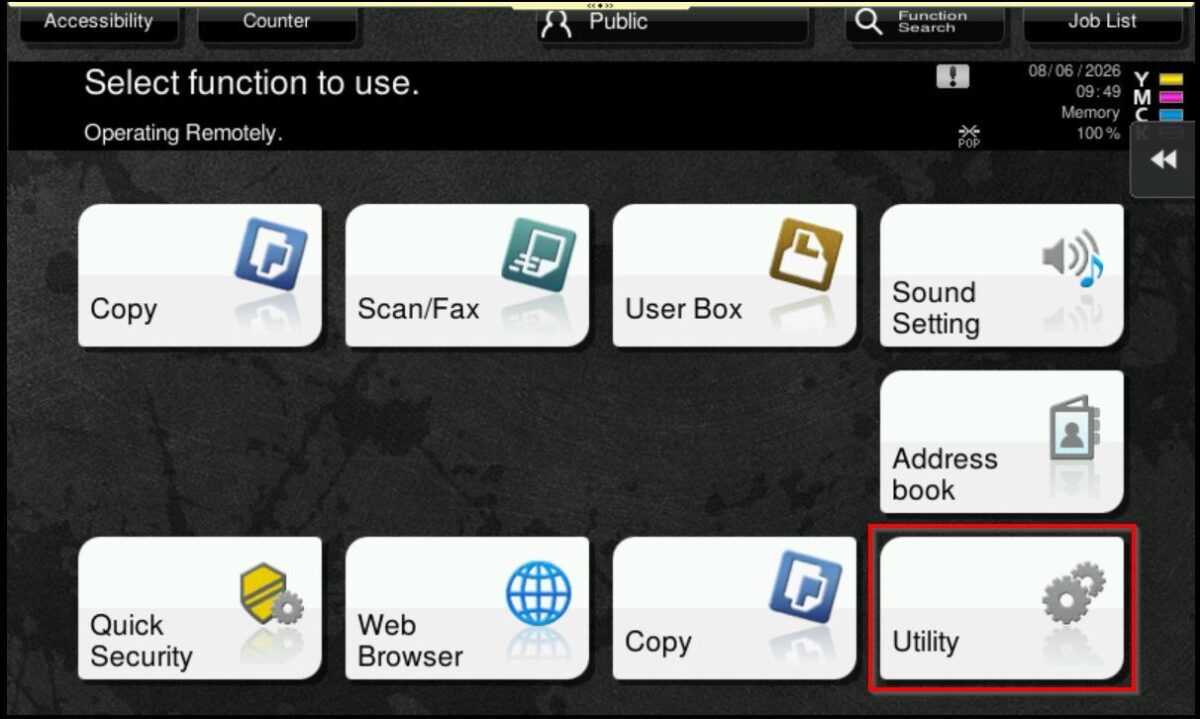
STEP 1 – On the machine Control Panel, click [Menu] button – [Utility] – [Administrator Settings].
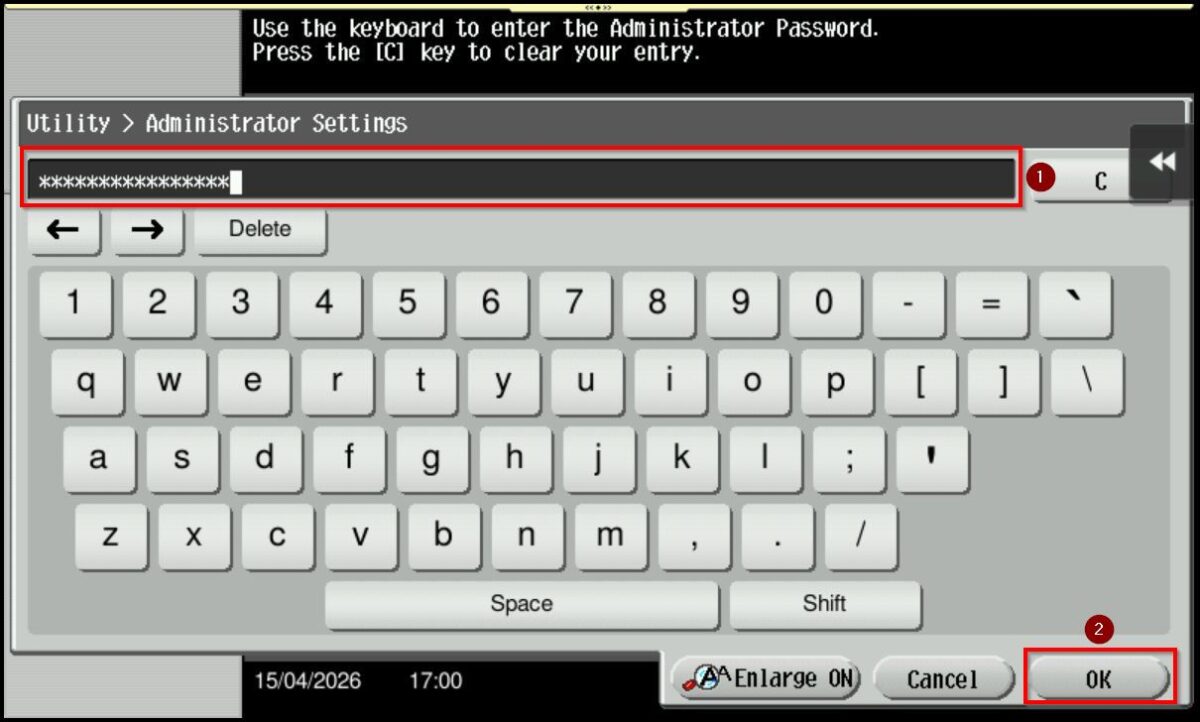
STEP 2 – Key in administrator password then proceed to select [OK], default administrator password: [7801261178012611] or [1234567812345678] or [12345678] or [12341234].
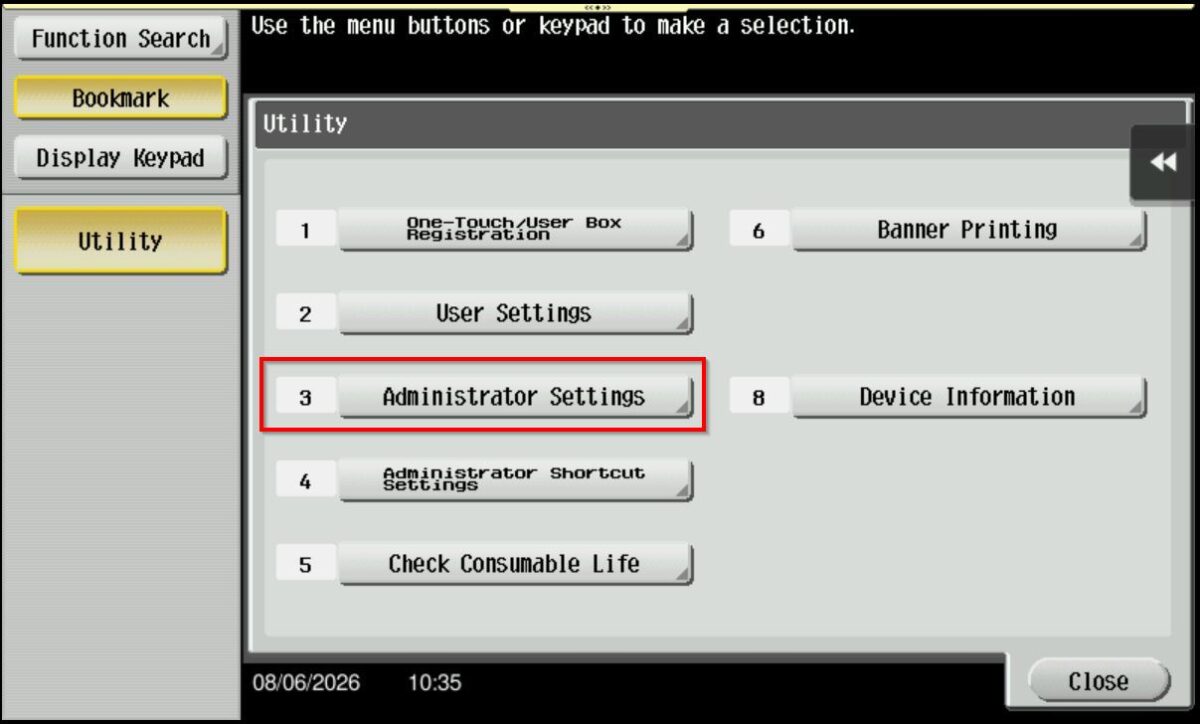
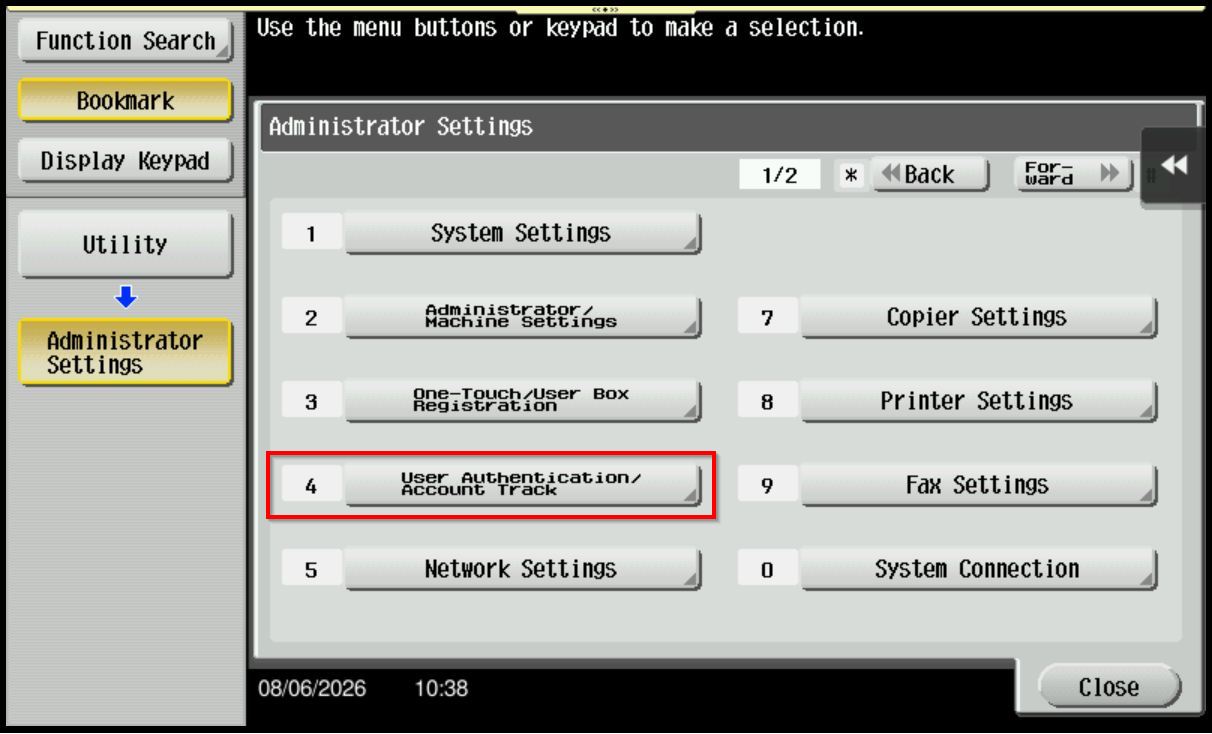
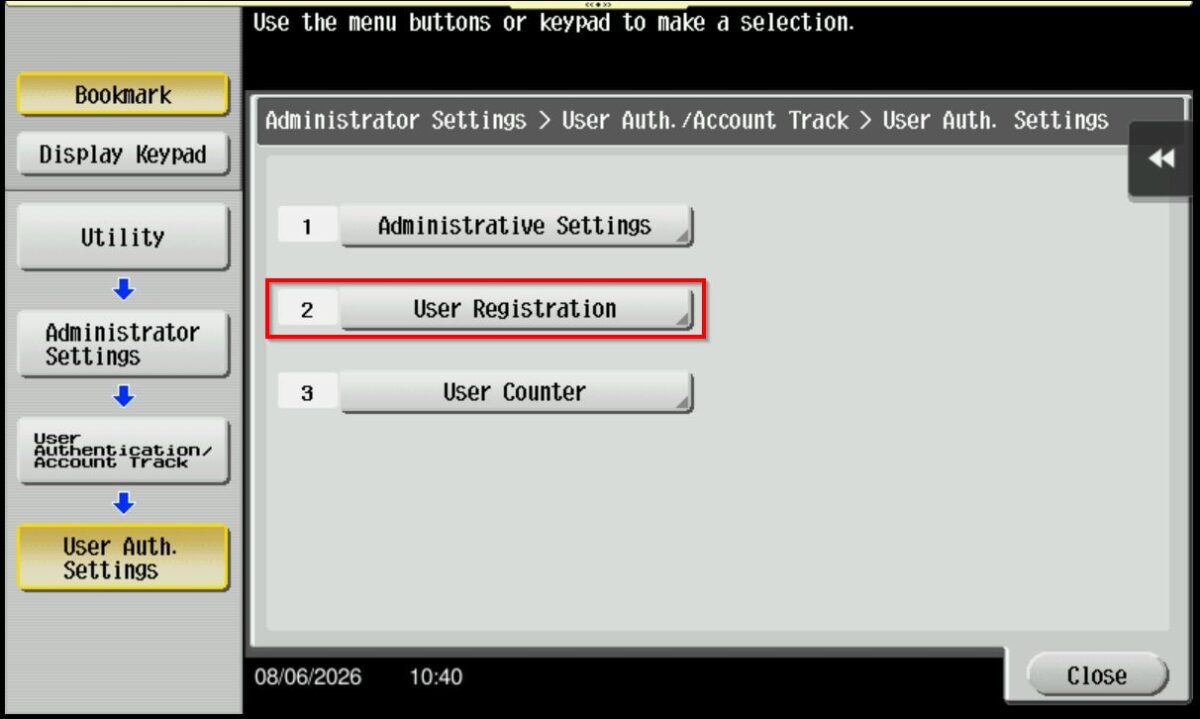
STEP 3 – Select [User Authentication/Account Track] – [User Registration Settings].

STEP 4 – Select [User Registration], choose the registered user that you want to set quota limits by click on [Edit].

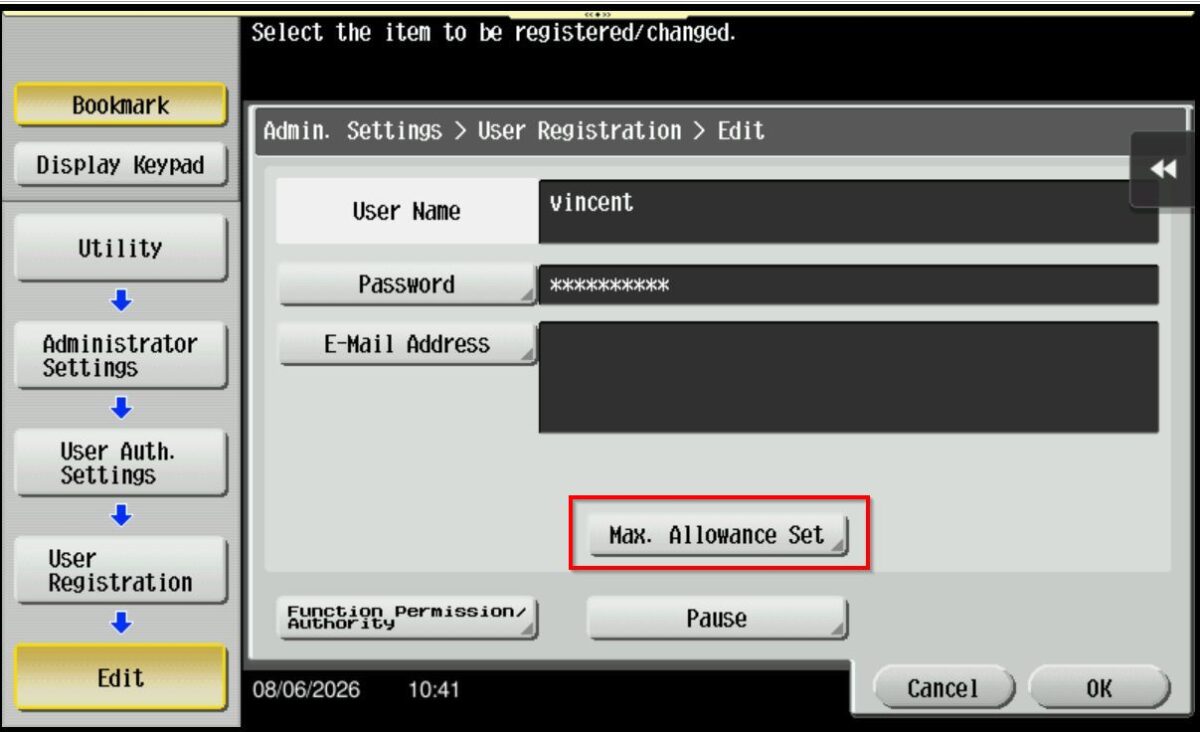
STEP 5 – Click on the [Max. Allowance Set], select the quota limit based on either the Total Allowance or the Individual Allowance, as required, then click [OK] to save the settings.
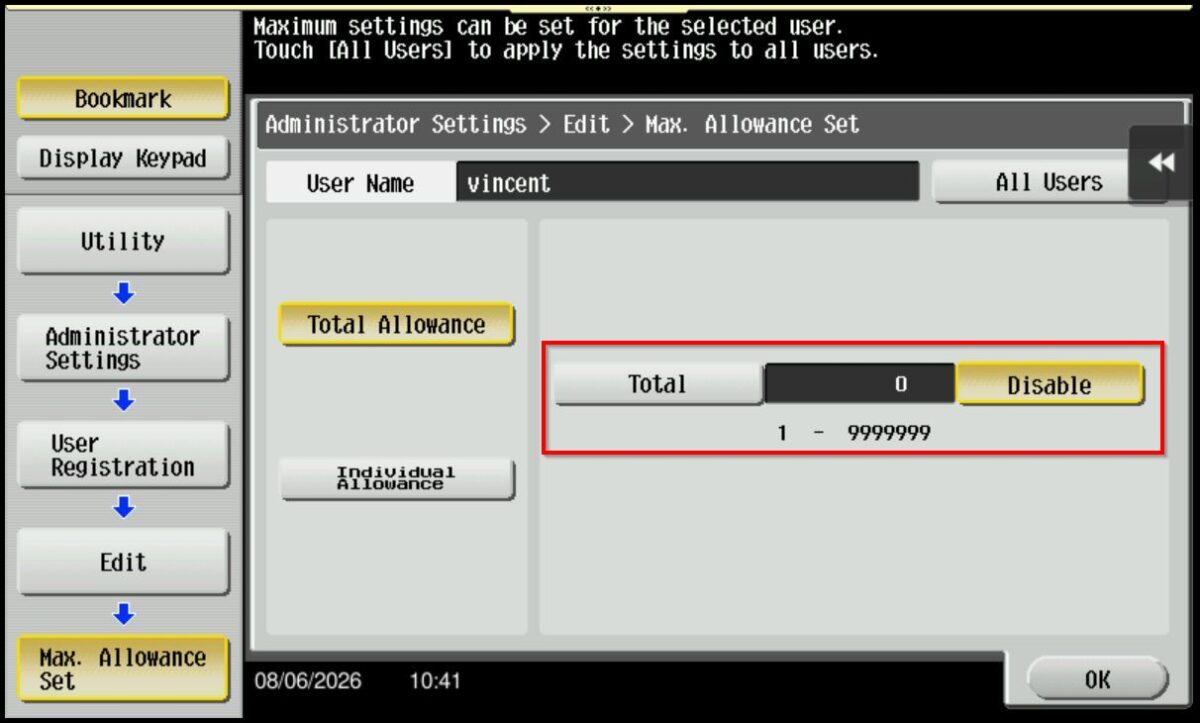
*Total Allowance: Specify the total number of pages that can be printed.

*Individual Allowance: Specify the number of pages that can be printed separately for [Color] and [Black].
STEP 6 – Once a quota limit has been set, the printing usage will be calculated based on the configured limit. To clear the quota limit, click this LINK to reset the quota for user authentication.
For Older Machine series / Non I-Series Machine (From Web Connection)
Video Tutorial
The video tutorial below provides detailed instructions and a complete demonstration of the configuration steps.
STEP 1 – Access the machine Web Connection. Click this LINK to check on how to get the IP Address from the Konica Minolta machine.
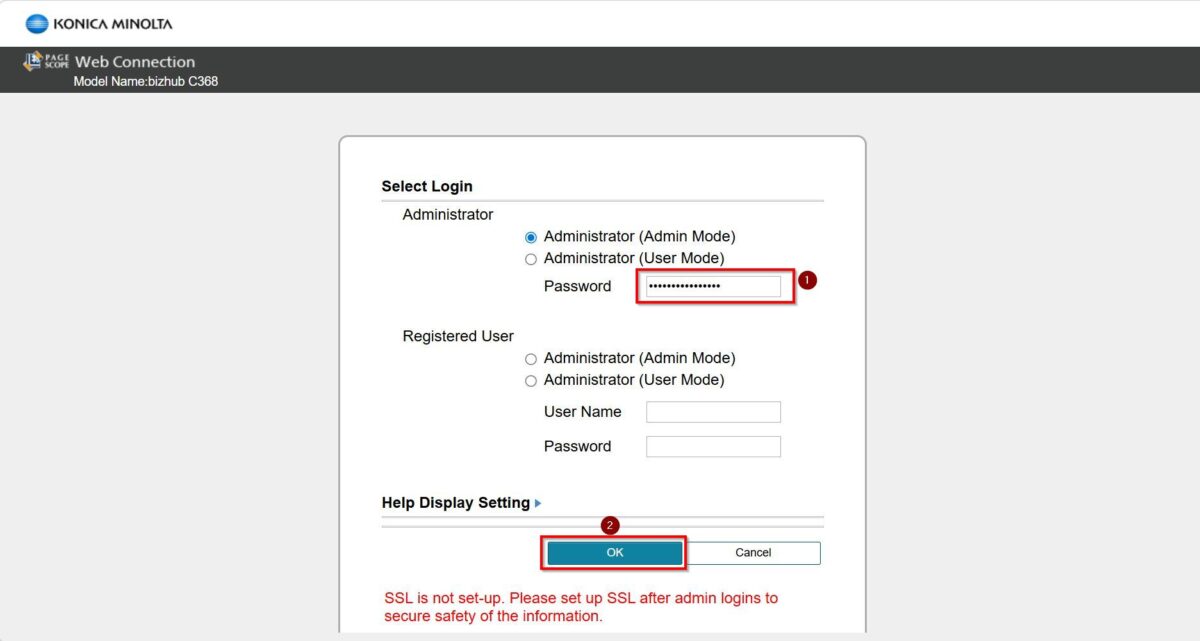
STEP 2 – Access the machine Web Connection from the PC browser. Click this LINK on how to access Web Connection from the browser.
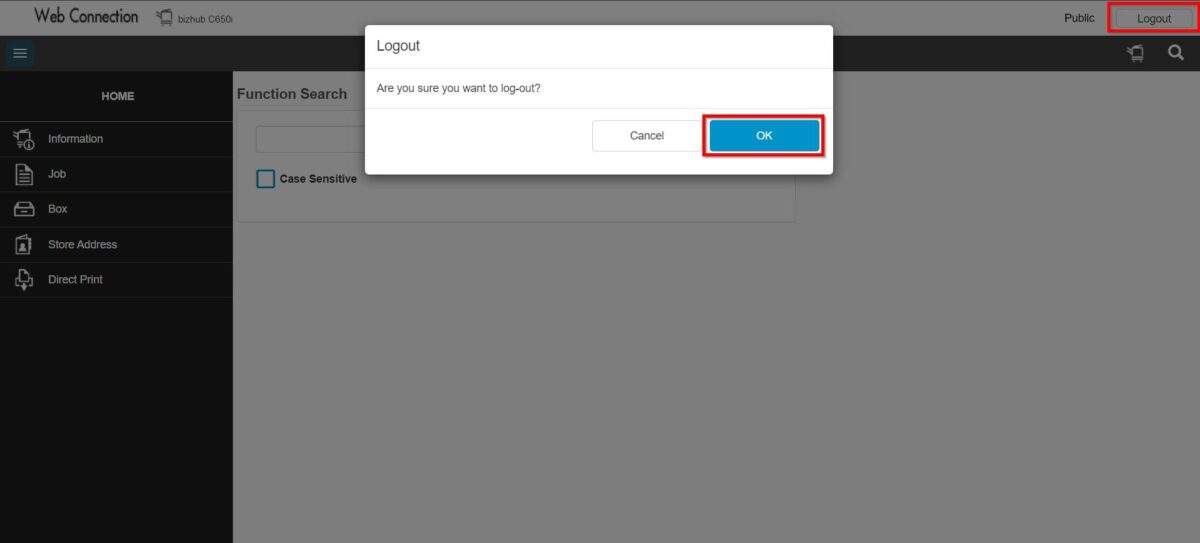
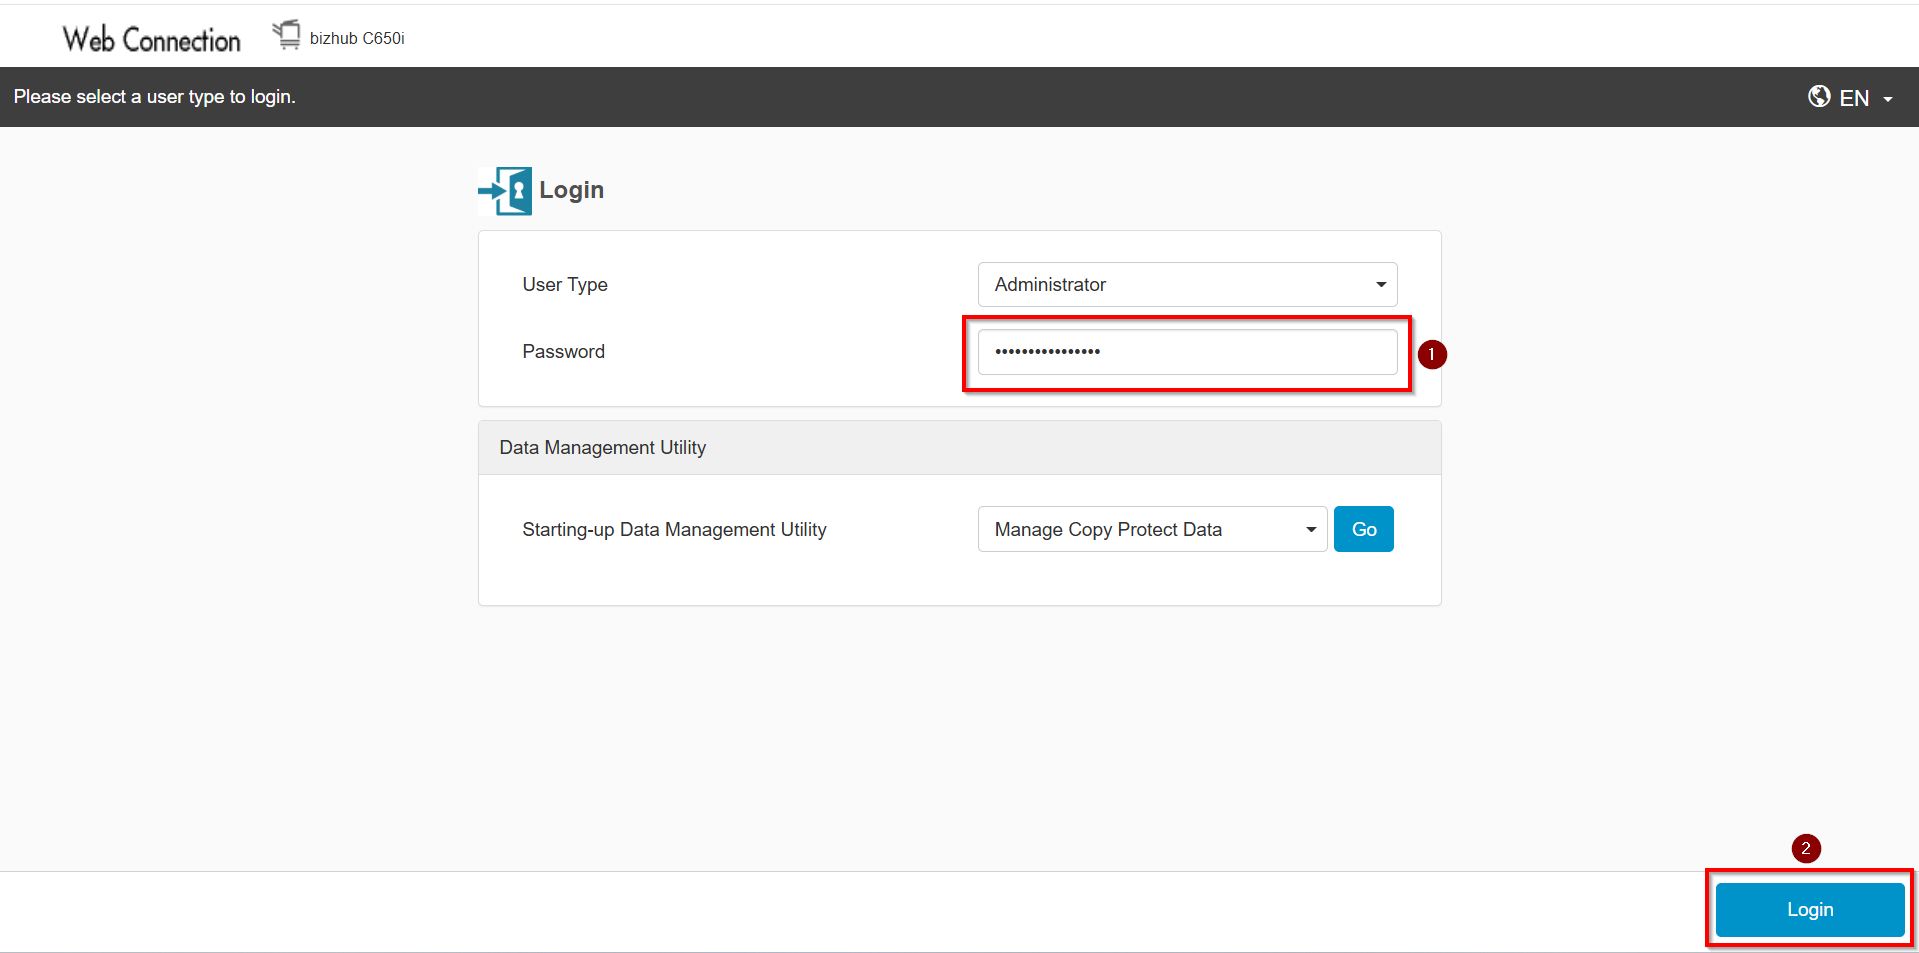
STEP 3 – Logout from public then login as Administrator, default administrator password: [7801261178012611] or [1234567812345678] or [12345678] or [12341234].
STEP 4 – Go to [User Auth/Account Track] – [User Authentication Setting – [User Registration], select the registered user that you want to set quota limits by click on [Edit].

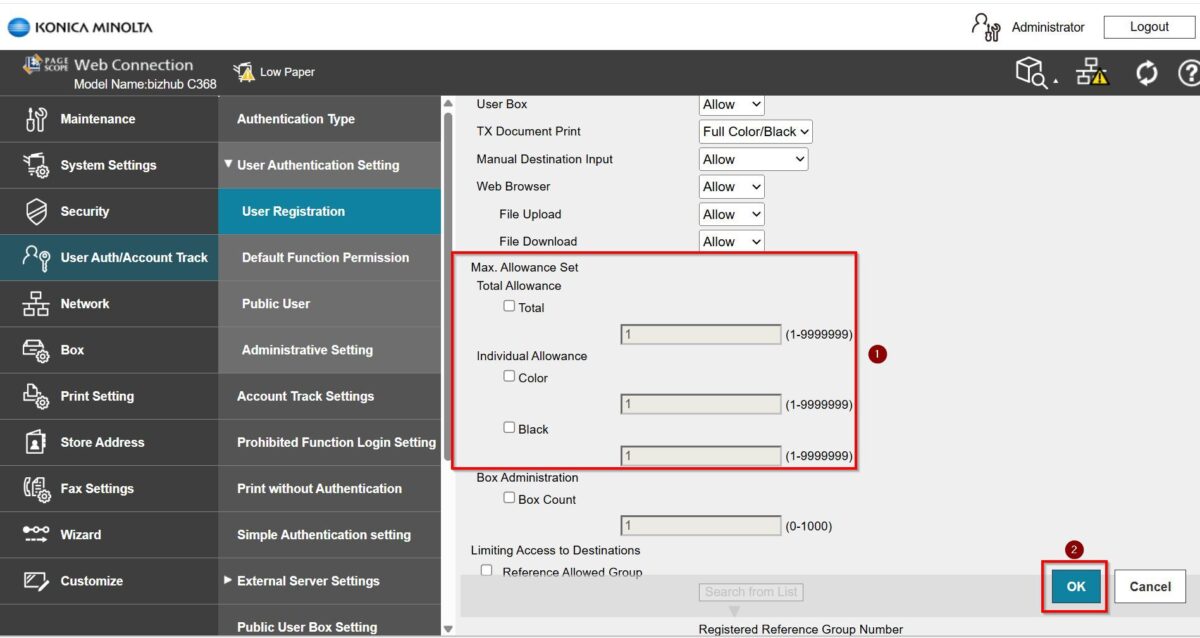
STEP 5 – Select either Total Allowance or Individual Allowance by checking the corresponding option. Once you have adjusted the settings, click [OK] to save the changes.
[Total Allowance]: Specify the total number of pages that can be printed.
[Individual Allowance]: Specify the number of pages that can be printed separately for [Color] and [Black].
STEP 6 – Once a quota limit has been set, the printing usage will be calculated based on the configured limit. To clear the quota limit, click this LINK to reset the quota for user authentication.
For Newer Machine series / I-Series Machine (From Machine Control Panel)
Video Tutorial
The video tutorial below provides detailed instructions and a complete demonstration of the configuration steps.
*From Machine Panel
*From Web Connection
STEP 1 – Select [Home] – [Utility].

**You may access to web connection via machine IP Address. Click on this to check how to get the IP Address from machine, then key in Konica Minolta Machine IP Address at web browser and log in as admin the Web Connection.
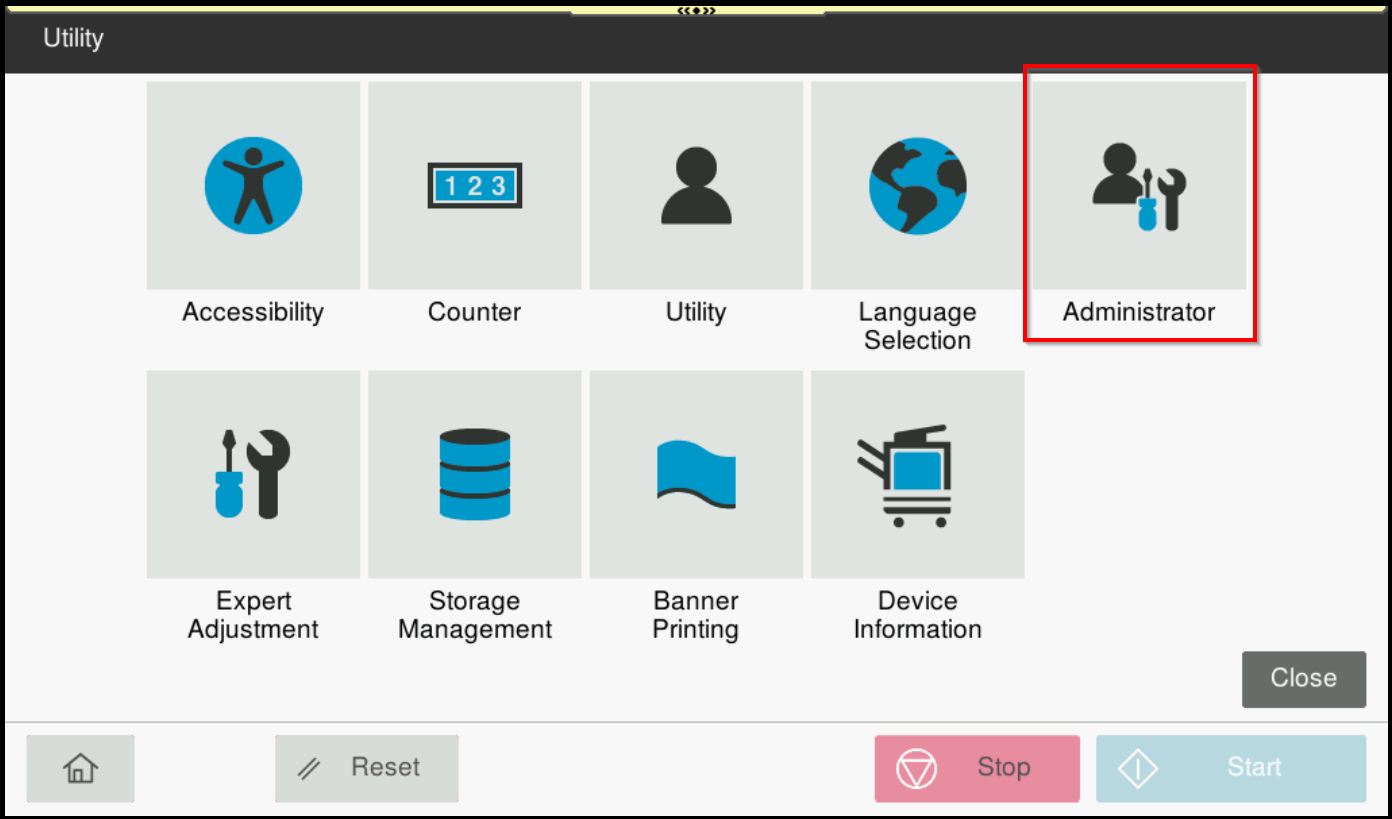
STEP 2 – Select [Administrator].
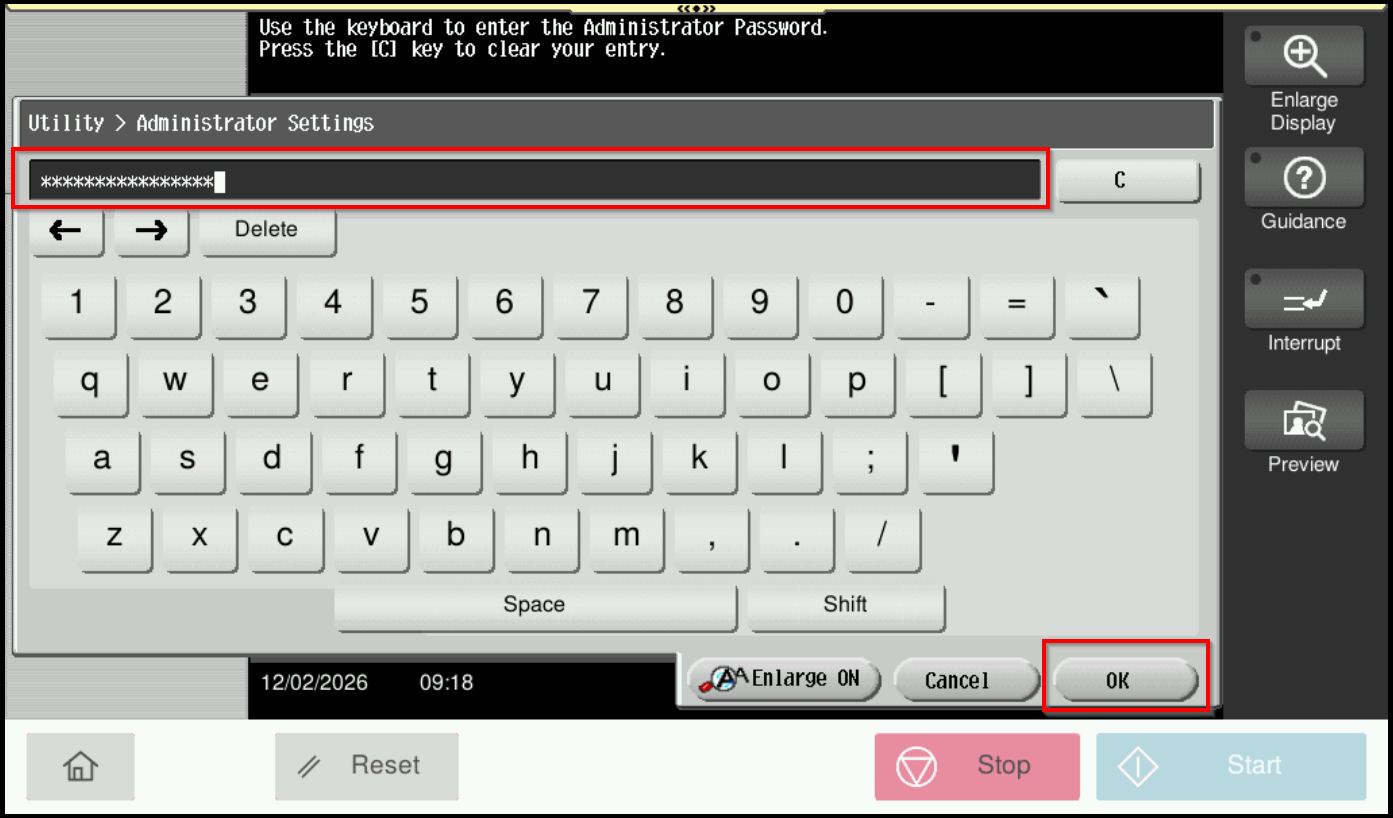
STEP 3 – Key in the default administrator password and click [OK] button.
Default administrator password: [7801261178012611] or [1234567812345678] or [12345678] or [12341234].
**On Web Connection login as admin mode by key in administrator password accordingly. The next step will be same option on below to change administrator password.
STEP 4 – Go to [User Auth/Account Track] – [User Authentication Setting].

*From Machine Panel
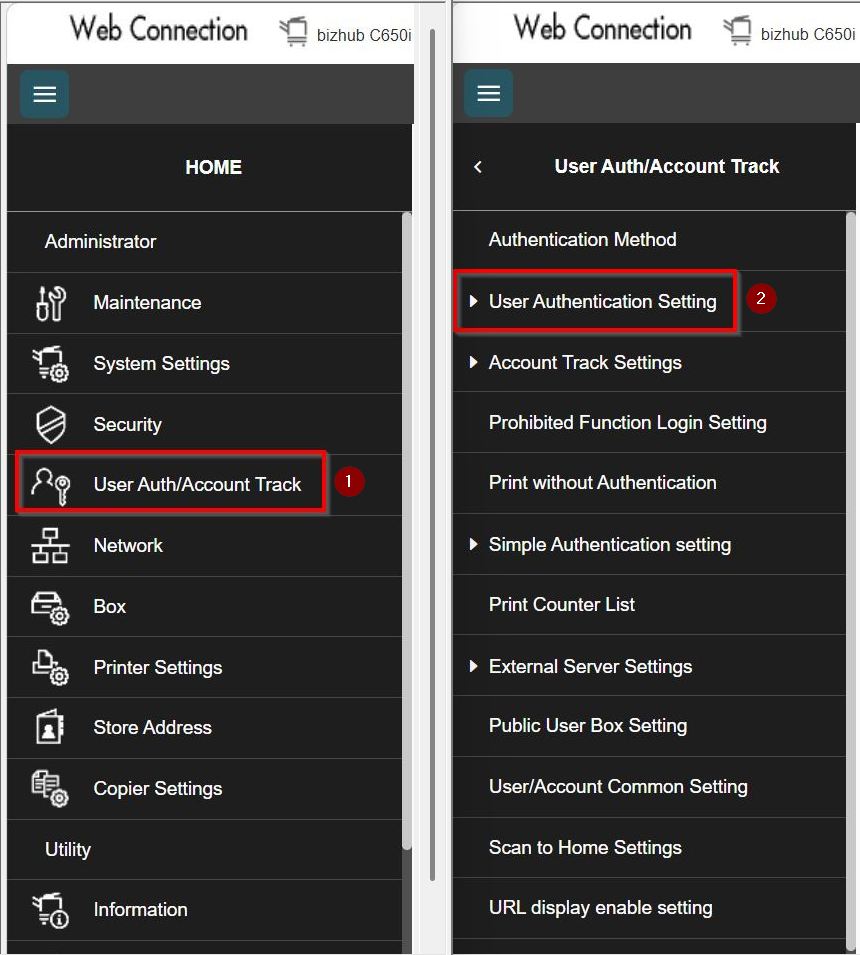
*From Web Connection
STEP 5 – Select [User Authentication] – highlight the user who needs to set the quota limit – [Edit].
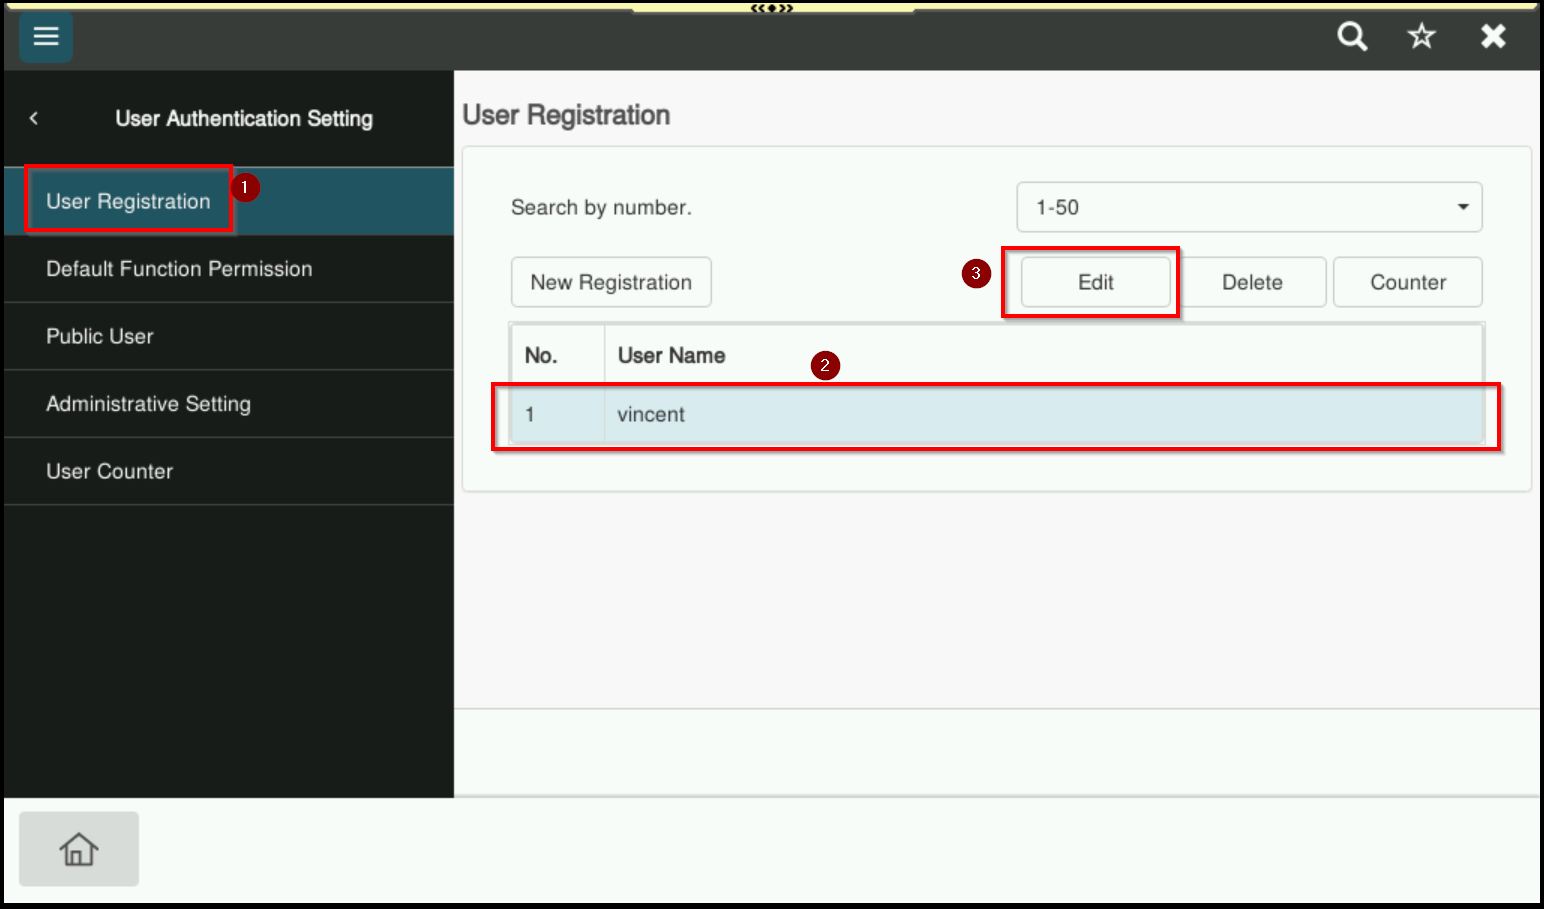
*On the Machine Panel
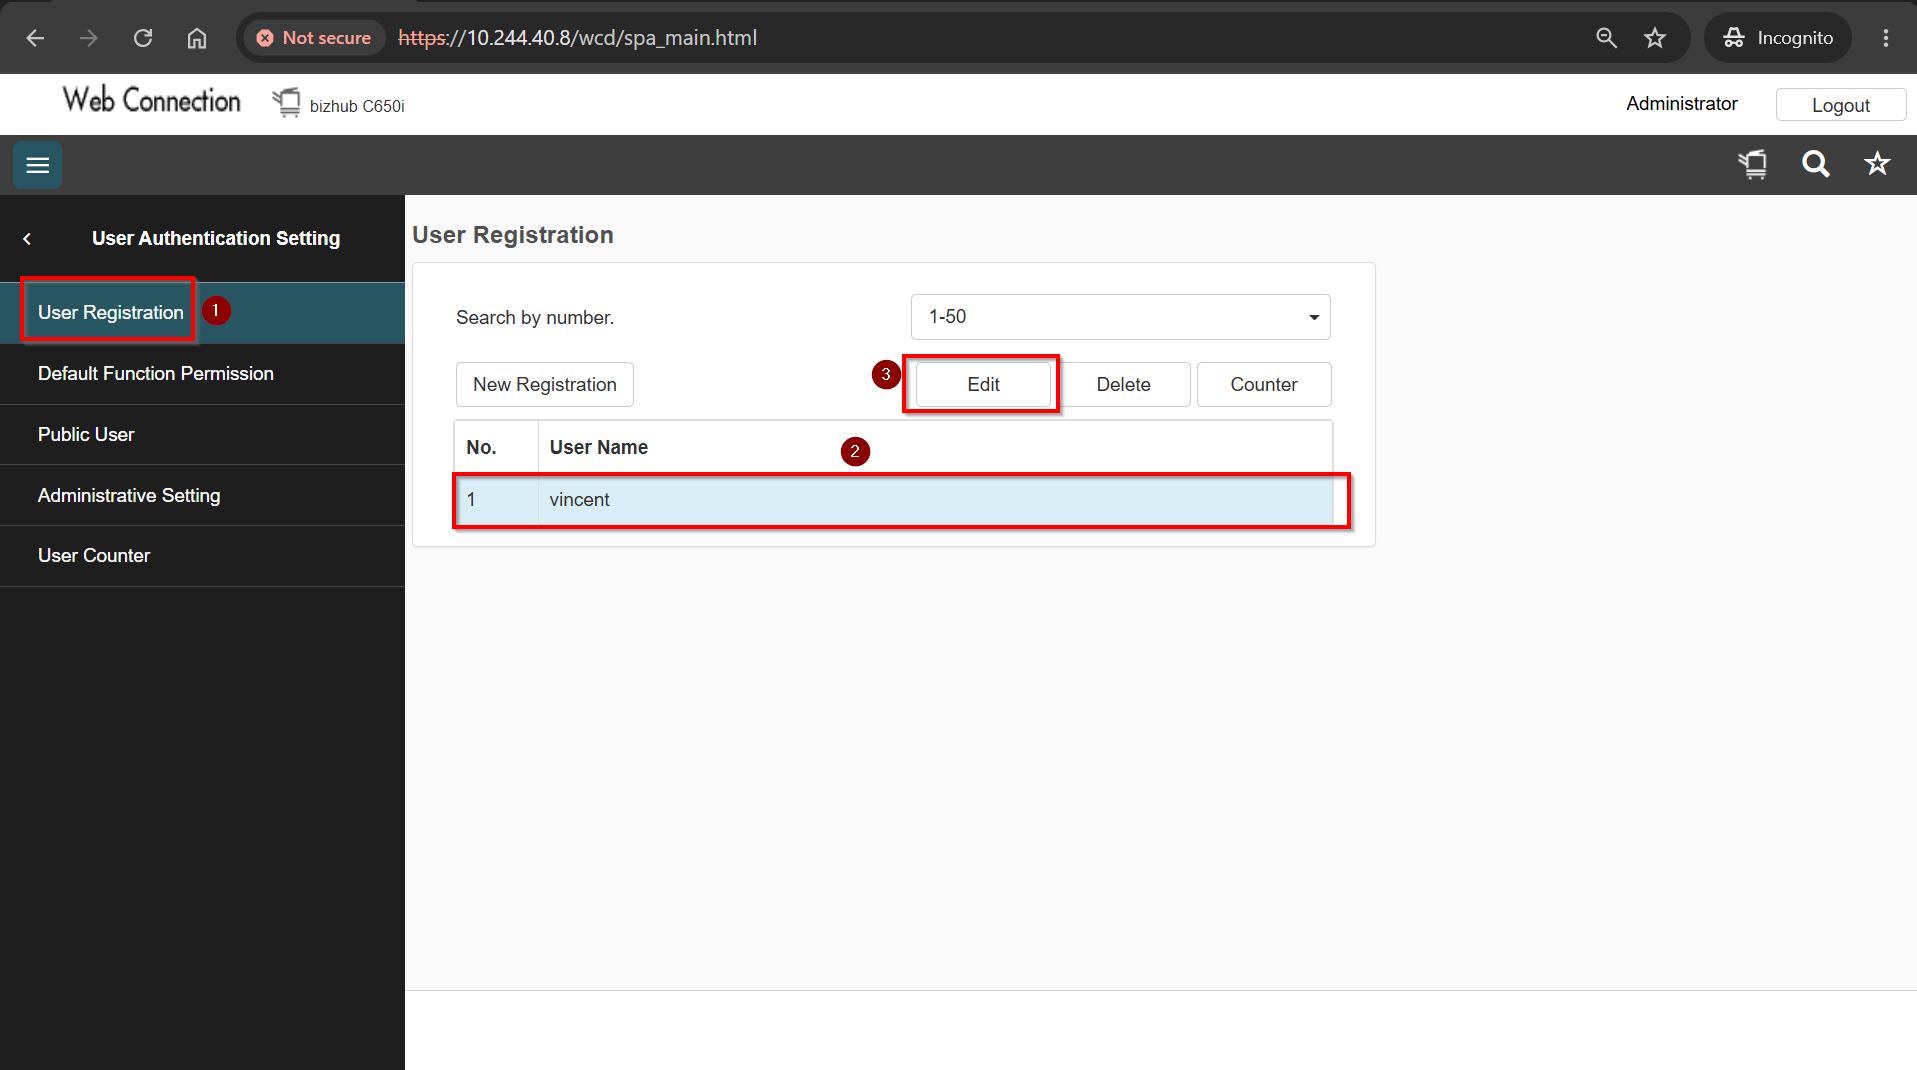
*On the Web Connection
STEP 6 – Select either Total Allowance or Individual Allowance by checking the corresponding option. Once you have adjusted the settings, click [OK] to save the changes.
[Total Allowance]: Specify the total number of pages that can be printed.
[Individual Allowance]: Specify the number of pages that can be printed separately for [Color] and [Black].
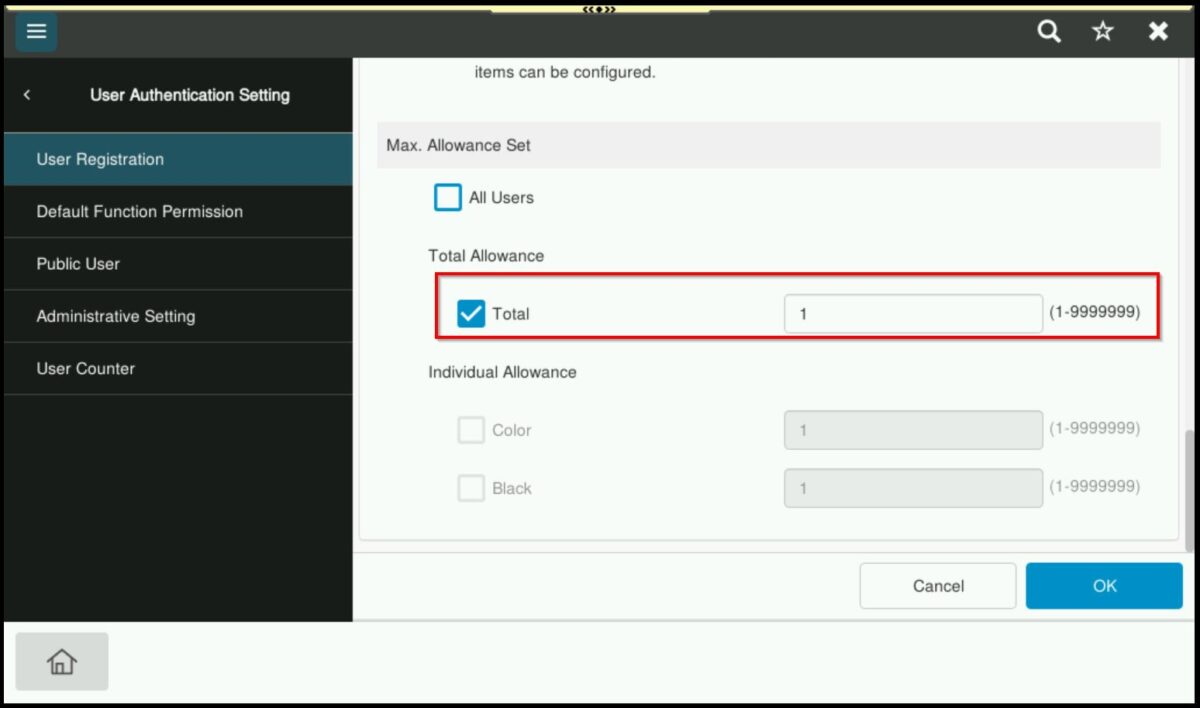
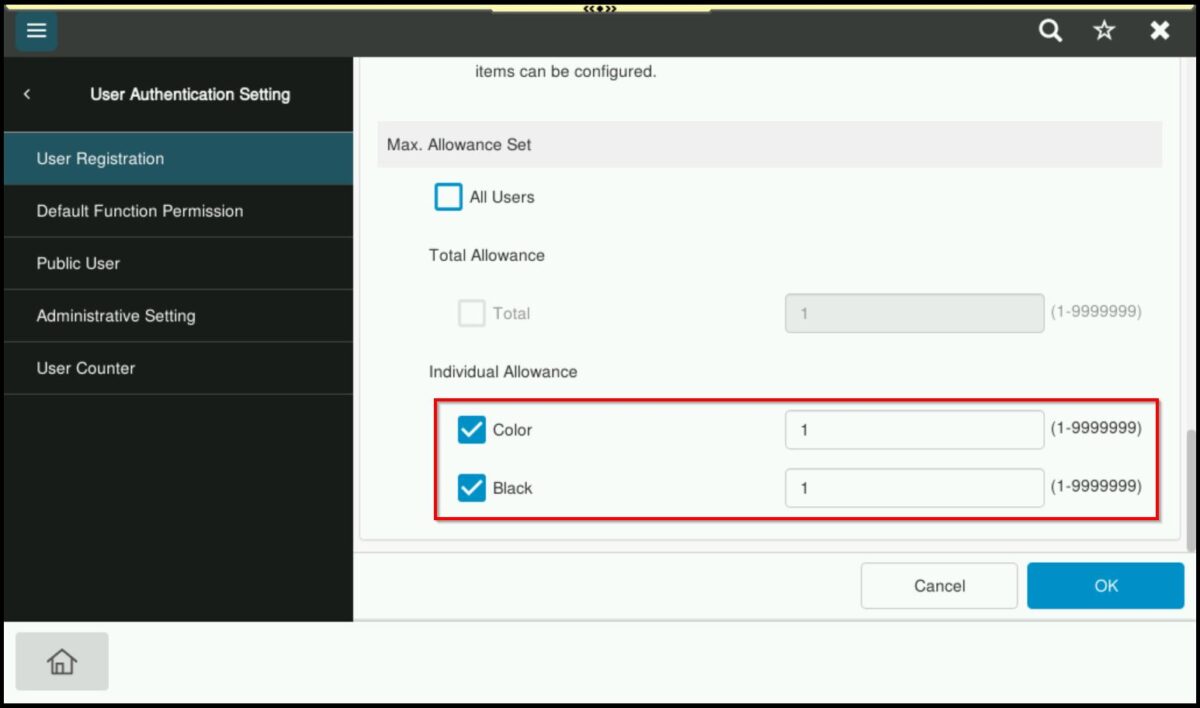
*Set either Total Allowance or Individual Allowance from Machine Panel.
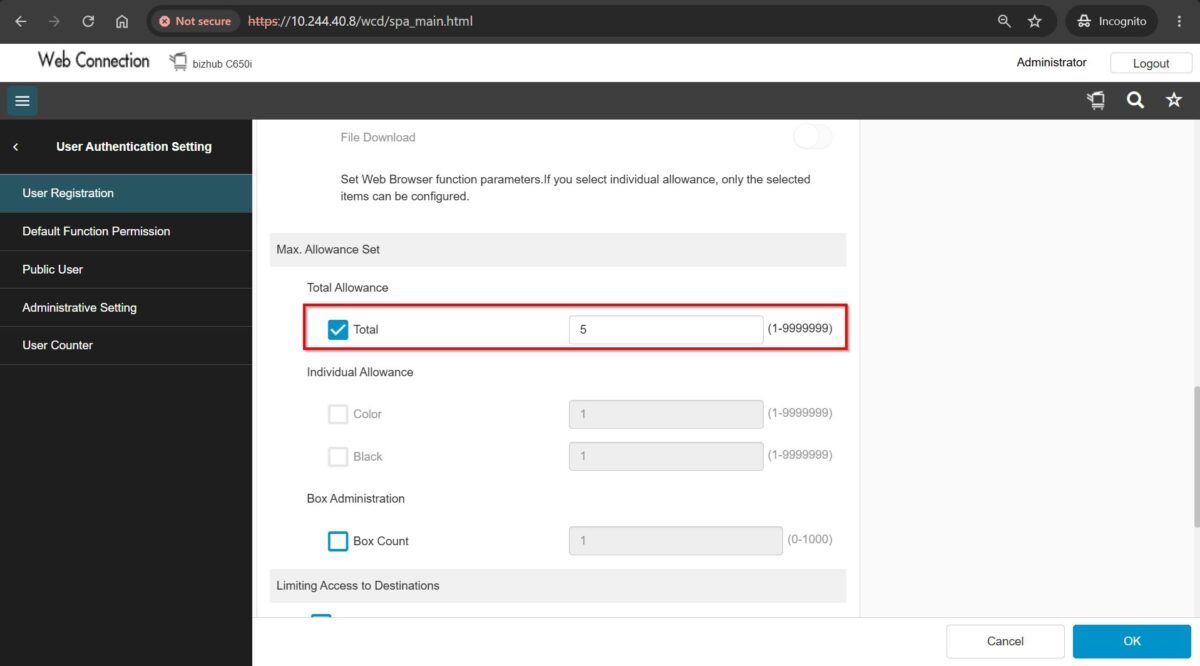

*Set either Total Allowance or Individual Allowance from Web Connection.
STEP 7 – Once a quota limit has been set, the printing usage will be calculated based on the configured limit. To clear the quota limit, click this LINK to reset the quota for user authentication.