Guide on fix Job Log Maximum Limit Reached Error
This guide explains how to resolve the following printer error: Job Log Reach Maximum Allowance
This issue occurs when the printer’s Job Log storage reaches its maximum capacity and can no longer save additional Accounting, Counting or Audit logs.
Users may experience the following:
- Printer displays “Job Log Reach Maximum Allowance”
- Unable to perform print, scan or copy operations
For Older Machine series / Non I-Series Machine (Accessible via Screen Panel only)
Video Tutorial
The video tutorial below provides detailed instructions and a complete demonstration of the configuration steps.
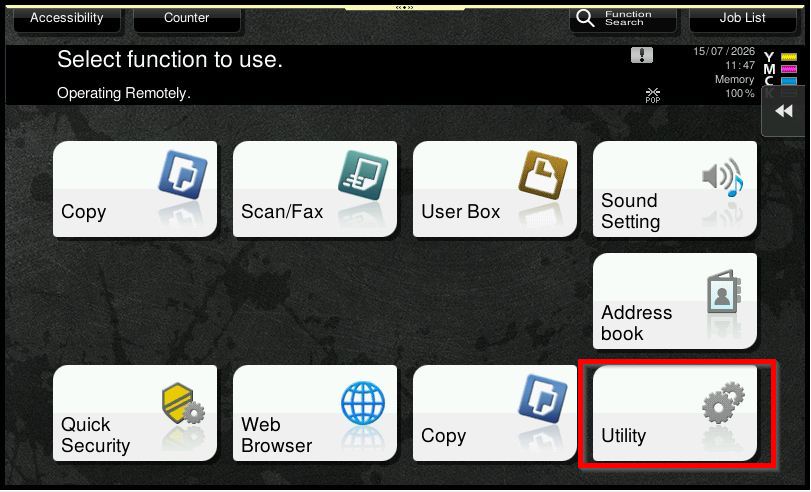
STEP 1 – Select [Utility].
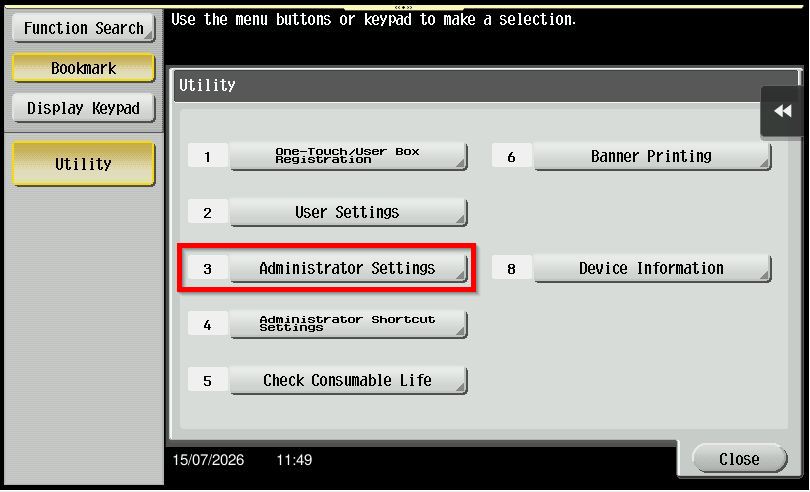
STEP 2 – Select [Administrator Settings] and Key in the default administrator password and click [OK] button to login.
Default administrator password: [7801261178012611] or [1234567812345678] or [12345678] or [12341234].
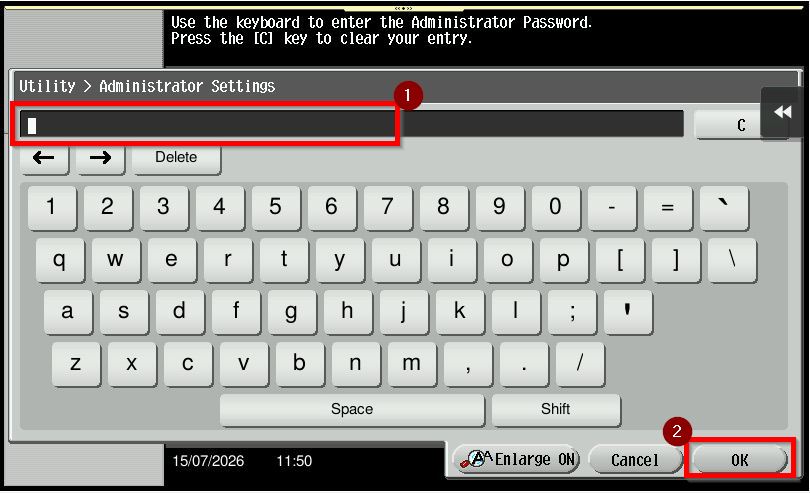
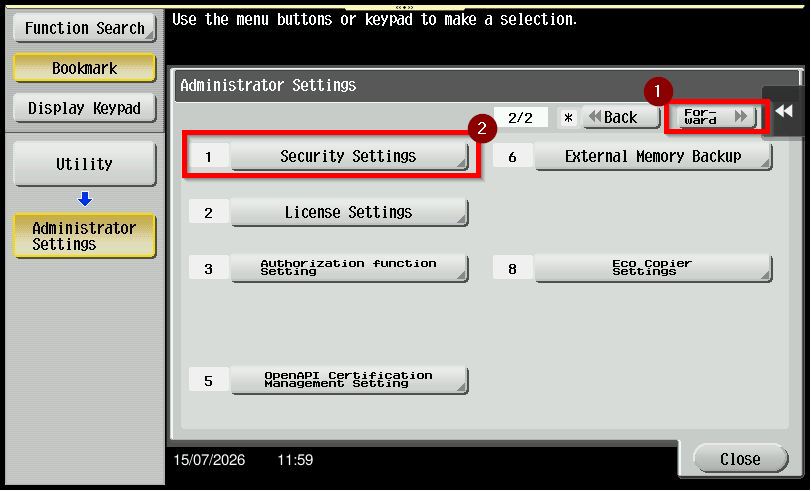
Step 3 – Click on the [Forward] button and go to [System Settings].
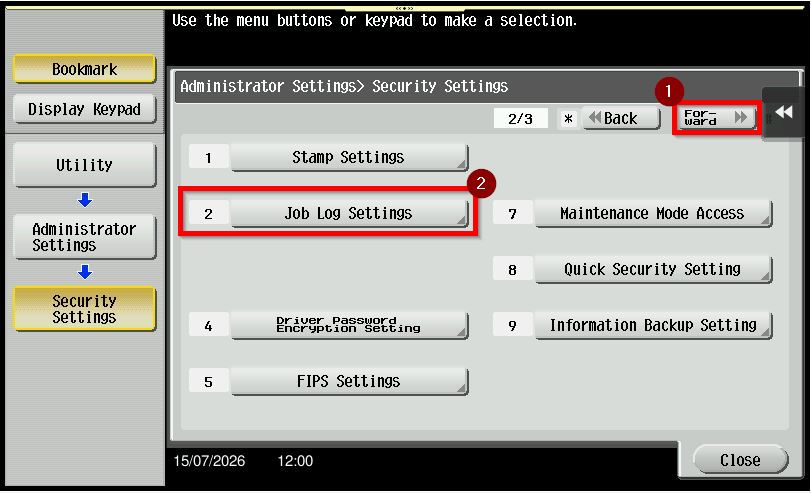
Step 4 – Click on the [Forward] button and go to [Job Log Settings].
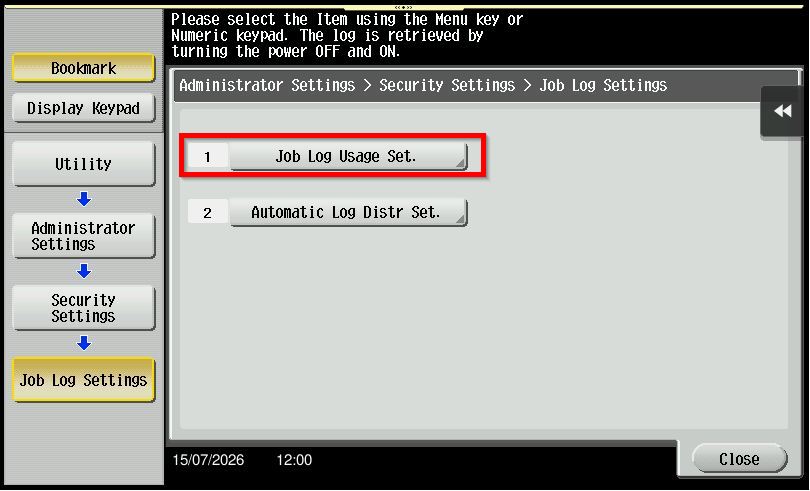
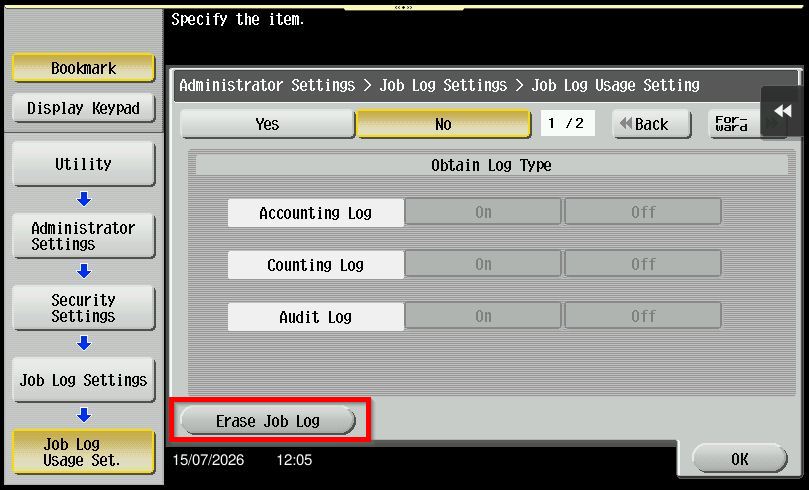
Step 5 – Select [Job Log Usage Set].
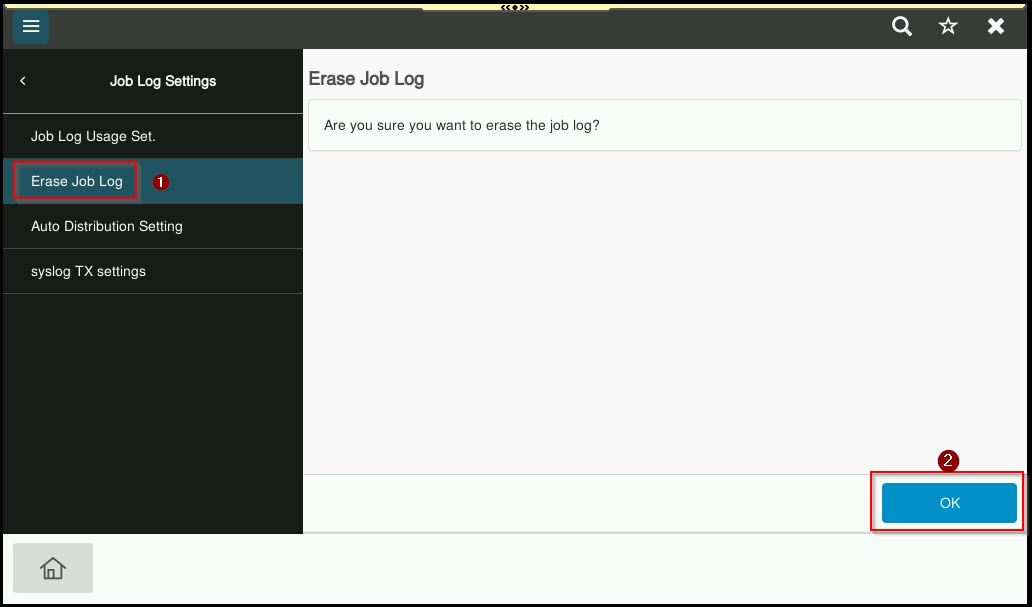
Step 6 – Select [Erase Job Log] to clear the existing job log records. After the process completes successfully, print a test page to verify whether the issue has been resolved.
For Newer Machine series / I-Series Machine (Accessible via Screen Panel & Web Connection)
Video Tutorial
The video tutorial below provides detailed instructions and a complete demonstration of the configuration steps.
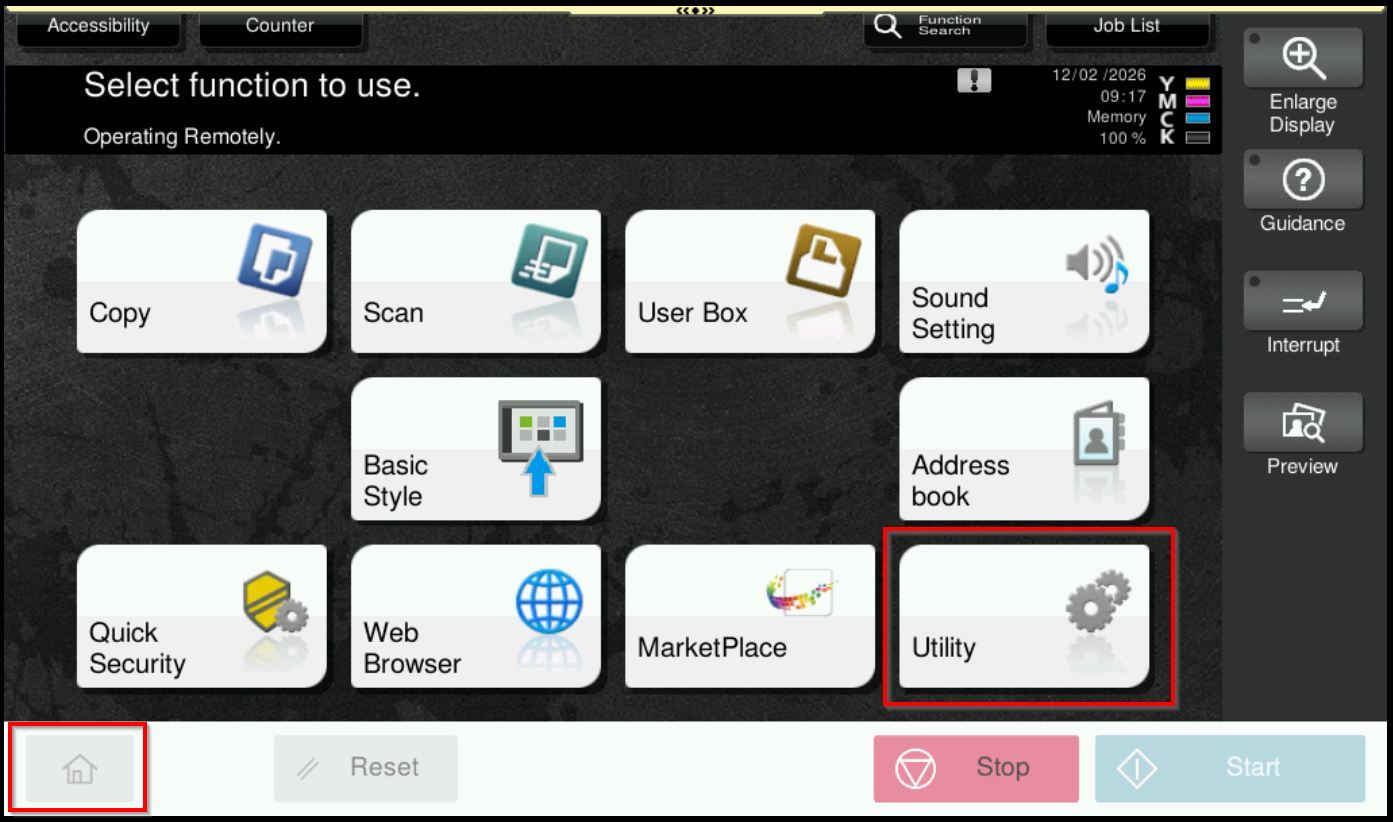
STEP 1 – Select [Home] – [Utility].
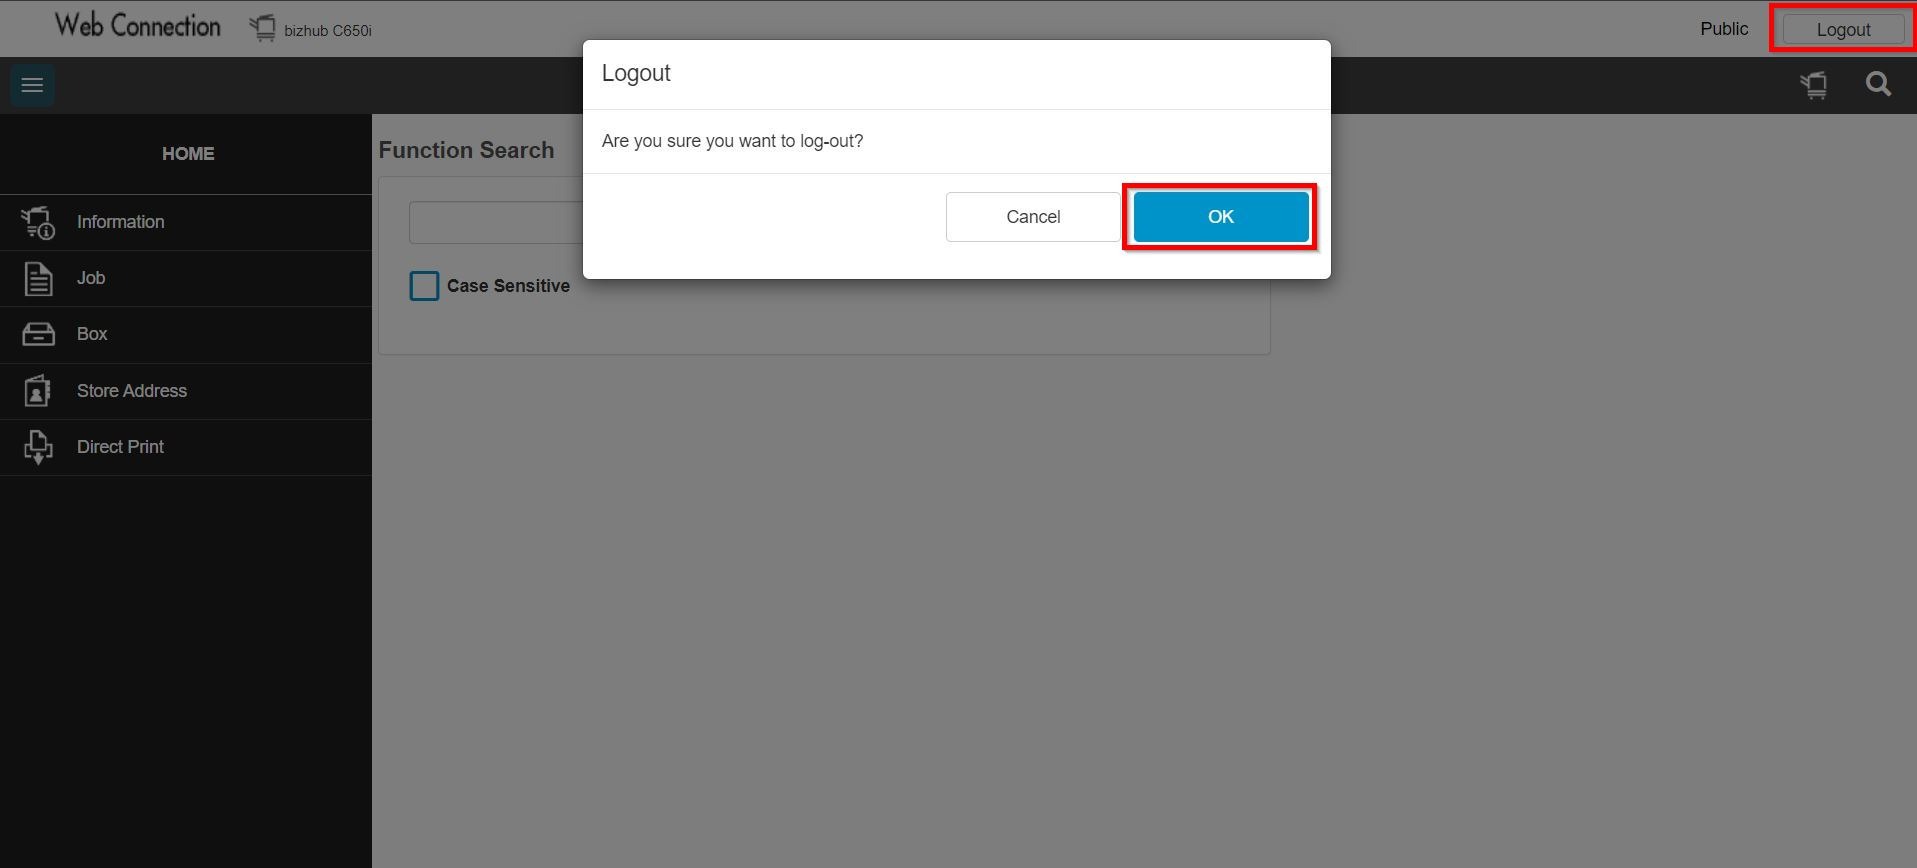
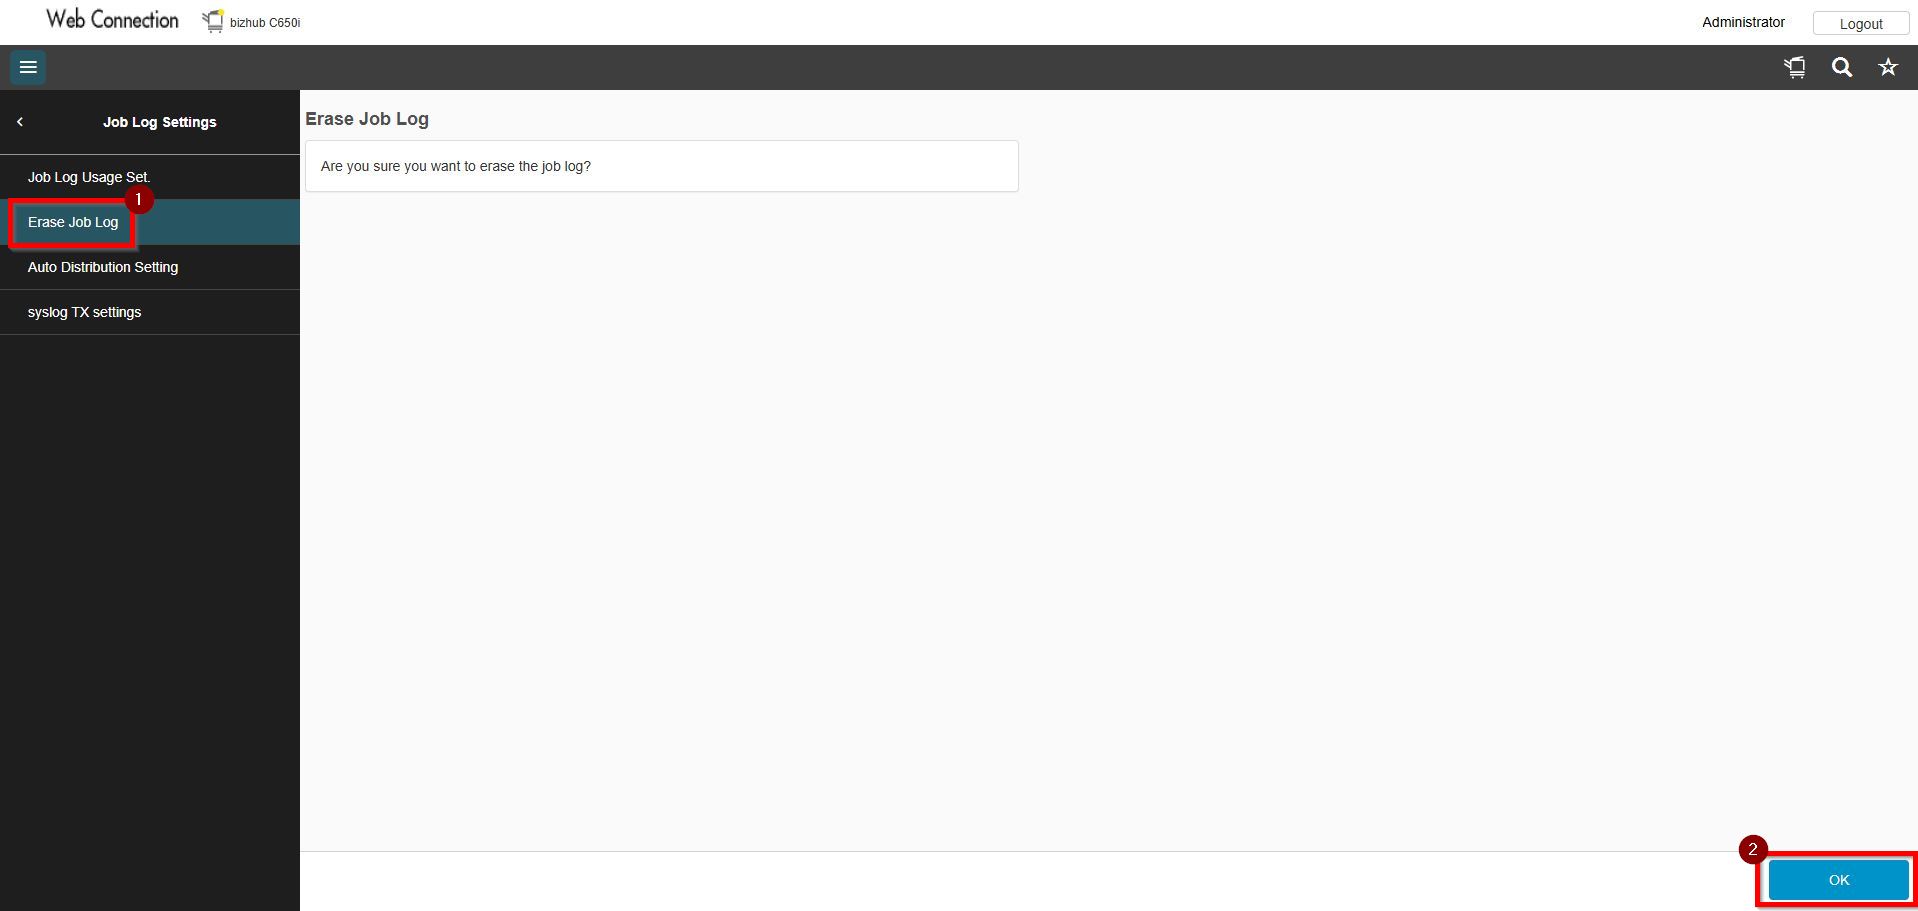
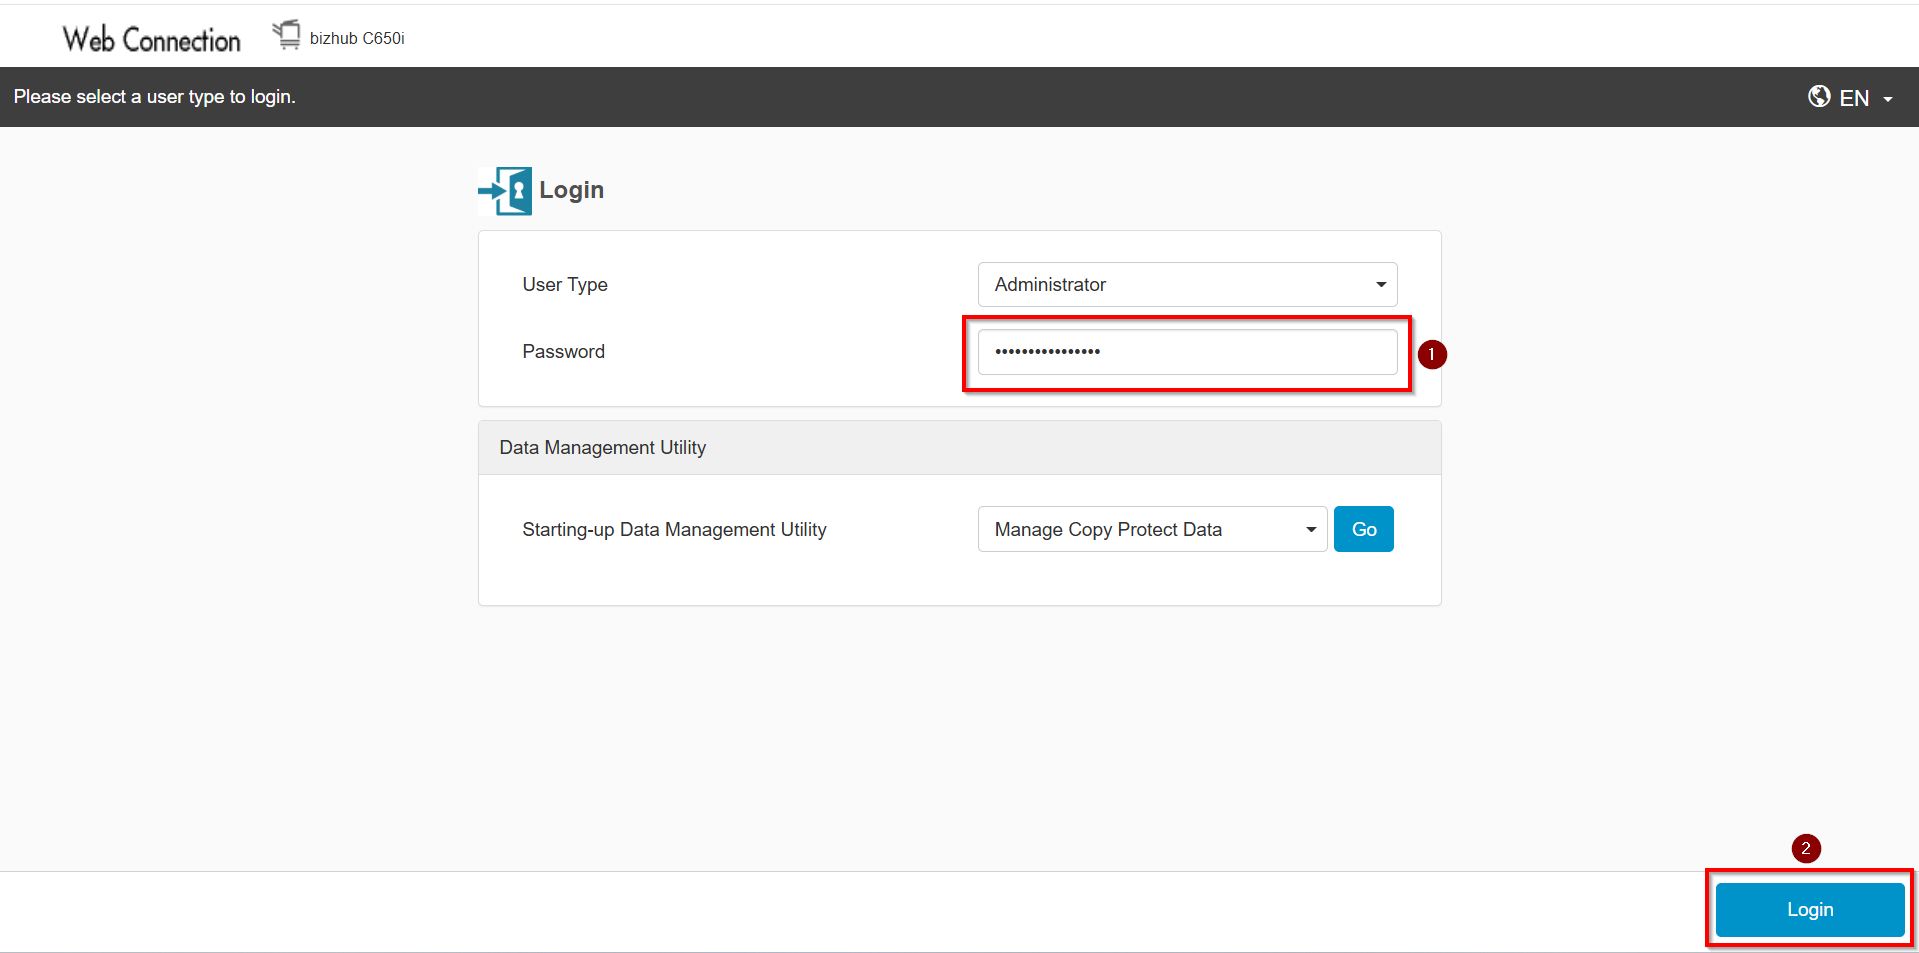
**You may access to web connection via machine IP Address. Click on this to check how to get the IP Address from machine, then key in Konica Minolta Machine IP Address at web browser and log in as admin the Web Connection.
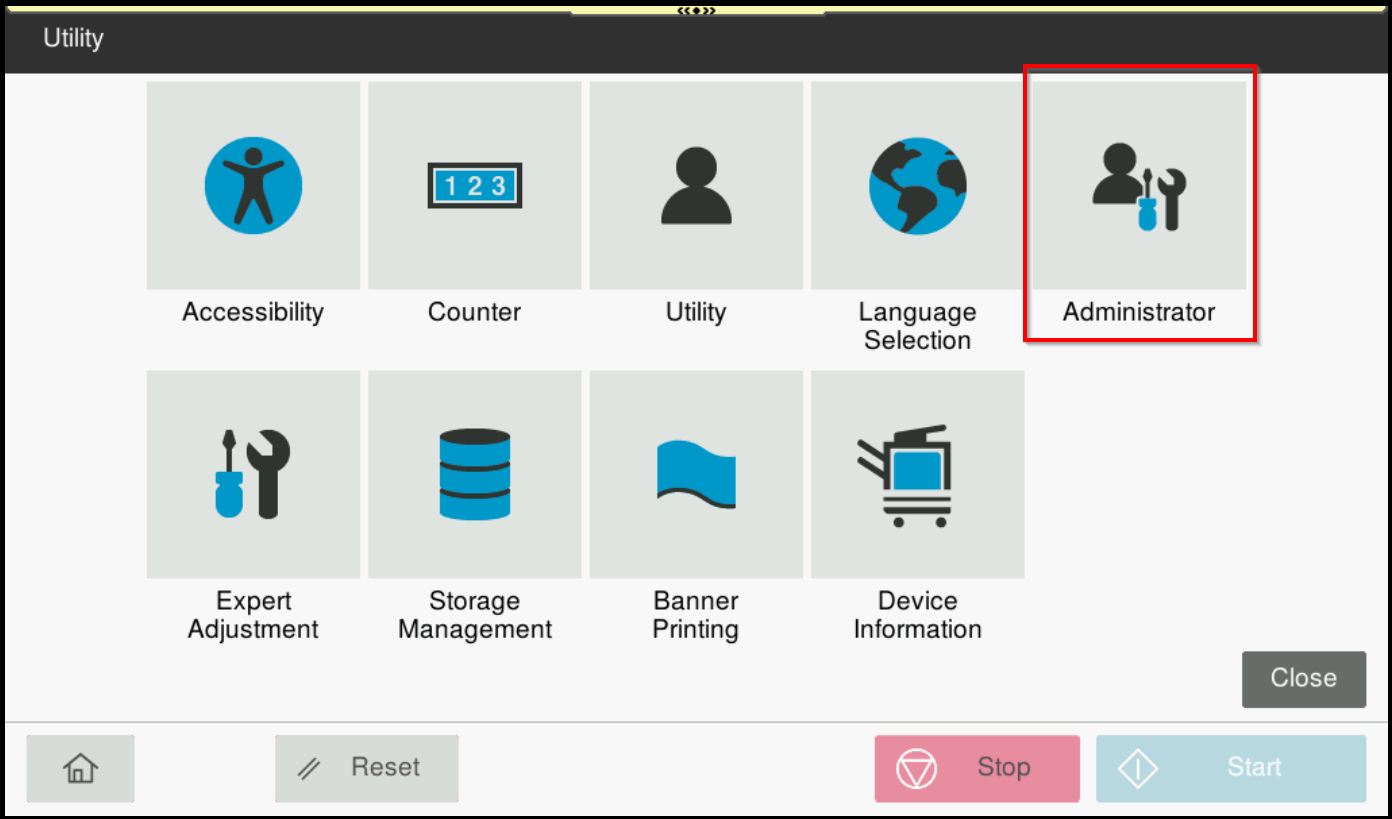
STEP 2 – Select [Administrator].
STEP 3 – Key in the default administrator password and click [OK] button.
Default administrator password: [7801261178012611] or [1234567812345678] or [12345678] or [12341234].
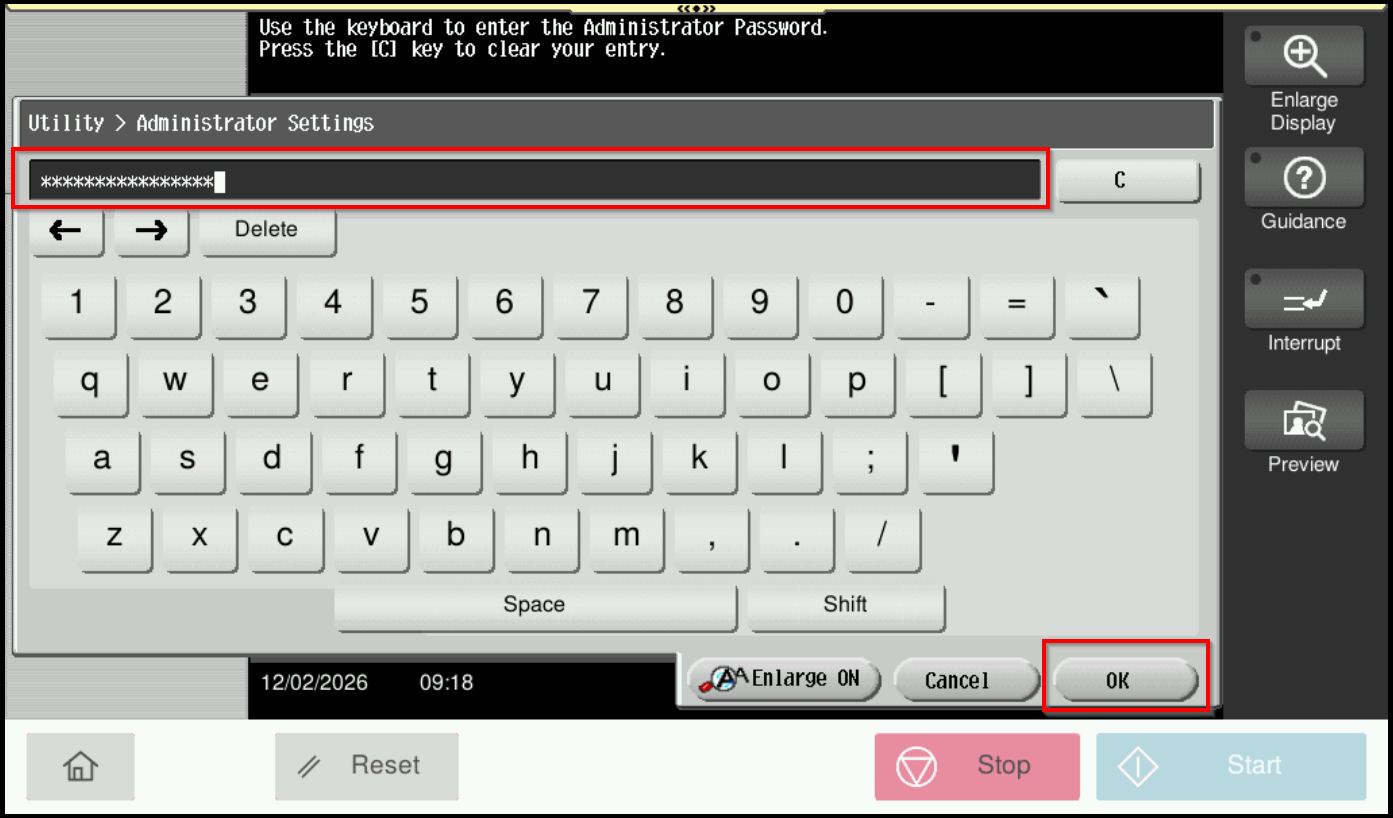
**On Web Connection login as admin mode by key in administrator password accordingly. The next step will be same option on below to change administrator password.
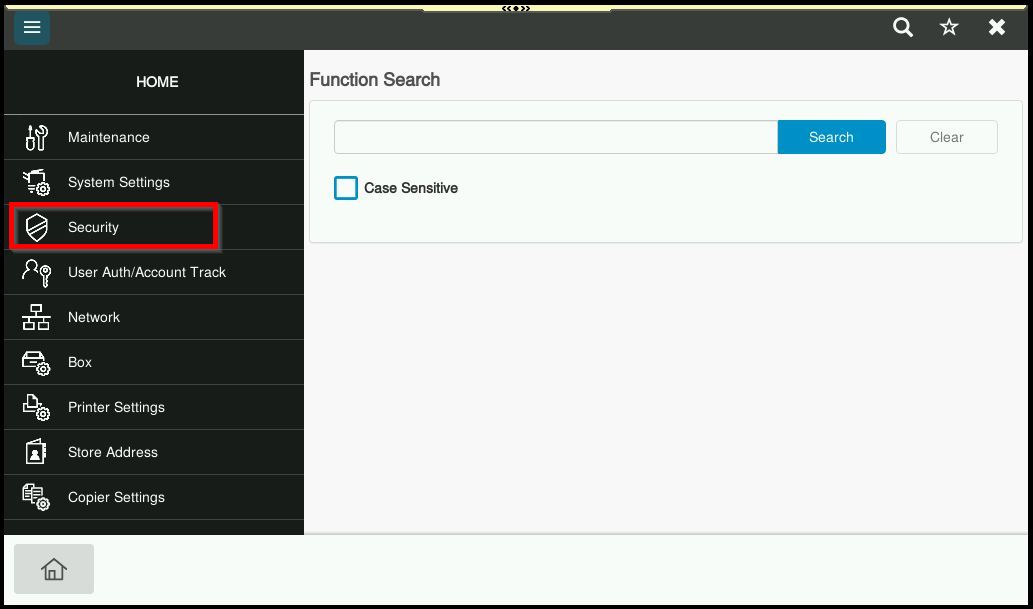
STEP 4 – Go to [Security].
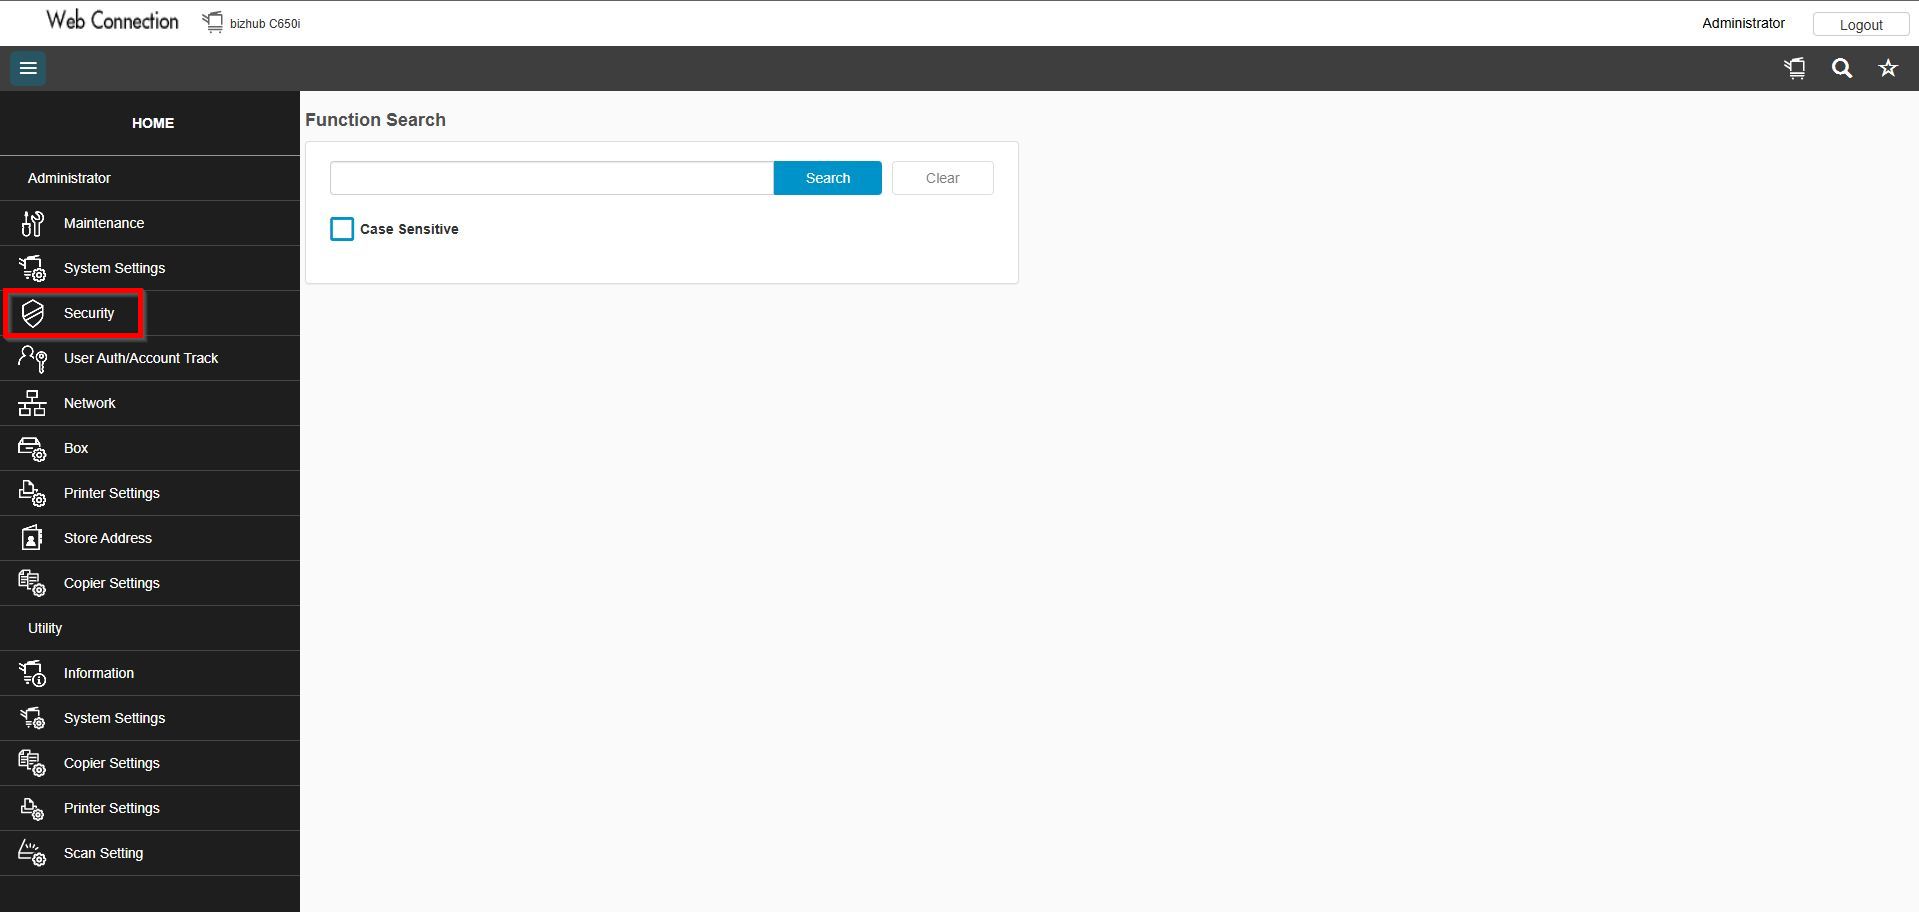
STEP 5 – Select [Job Log Settings].
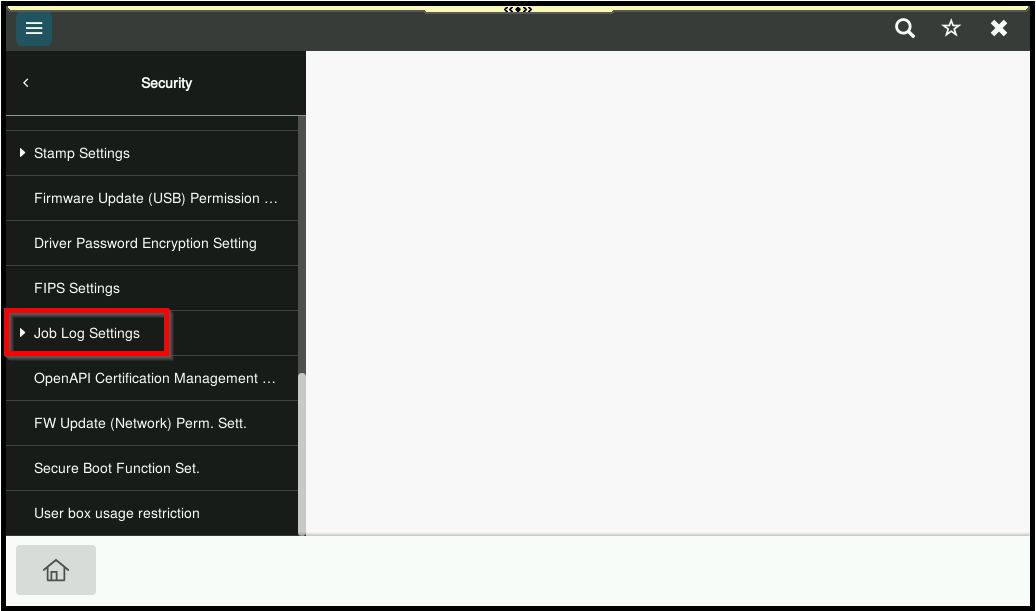
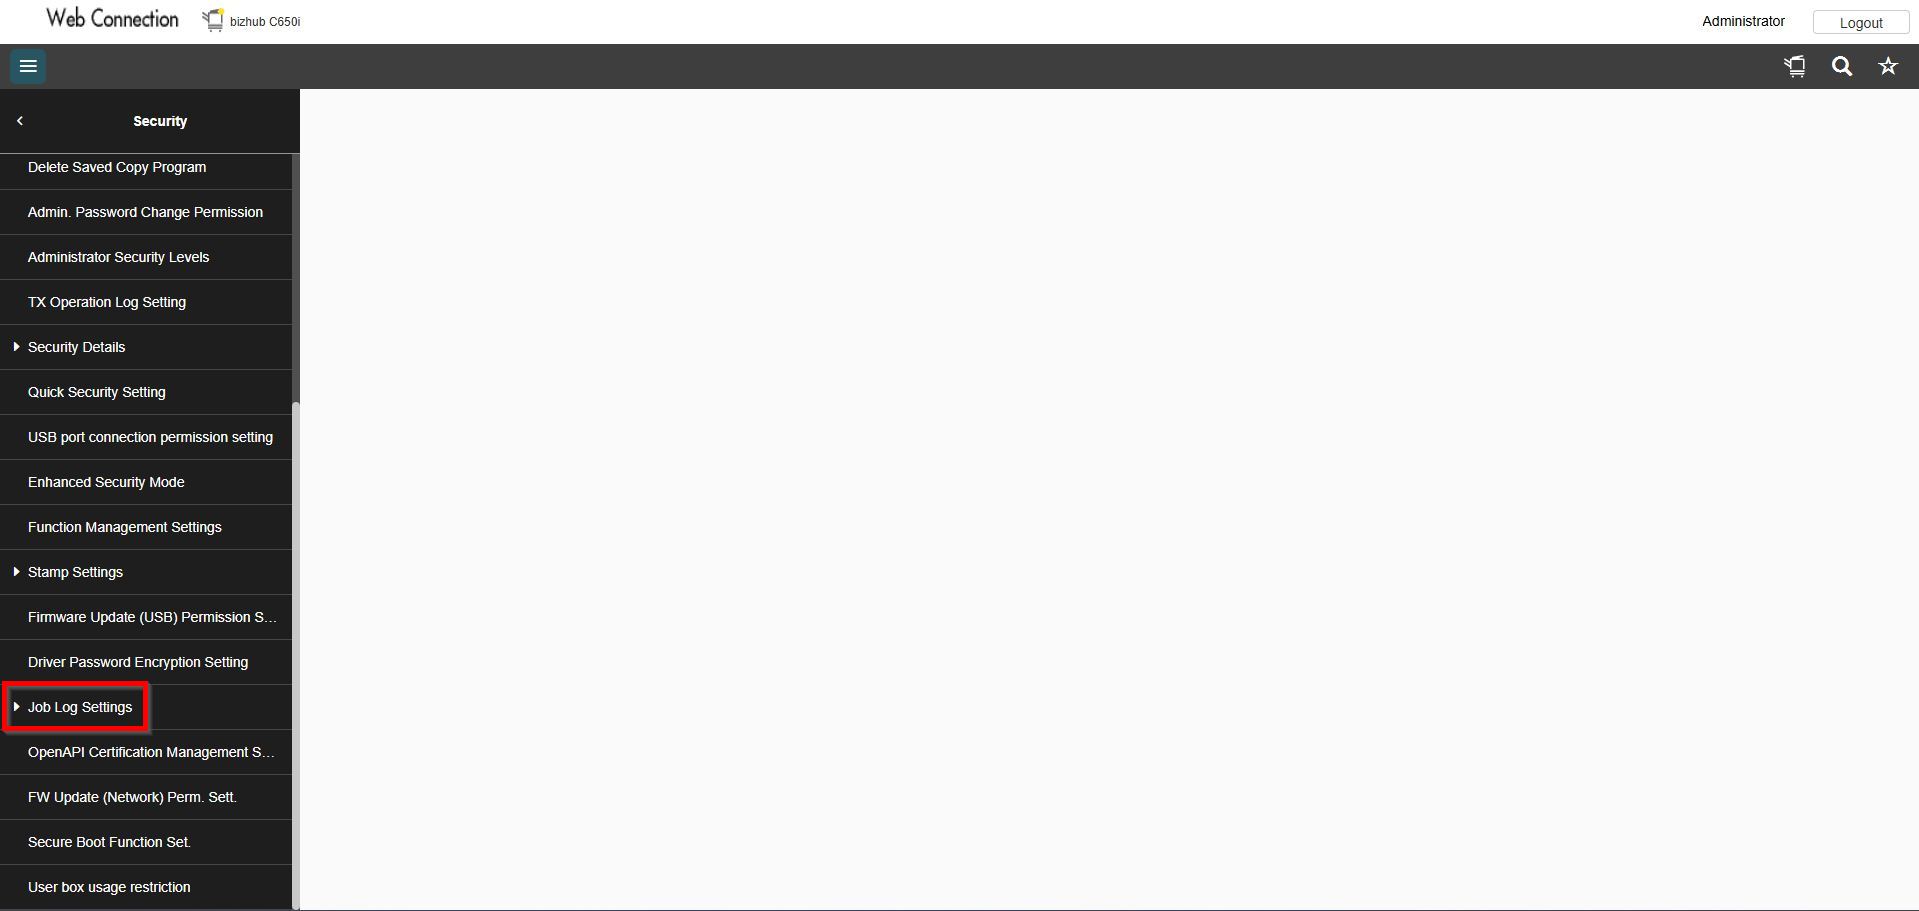
Step 6 – Select [Erase Job Log] to clear the existing job log records. Once the process has completed successfully, please try to print again and verify whether the issue has been resolved.