
Guide on how to register multiple destination in store address as a group on Photostat Machine or Web Connection.
The single destination under store address book list can be combined into group which can include different types of destination for a group, such as Scan to E-mail, SMB Address, FTP Address, and Fax Address.
To register a new one, kindly follow below step and configure the following setting in [New Registration].
For the Older Machine series / Non I-Series Machine
How To Register Multiple Destination In Store Address As Group via Photostat Machine Screen Panel
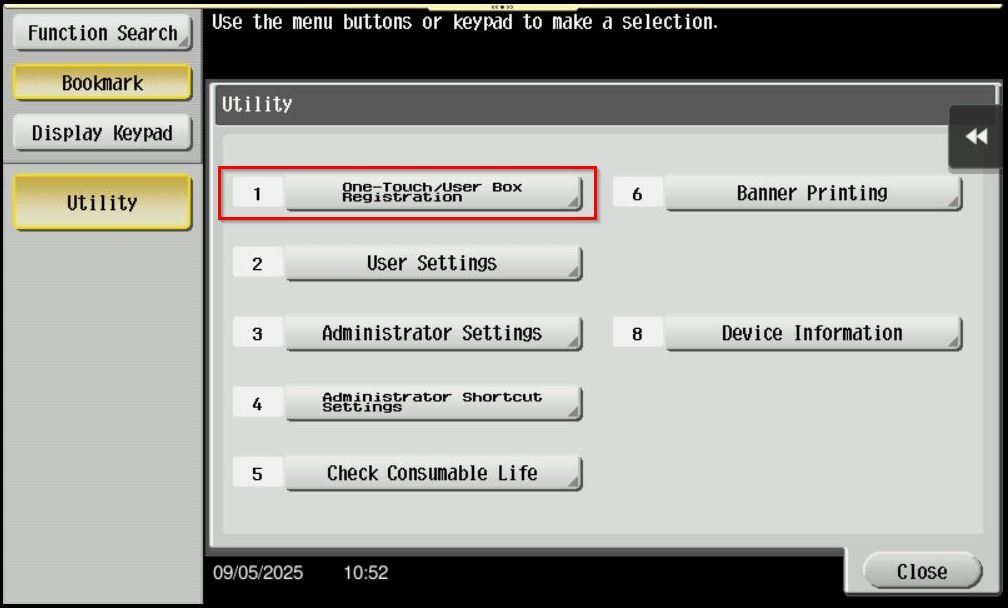
STEP 1 – On the Konica Minolta machine screen panel, select [Utility].
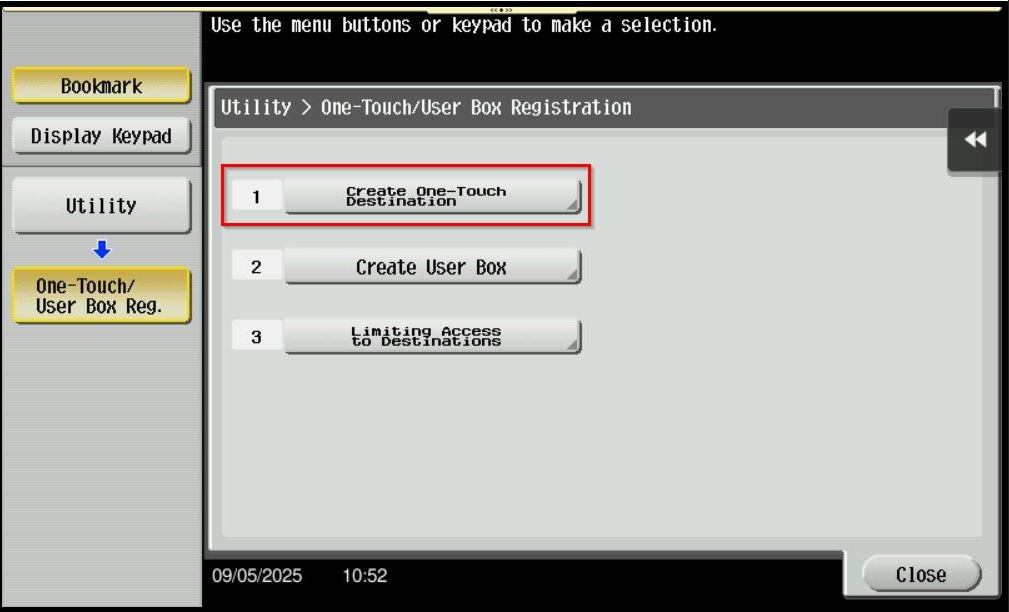
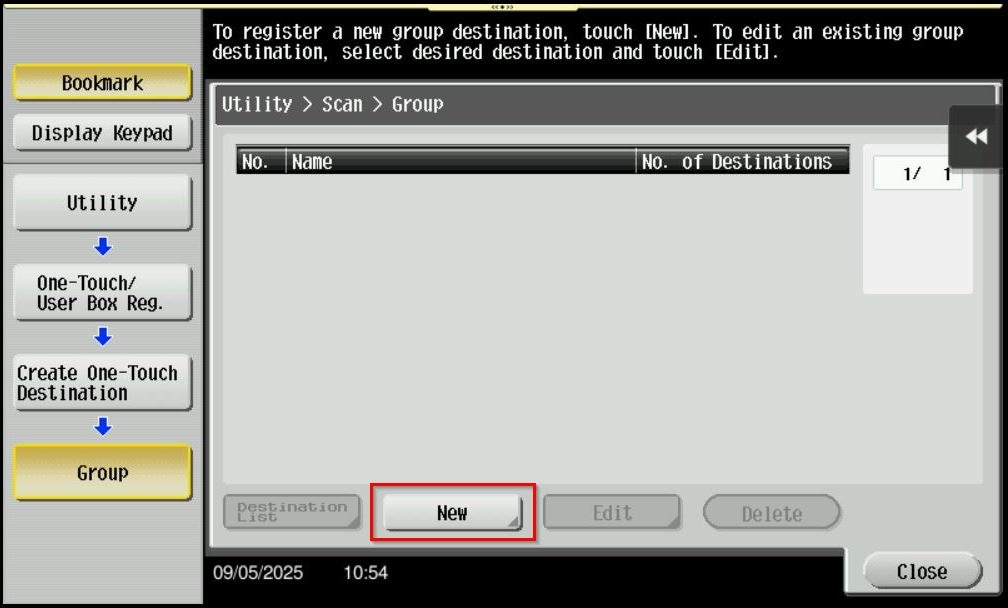
STEP 2 – Go to [One-Touch / User Box Registration] – [Create One-Touch Destination] and select [Group].
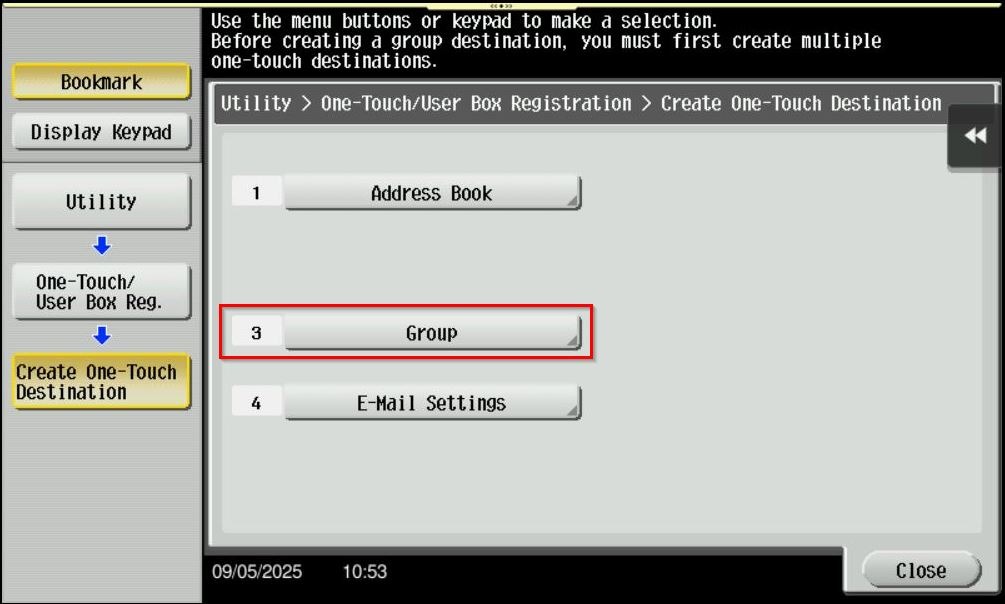
STEP 3 – Select [New] to create a new group name.
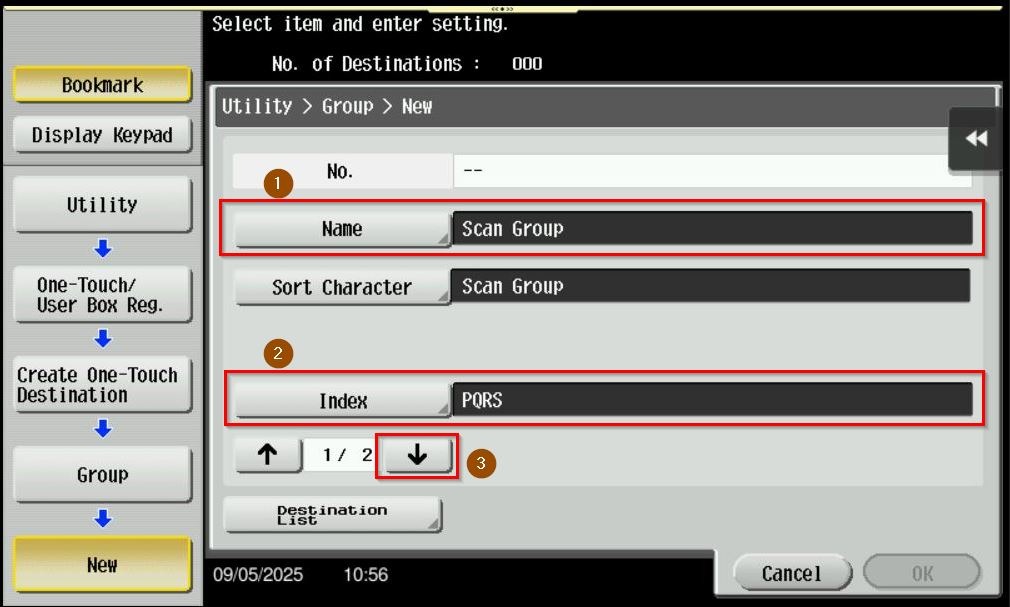
STEP 4 – Key in the information as per below to register. Click OK after finish to save the setting and you will able to scan under Group to multiple destination.
- Name: Scan Group (Name that shown on machine later when scan)
- Index: First character that on the Name above, in this case will be PQRS.
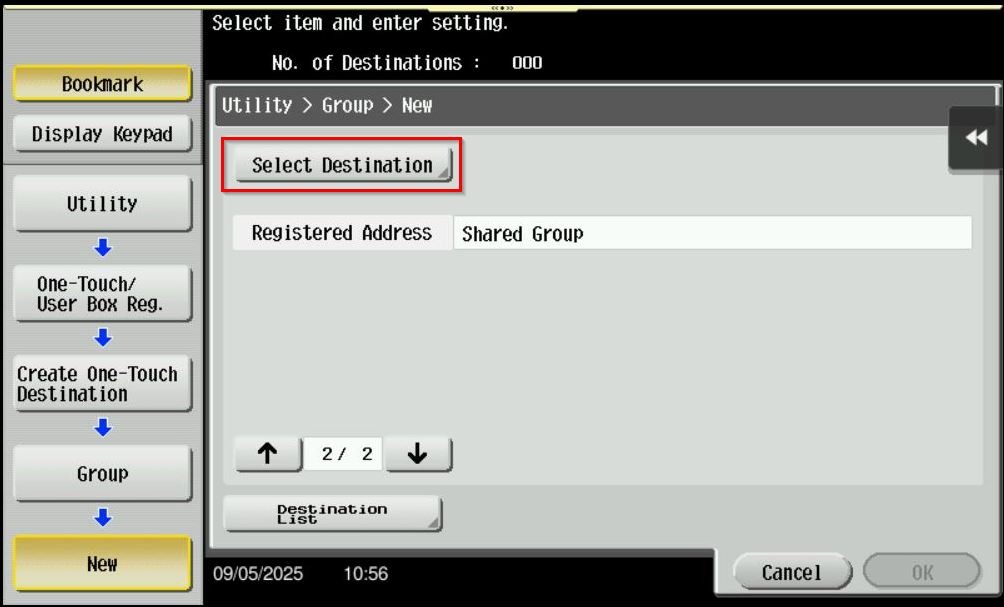
- Select Destination: Choose the list that is under store address to be combined into group. In this case, we have selected 3 name on store address to be register under group scan.
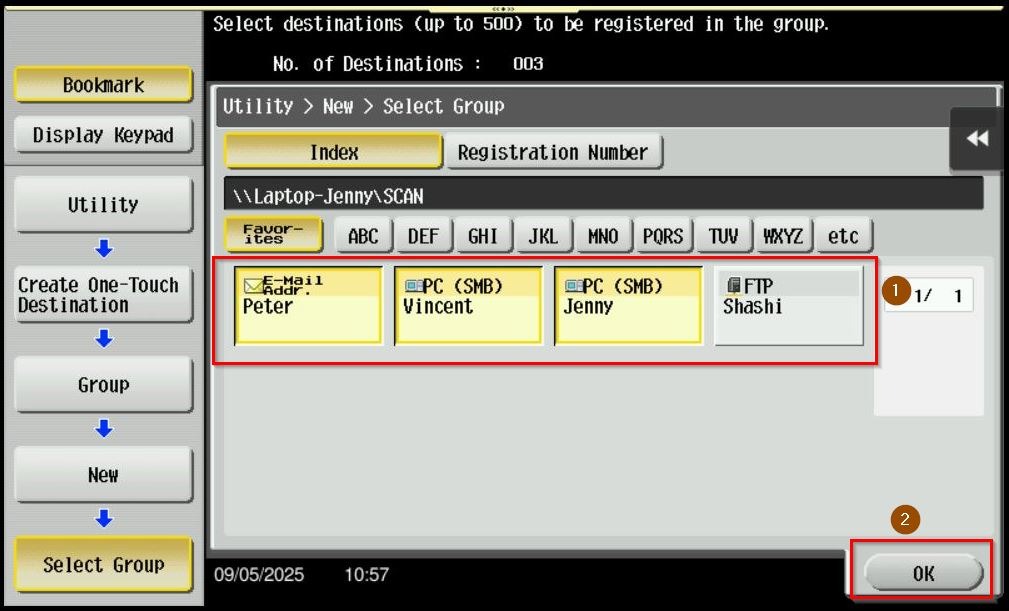
STEP 5 – The name Scan Group will be created and it contain of 3 name which is Peter(E-mail), Vincent(SMB) & Jenny(SMB). It can be check further which destination has been register under this group scan by selecting the [Destination list].
How To Register Multiple Destination In Store Address As Group via Photostat Machine Screen Panel
STEP 1 – At the web browser, enter the ip address of the Konica Minolta. Click Here for the guide on how to get the machine IP Address.
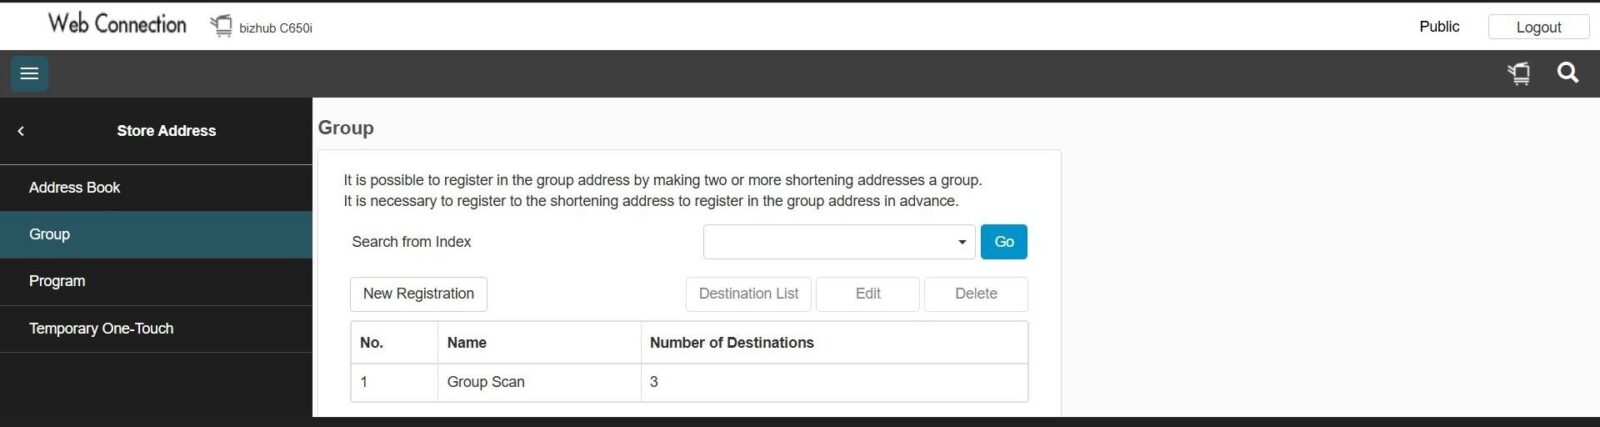
STEP 2 – Select [Store Address] – [Group] – [New Registration] to register a new group for multiple destination.
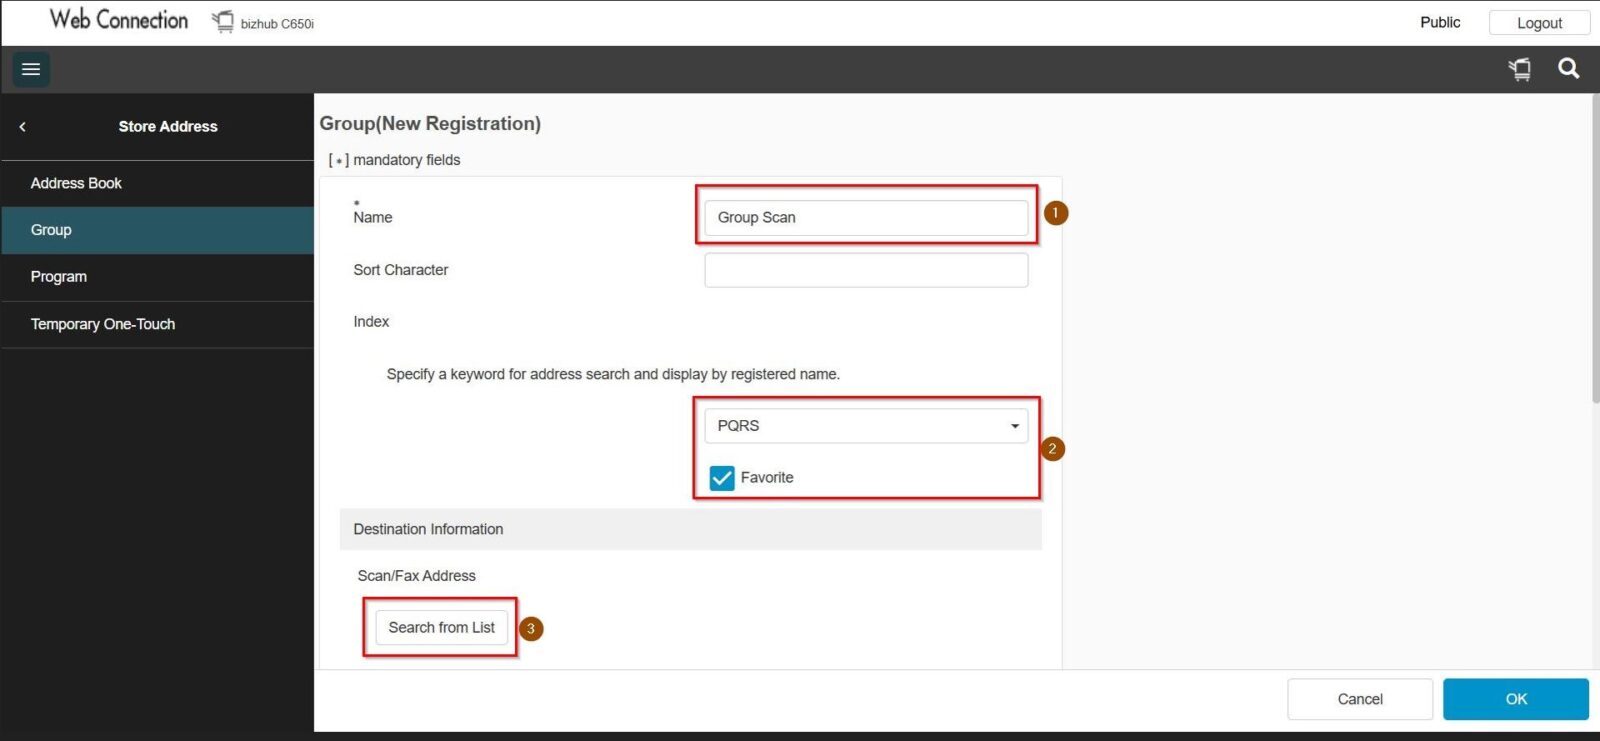
STEP 3 – Key in the information as per below. Click OK after finish to save the setting and you will able to scan under Group to multiple destination.
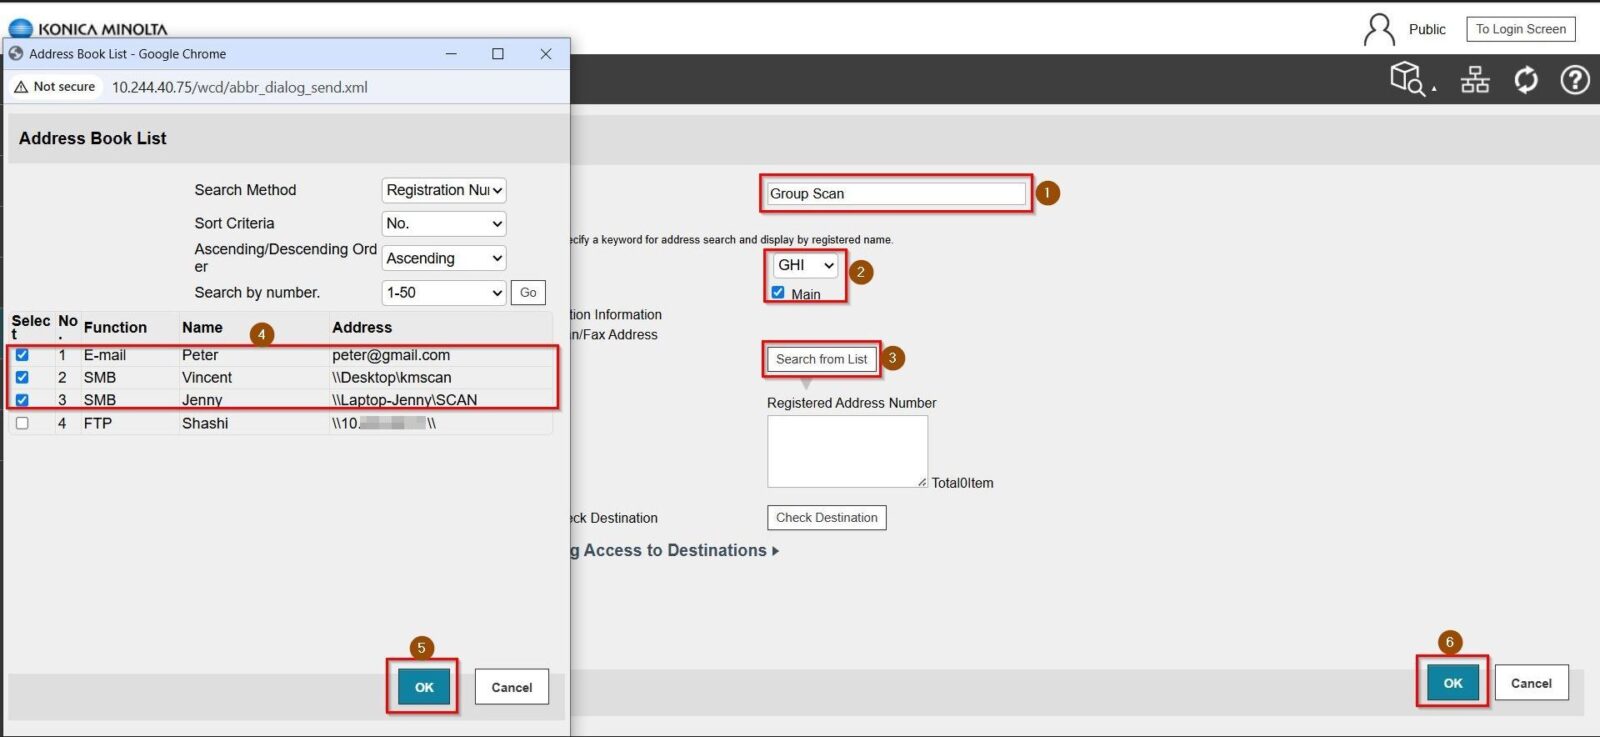
- Name: Group Scan (Name that shown on machine later when scan)
- Index: First character that on the Name above, in this case will be GHI.
- Main: Tick to be shown under favorite tab
- Select from List: Choose the list that is under store address to be combined into group. In this case, we have selected 3 name on store address to be register under group scan.
STEP 4 – The name Group Scan will be created and it contain of 3 name which is Peter(E-mail), Vincent(SMB) & Jenny(SMB). It can be check further which destination has been register under this group by selecting the [Edit] – [Check Destination].

For the Newer Machine series / I-Series
How To Register Multiple Destination In Store Address As Group On Machine Or Web Connection
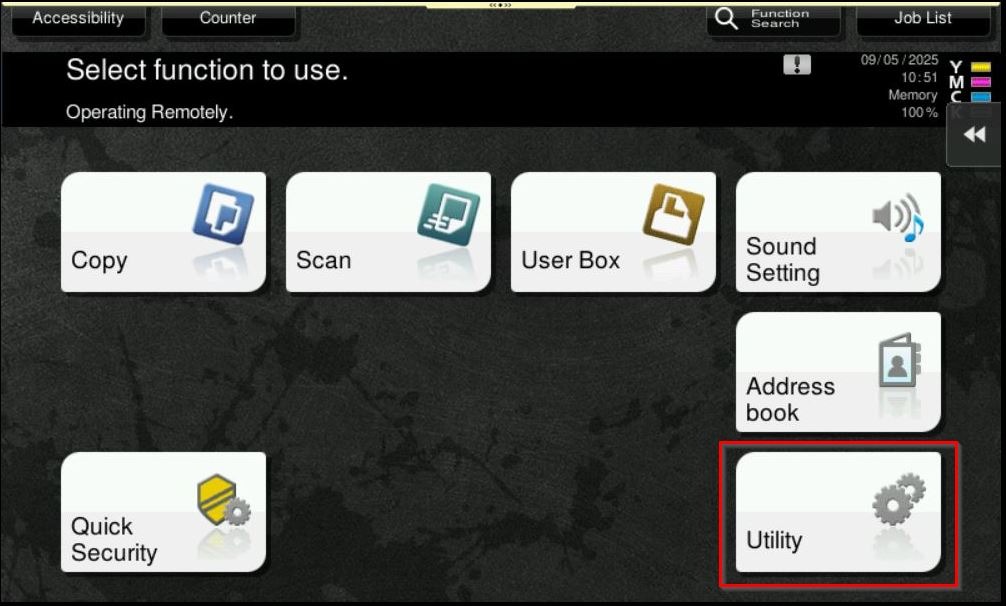
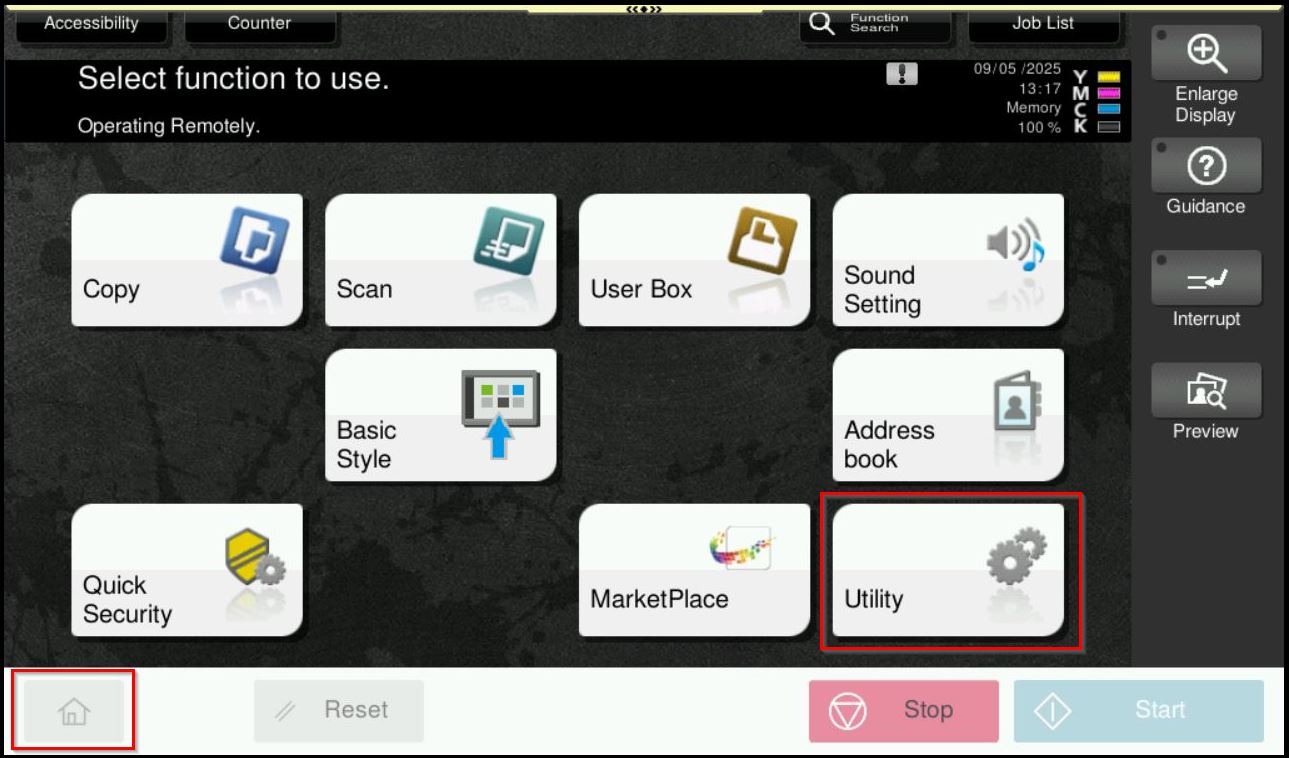
STEP 1 – Select [Home] – [Utility].
**You may access web connection page via machine IP Address. Click on this to check how to get the IP Address from machine, then key in Konica Minolta Machine IP Address at web browser and log in as admin the Web Connection.

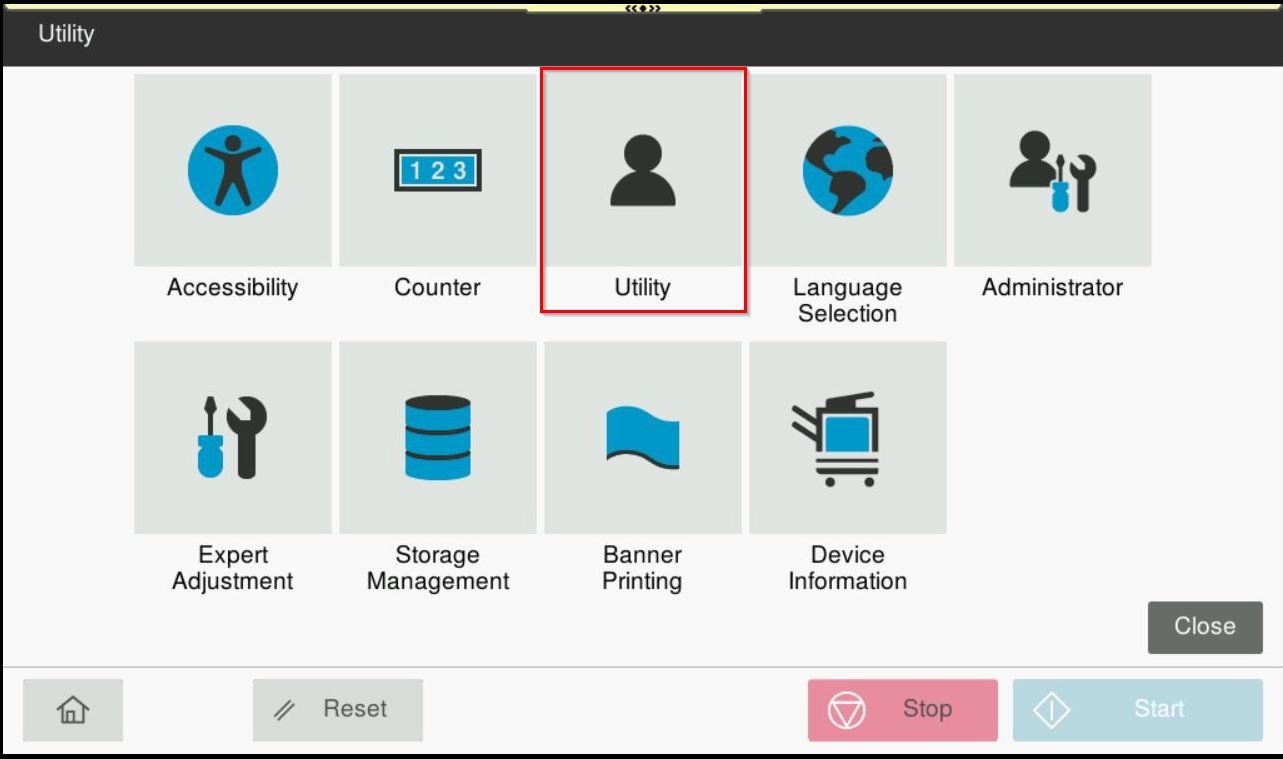
STEP 2 – Select [Utility].
**On Web Connection page can select Store address directly. The next step will be same option on below to register multiple destination on store address as a group.
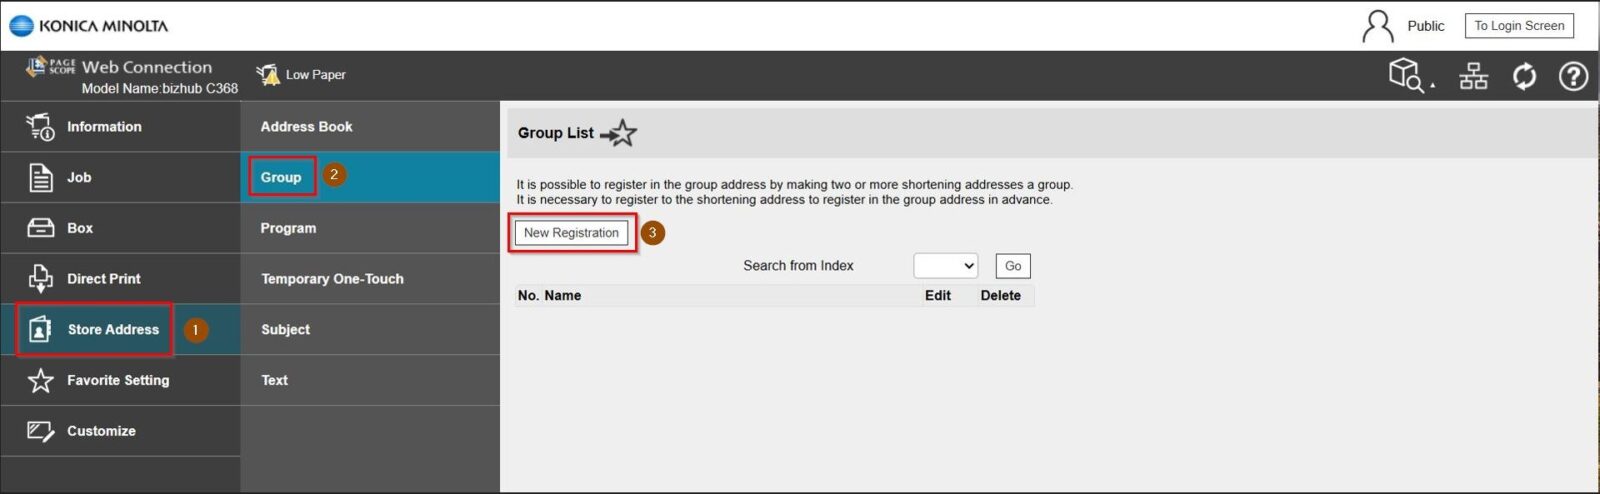
STEP 3 – Select [Store Address] – [Group] – [New Registration].
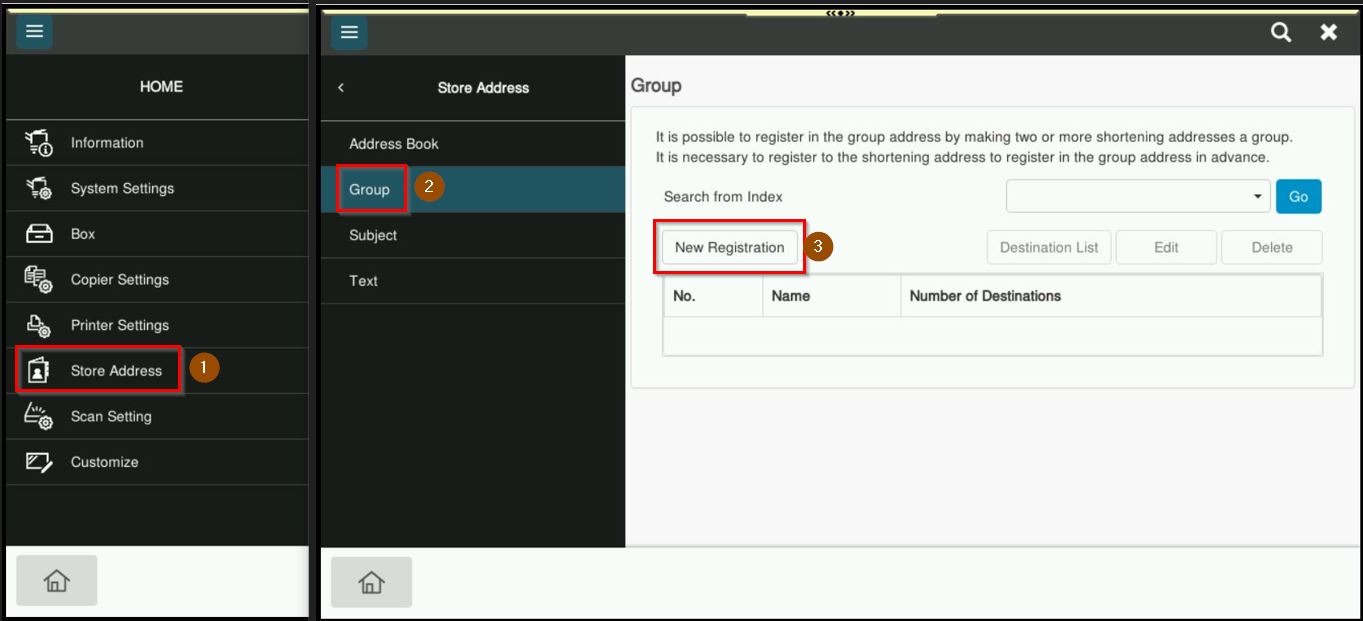
*Via Machine Screen Panel
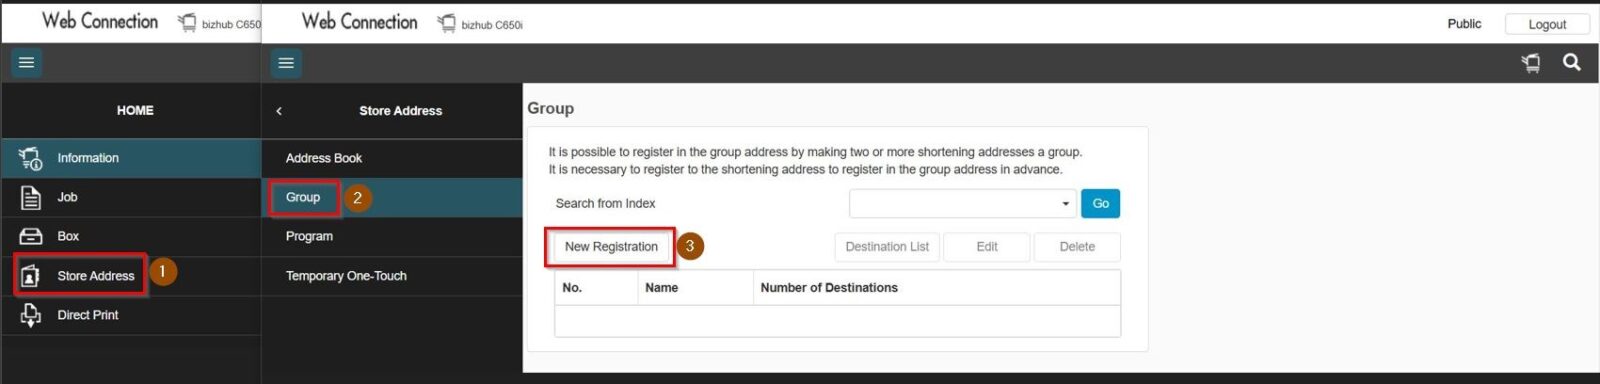
*Via Web Connection
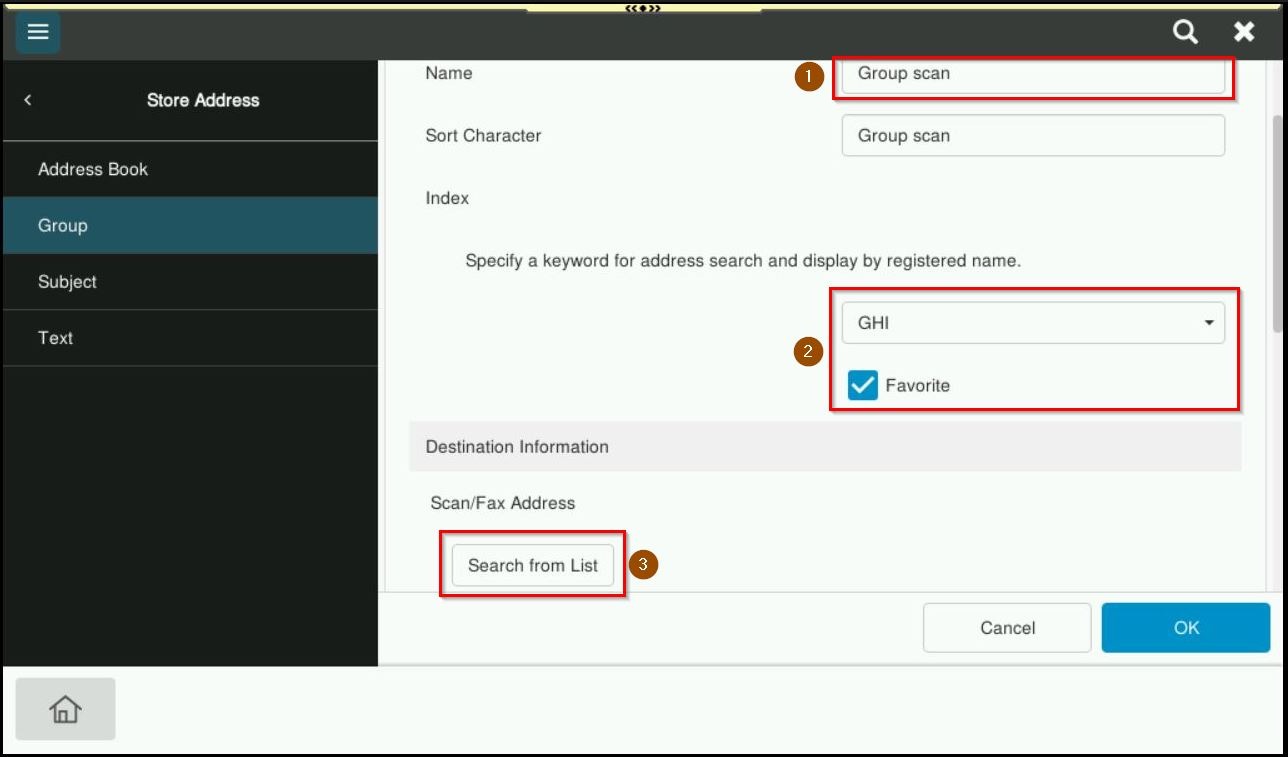
STEP 4 – Key in the information as per below.
- Name: Group Scan (Name that shown on machine later when scan)
- Index: First character that on the Name above, in this case will be GHI.
- Favorite: Tick to be shown under favorite tab
- Search from List: Choose the list that is under store address to be combined into group. In this case, we have selected 3 name on store address to be register under group scan.
*Via Machine Screen Panel
*Via Web Connection
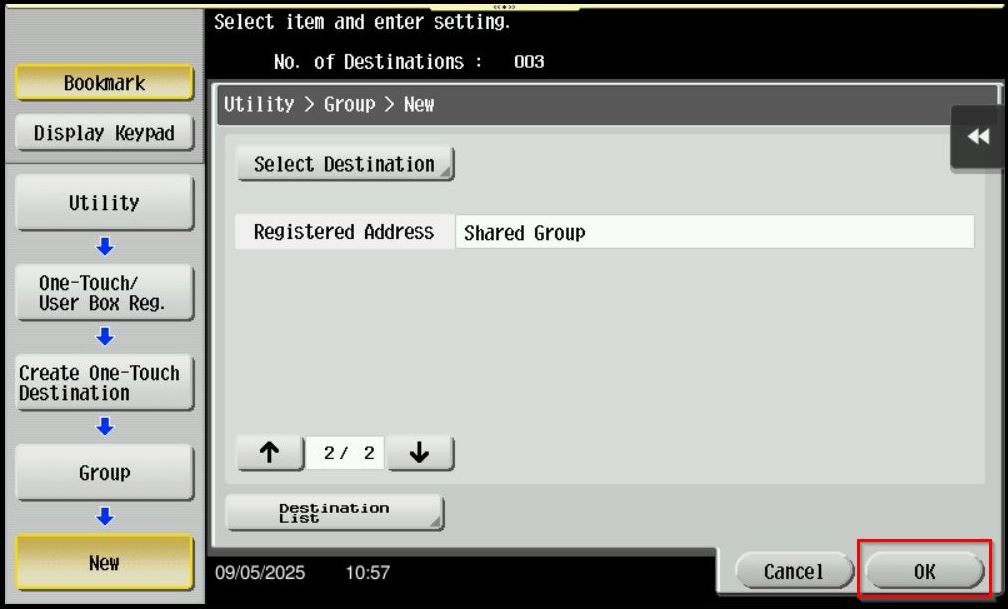
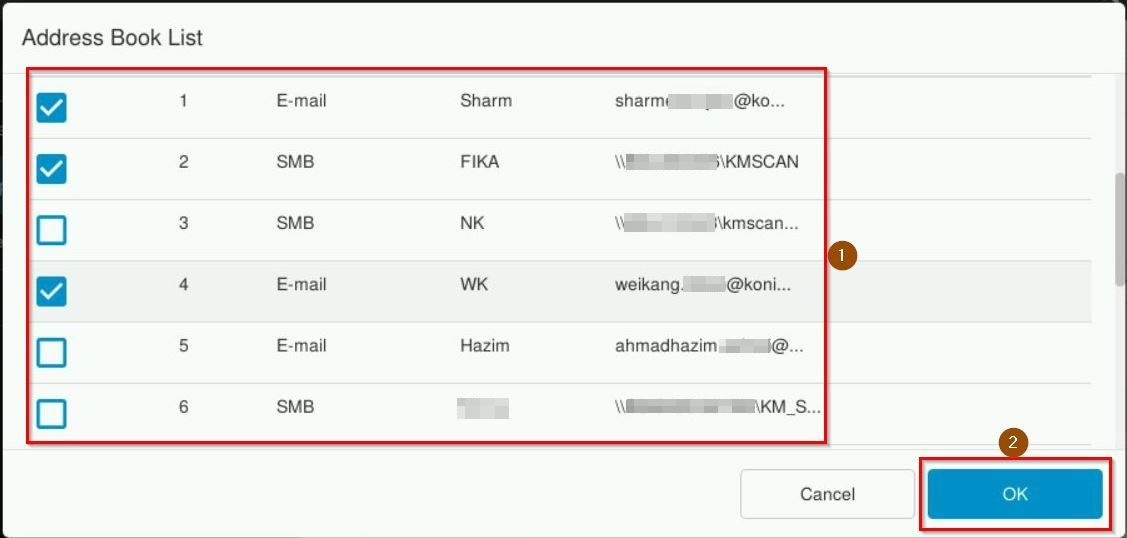
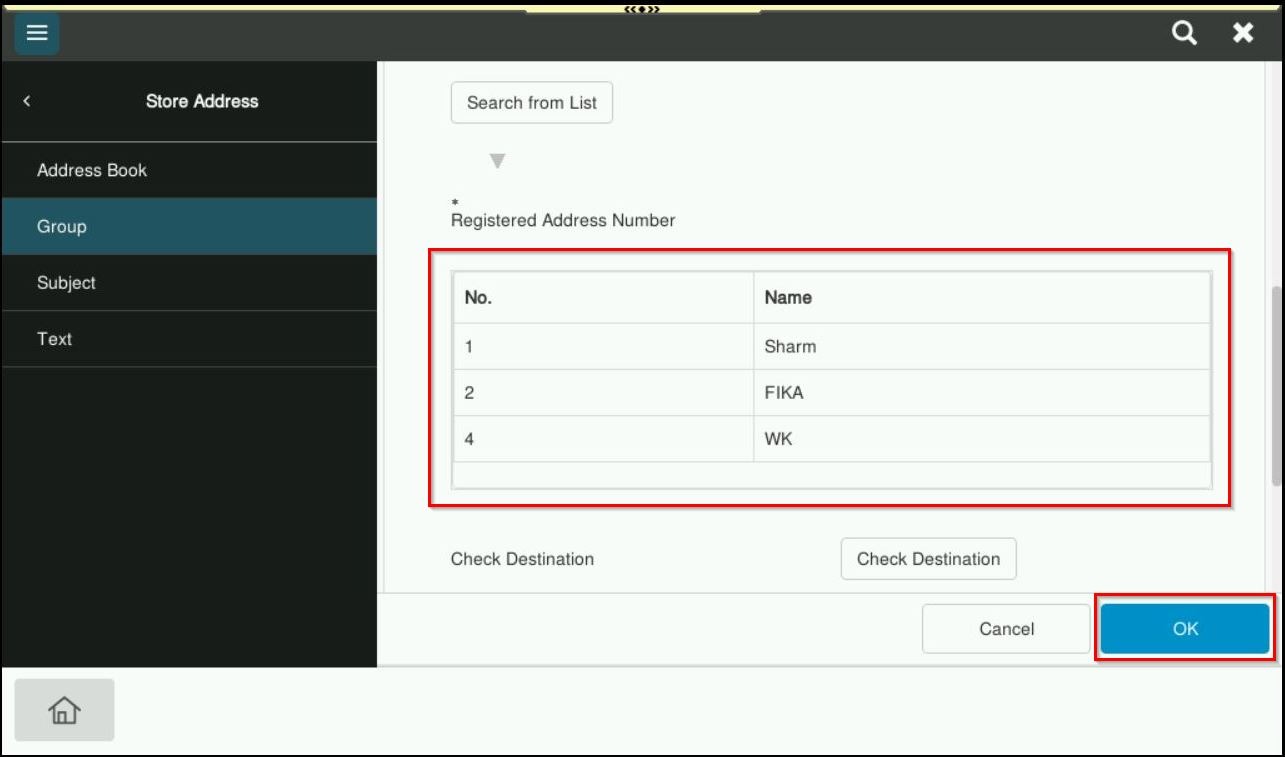
STEP 4 – Select the multiple destination from store address then click [OK] to save the list.
*Via Machine Screen Panel
*Via Web Connection
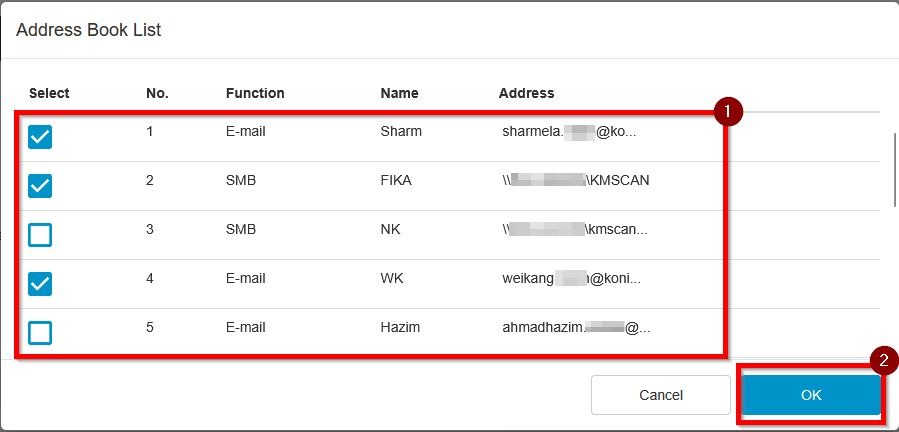
STEP 5 – The destination list will show the multiple destination that has been selected, proceed to click [OK] to finish the creation of group.
*Via Machine Screen Panel

*Via Web Connection
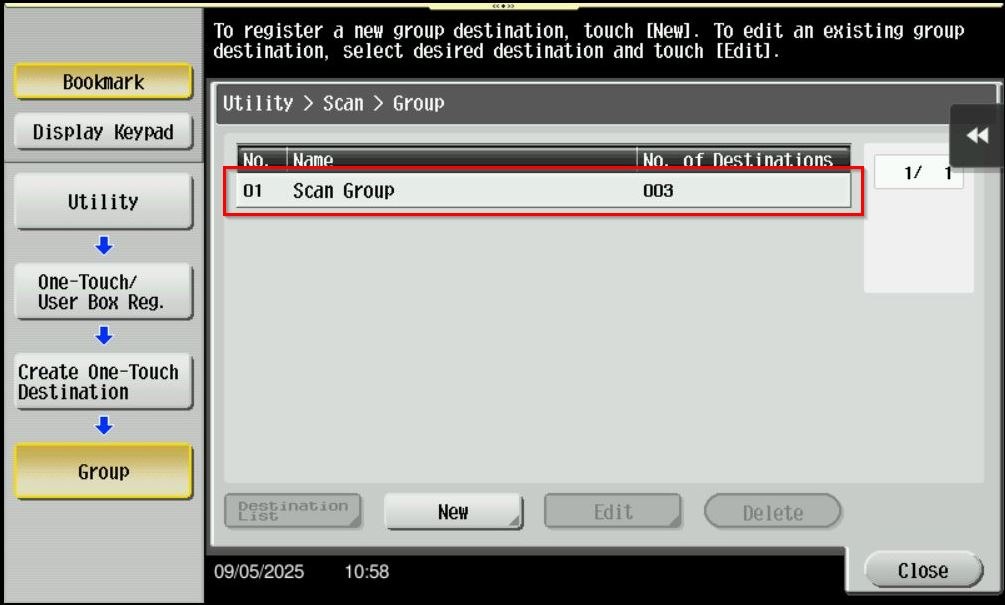
STEP 6 – The name Group Scan will be created, and it contain of 3 name which is Sharm(E-mail), Fika(SMB) & WeiKang(E-mail). It can be check further which destination has been register under this group by selecting the [Edit] – [Check Destination].

*Via Machine Screen Panel
*Via Web Connection