Guide on add a Stored Scan Destination Shortcut to the Main Panel
For the Older Machine series / Non I-Series Machine
STEP 1 – On the Konica Minolta machine, we need to register the scan name on the program, Select [Scan].
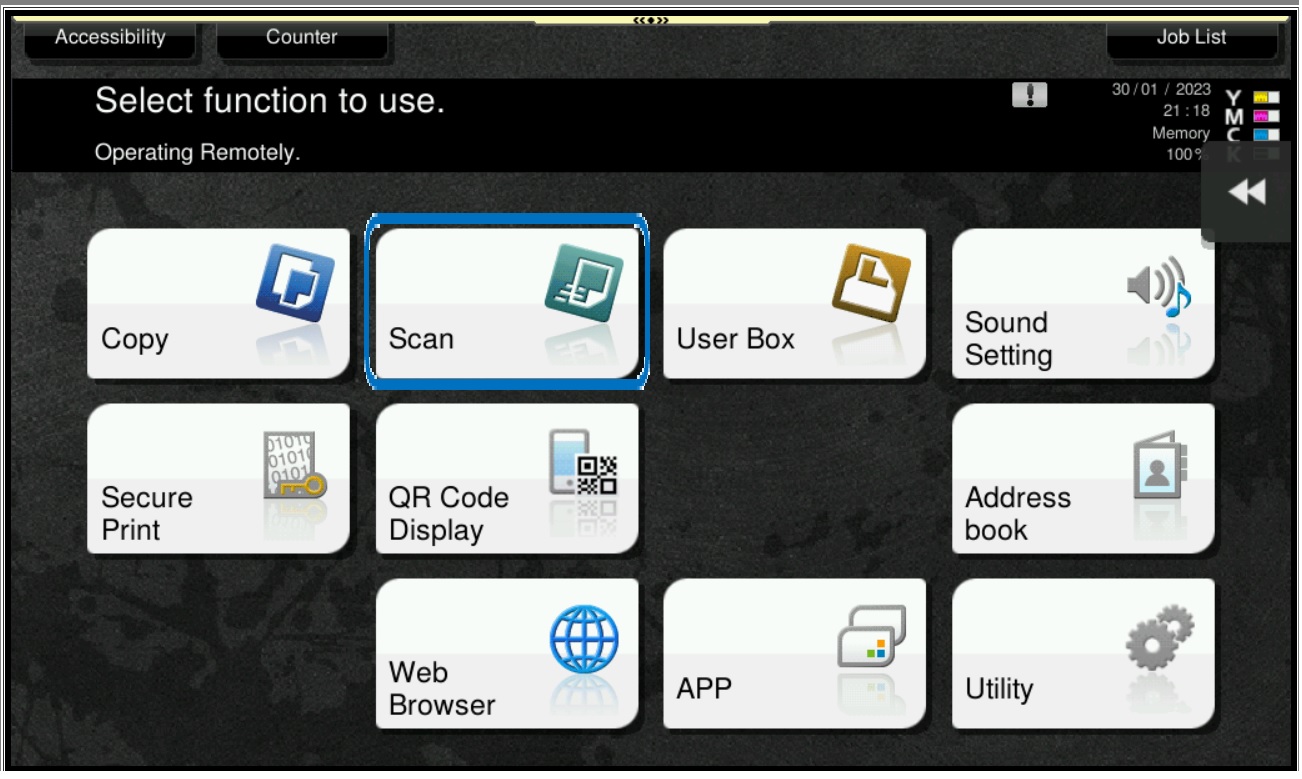
STEP 2 – Go to [Program], and click on [Not Registered], and select [Register].
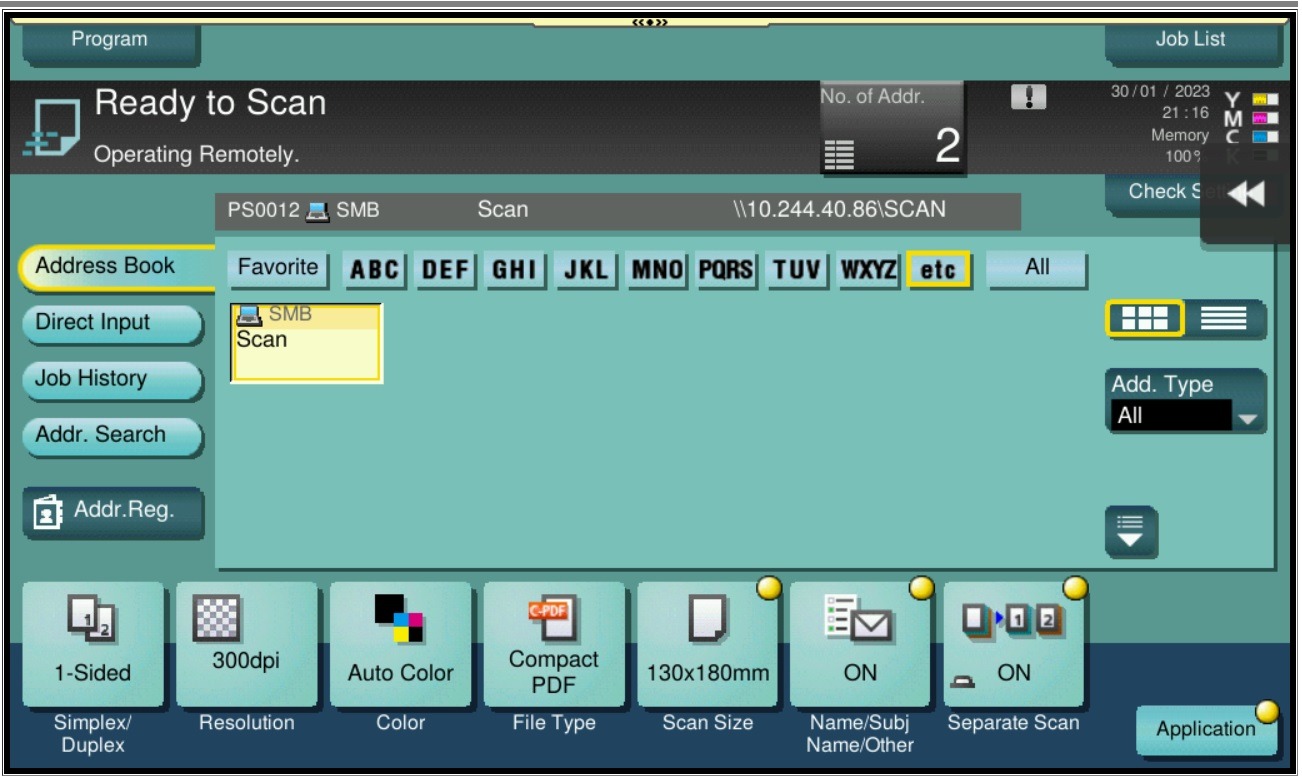
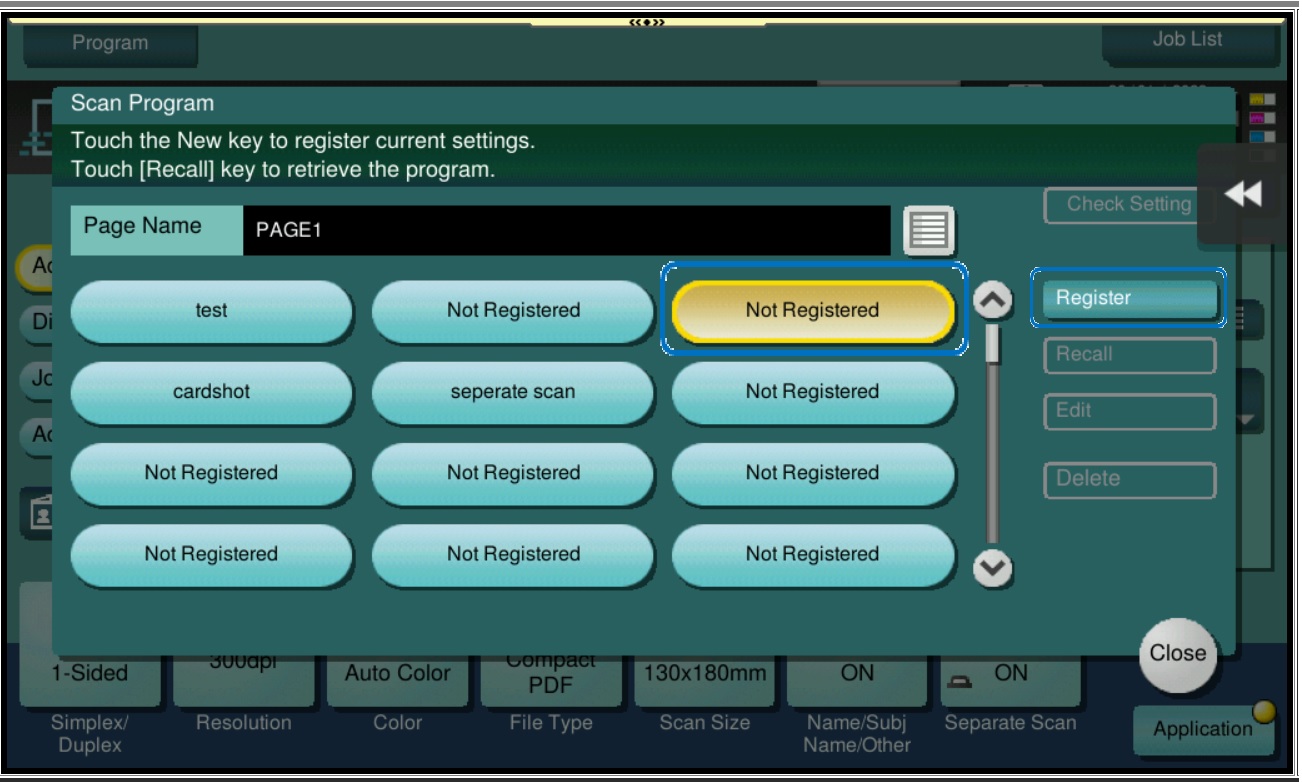
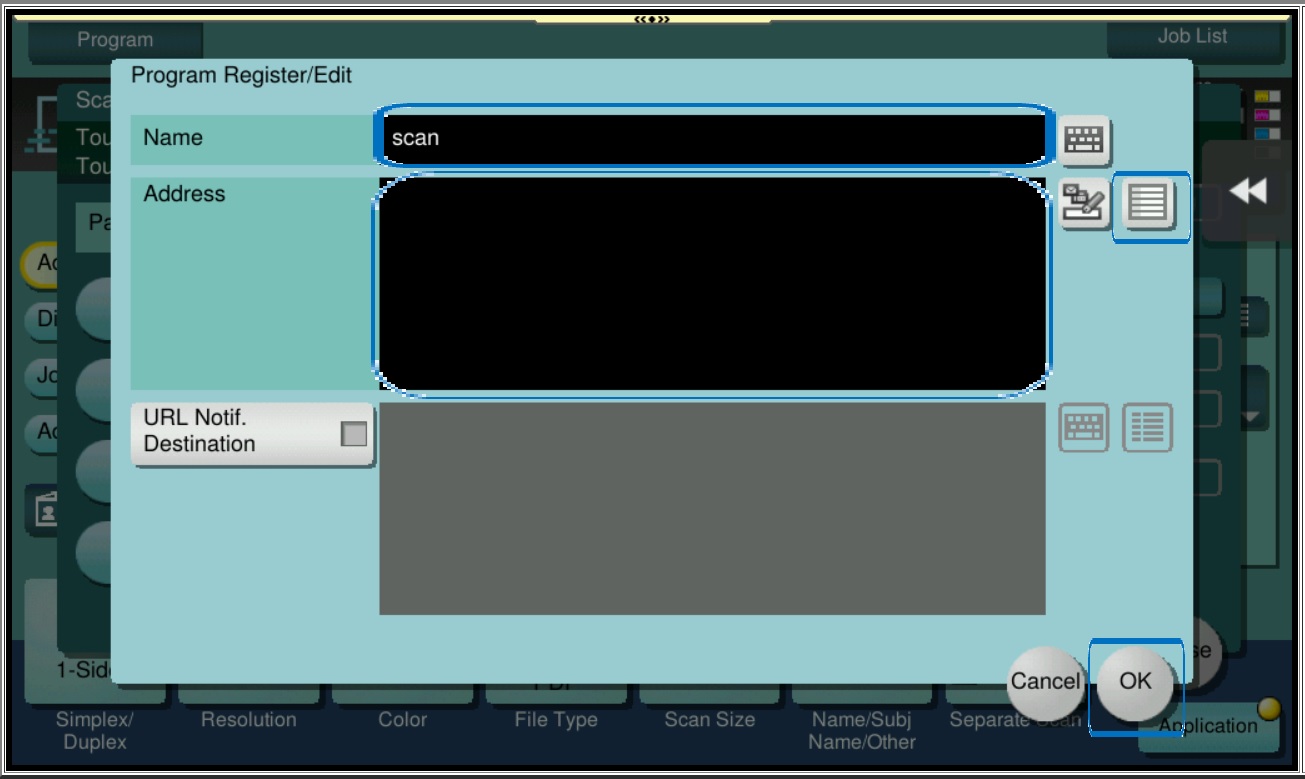
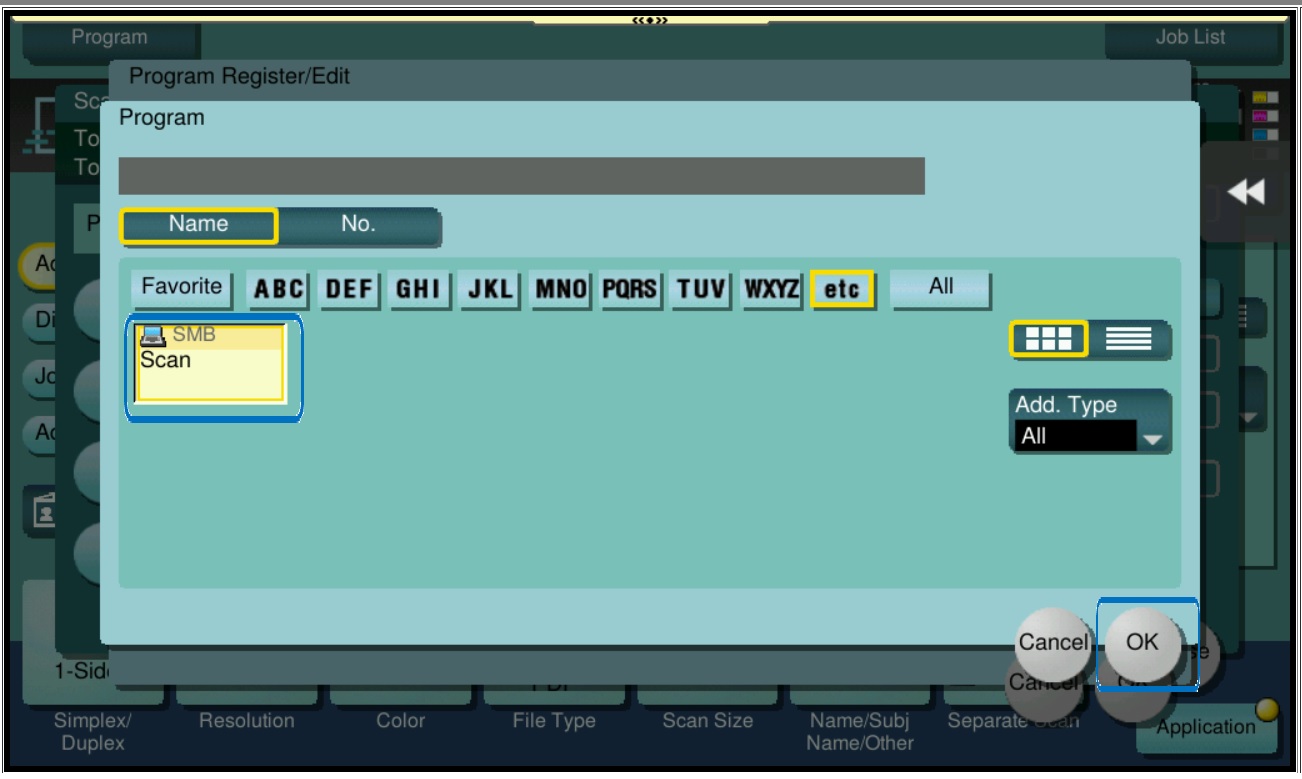
STEP 3 – Key in the Name, and select the Scan Address by click on drop down list, and select OK to [Register].
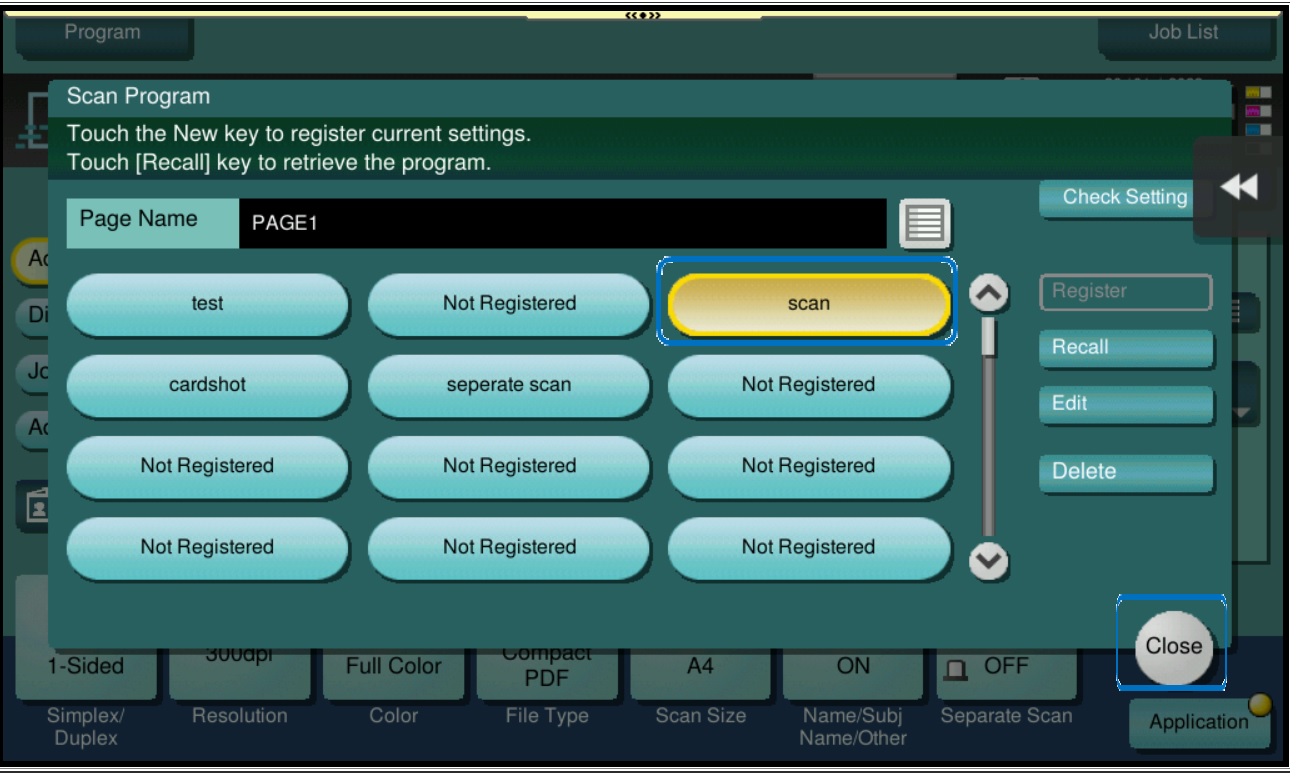
STEP 4 – Once registered the name will appear on Scan Program, and select [Close], then we proceed to add this Scan Program on the main screen.
STEP 5 – On the Konica Minolta machine, click on [Menu] button, Select [Utility] from Control Panel.
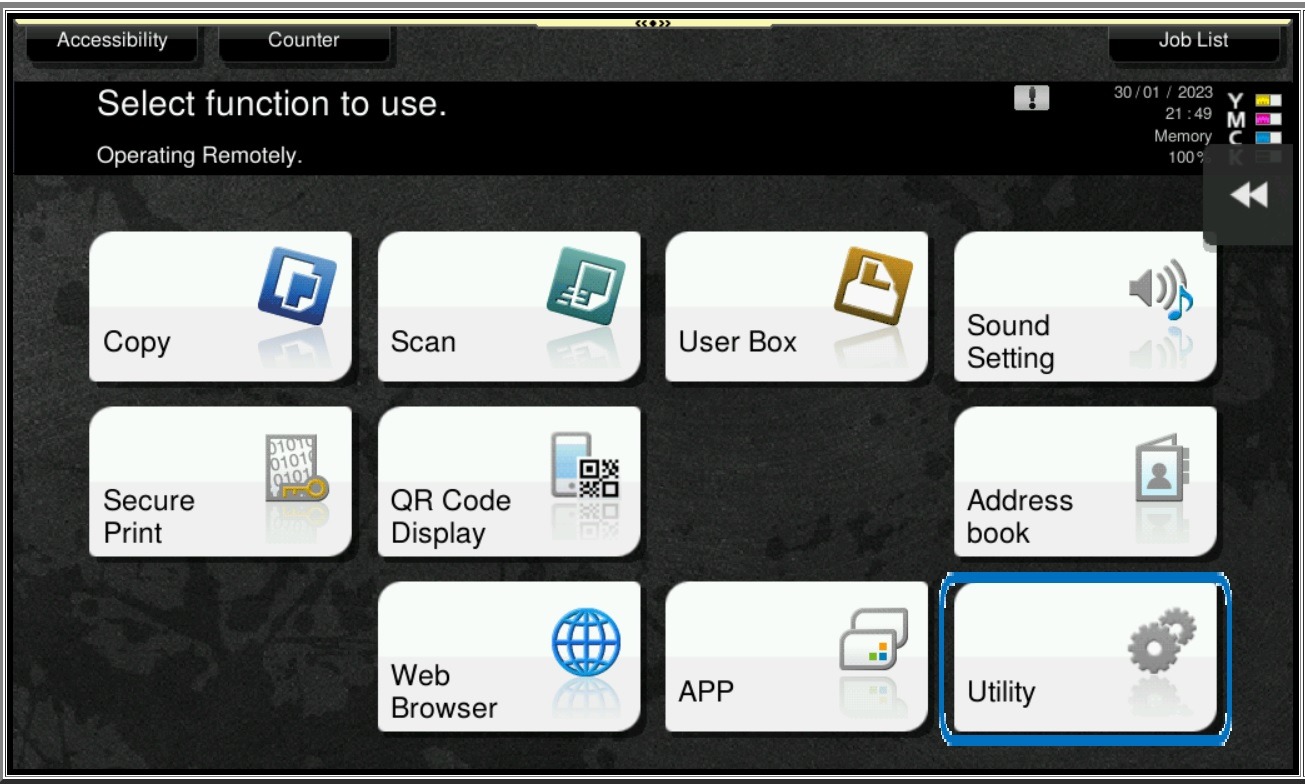
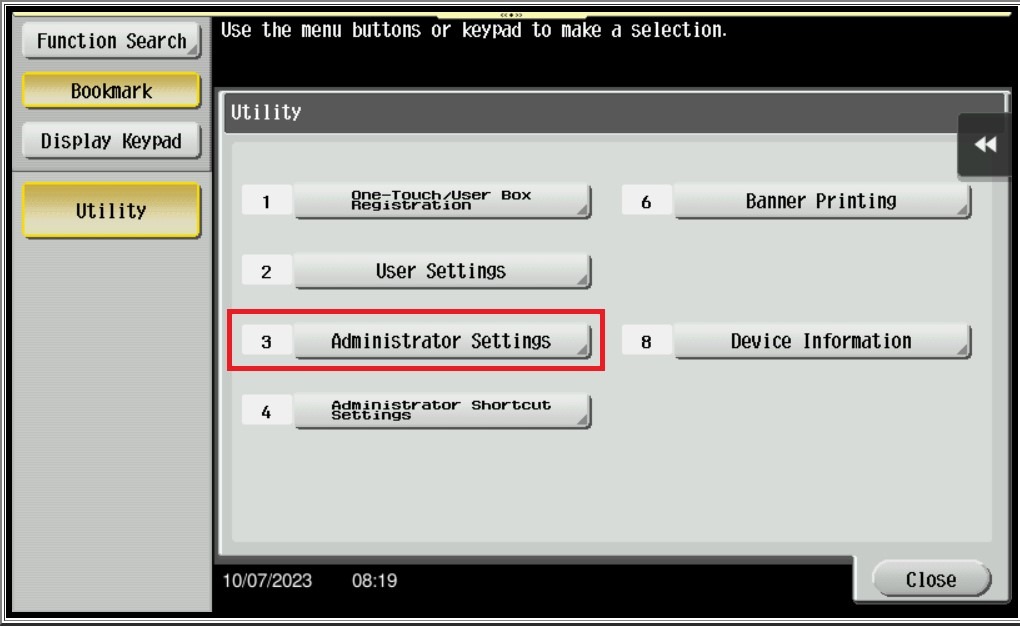
STEP 6 – Select [Administrator Settings], and key in the Administrator password accordingly.
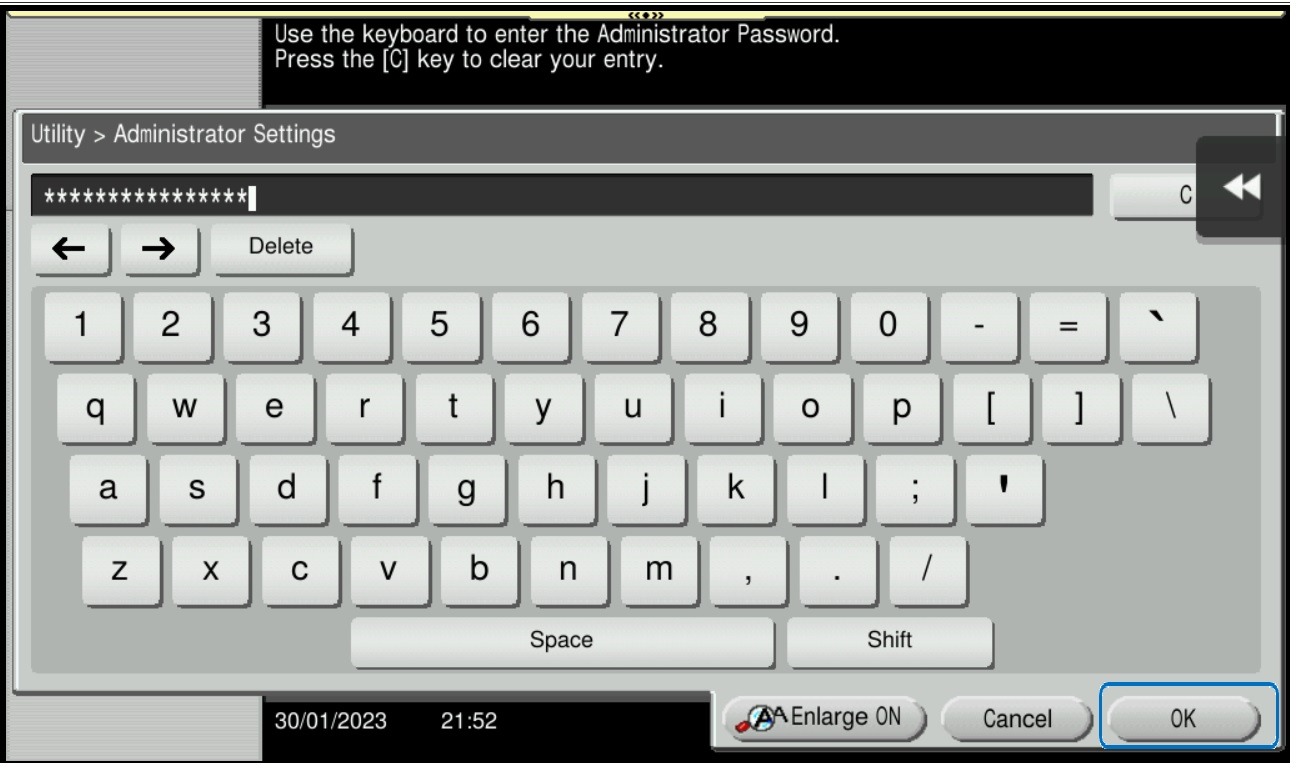
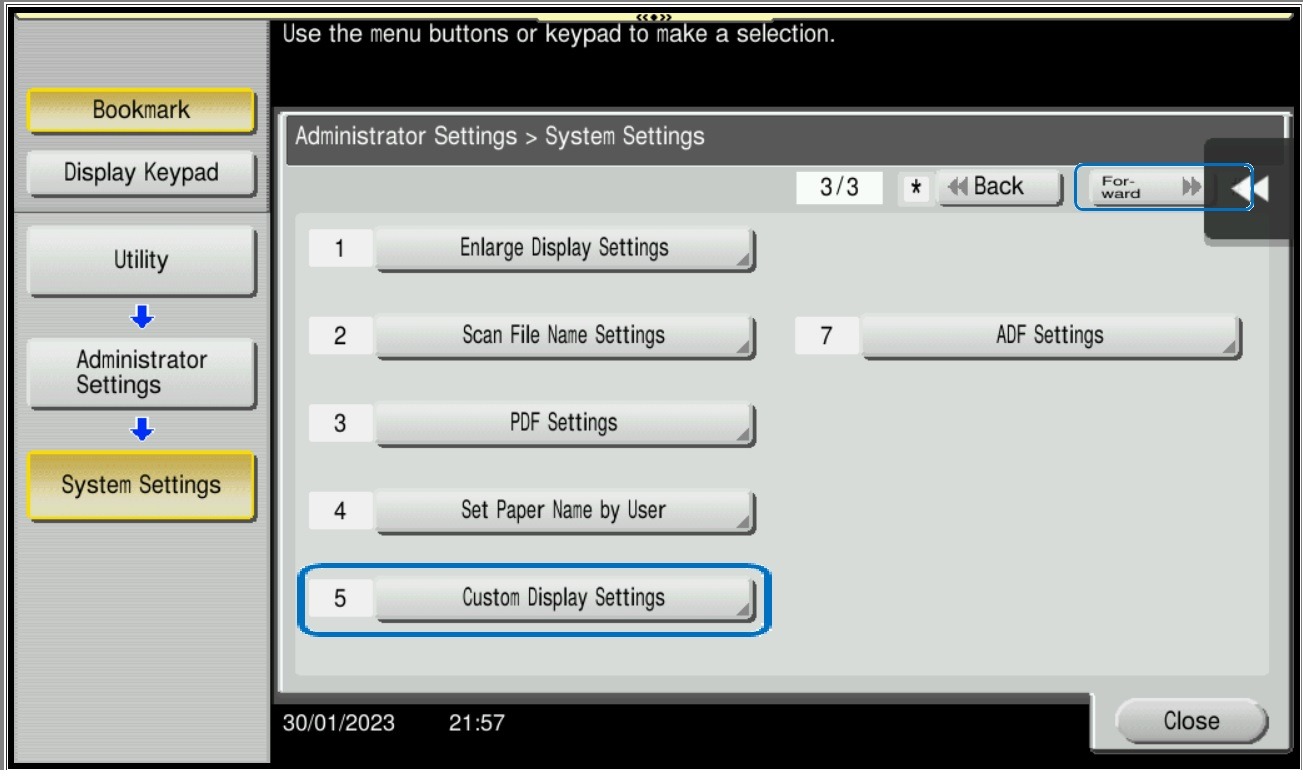
STEP 7 – Go to [System Settings].

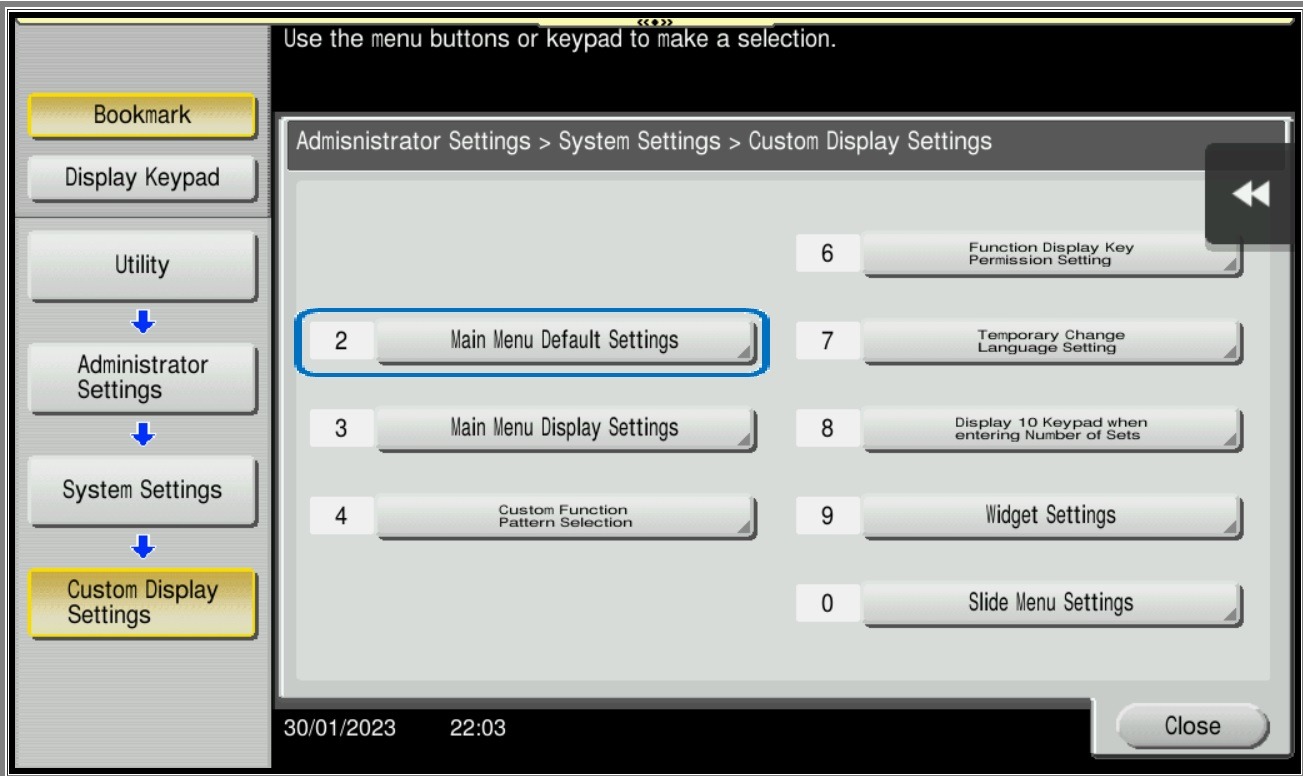
STEP 8 – Select [Custom Display Settings].
STEP 9 – Select [Main Menu Default Settings].
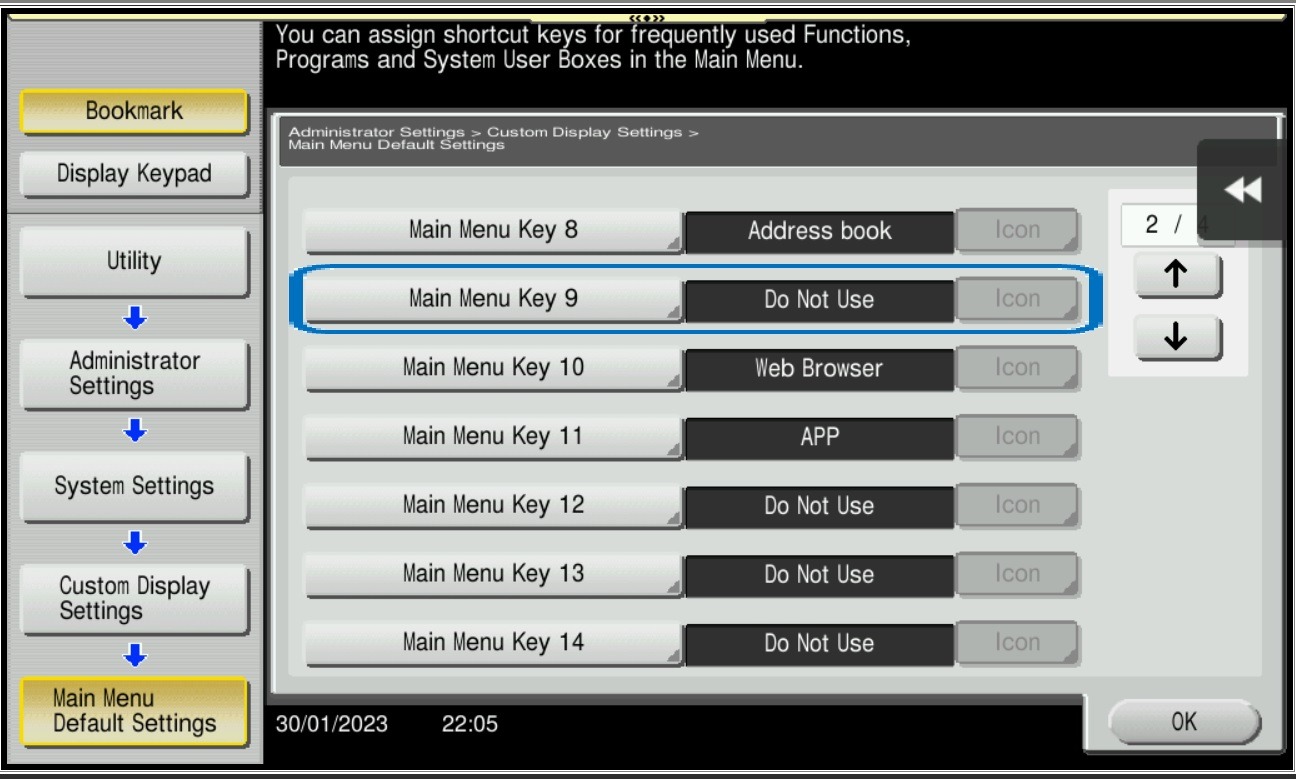
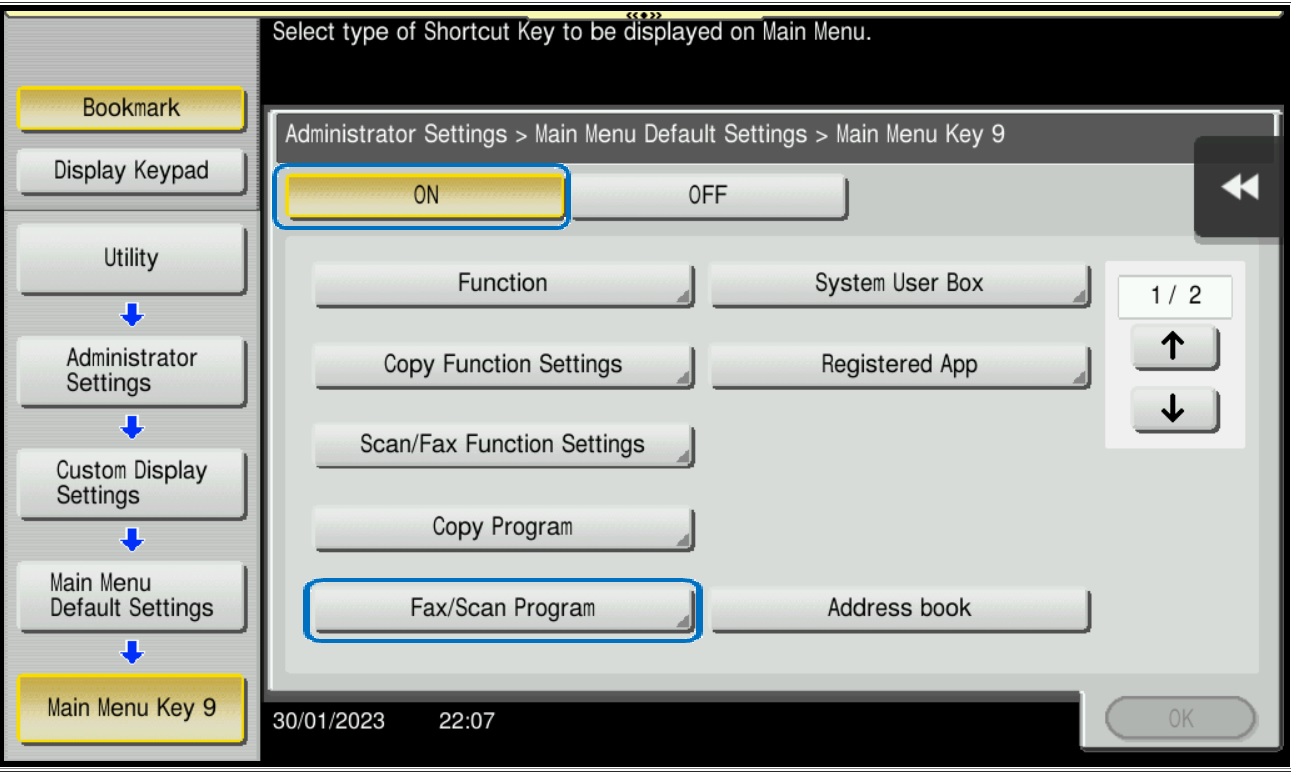
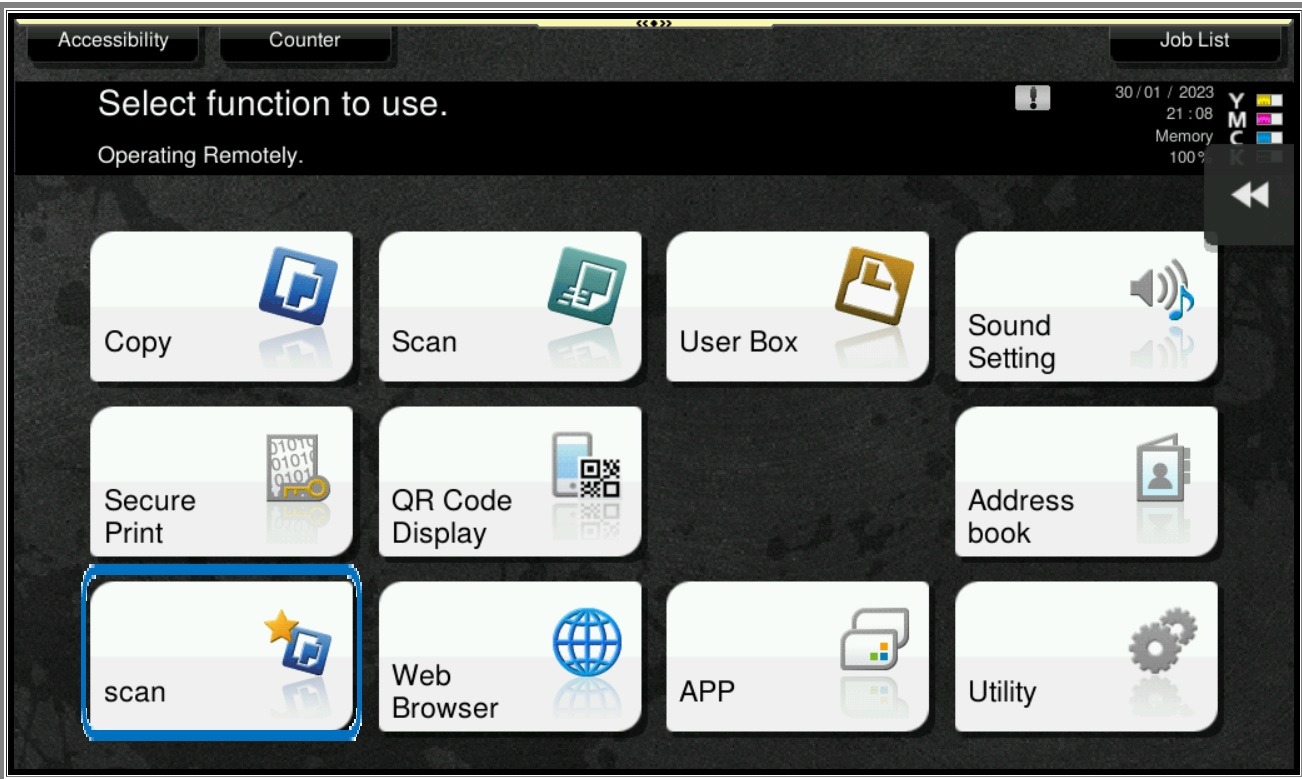
STEP 10 – Select those who are stated [Do Not Use] under any Main Menu Key and select On, click on [Fax/Scan Program].
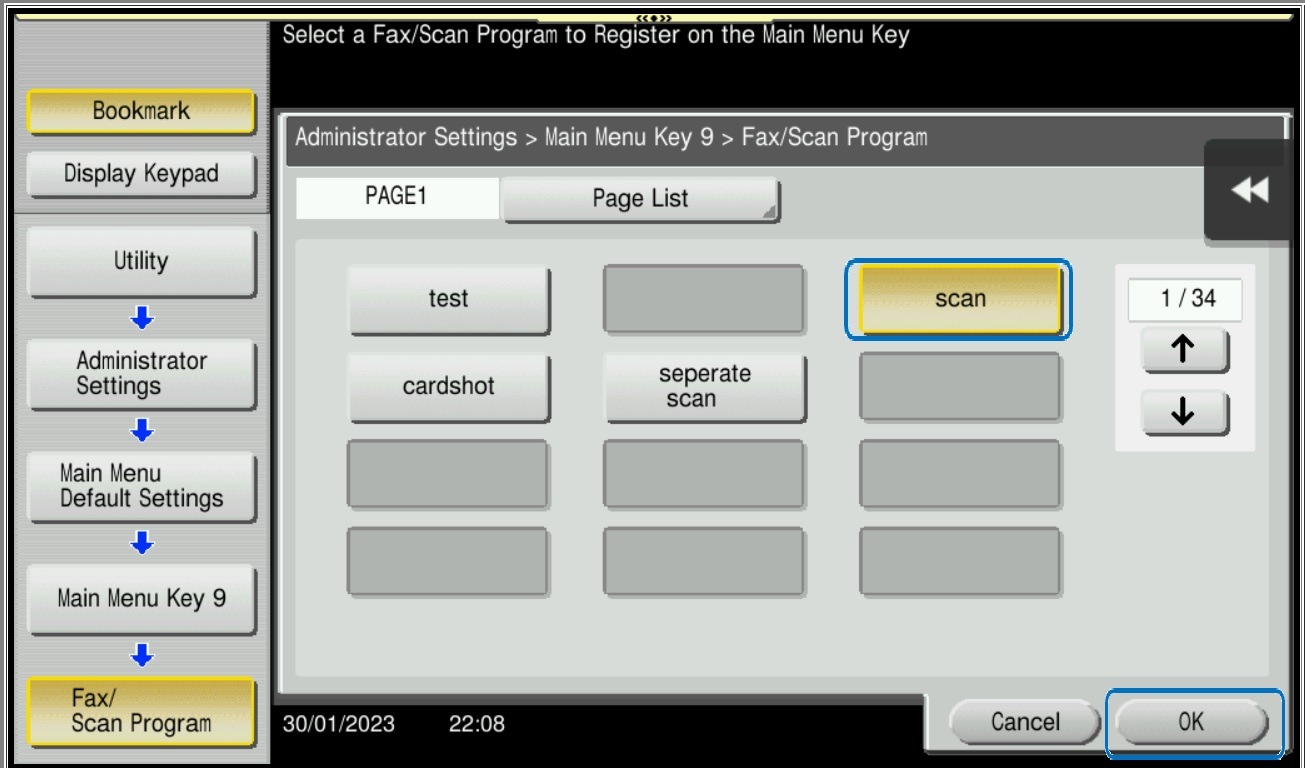
STEP 11 – Select the name that have been register just now, click [OK] to save the setting, the scan name will appear under the main screen, so it will be able to scan without need to go in to [Scan] name and select the name manually.
For the Newer Machine series / I-Series Machine
STEP 1 – On the Konica Minolta machine, we need to register the scan name on the program, Select [Scan].
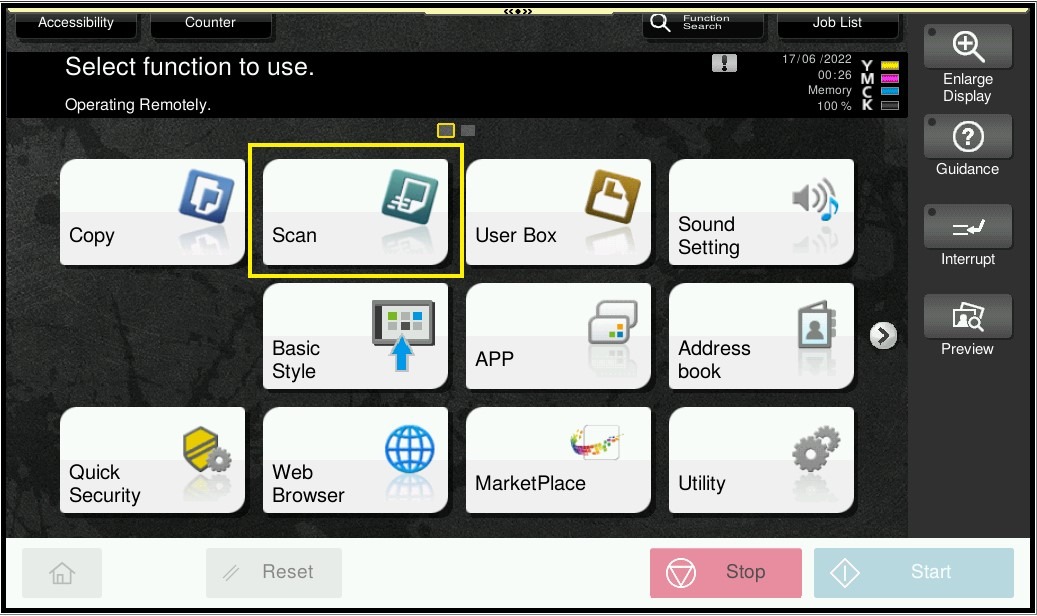
STEP 2 – Go to [Program], and click on [Not Registered], and select [Register].
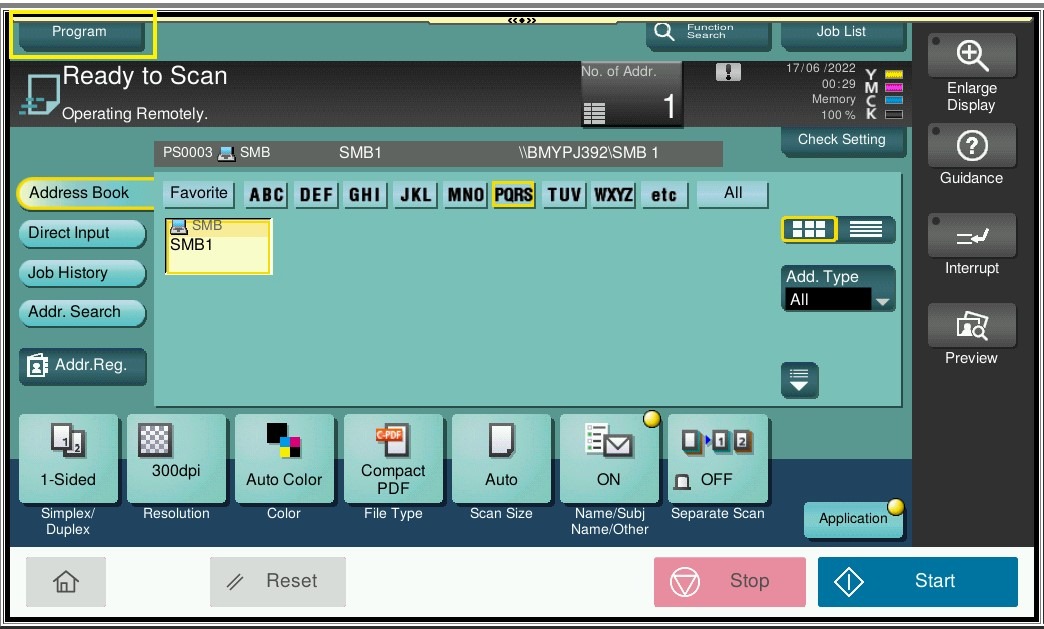

STEP 3 – Key in the Name, and select the Scan Address by click on drop down list, and select OK to [Register].

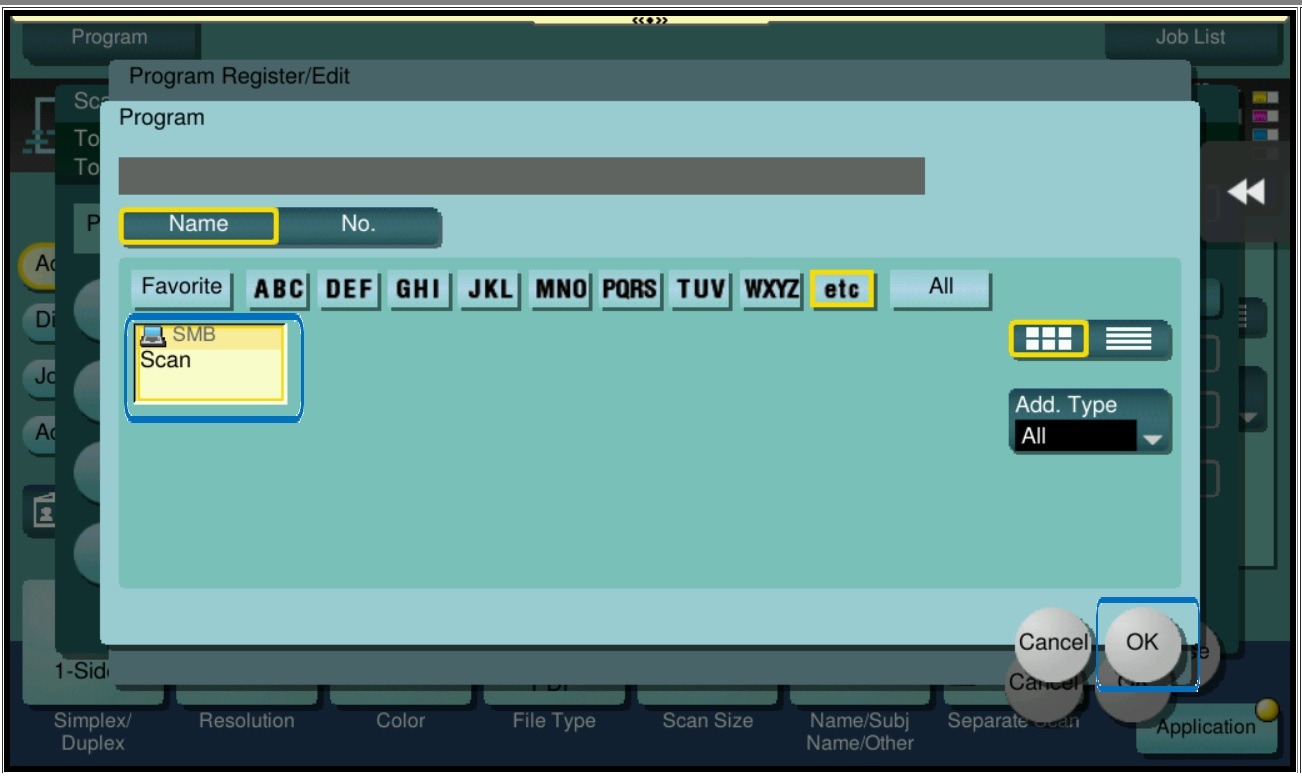
STEP 4 – Once registered the name will appear on Scan Program, and select [Close], then we proceed to add this Scan Program on the main screen.

STEP 5 – On the Konica Minolta machine, click on [Home] button, Select [Utility] from Control Panel.
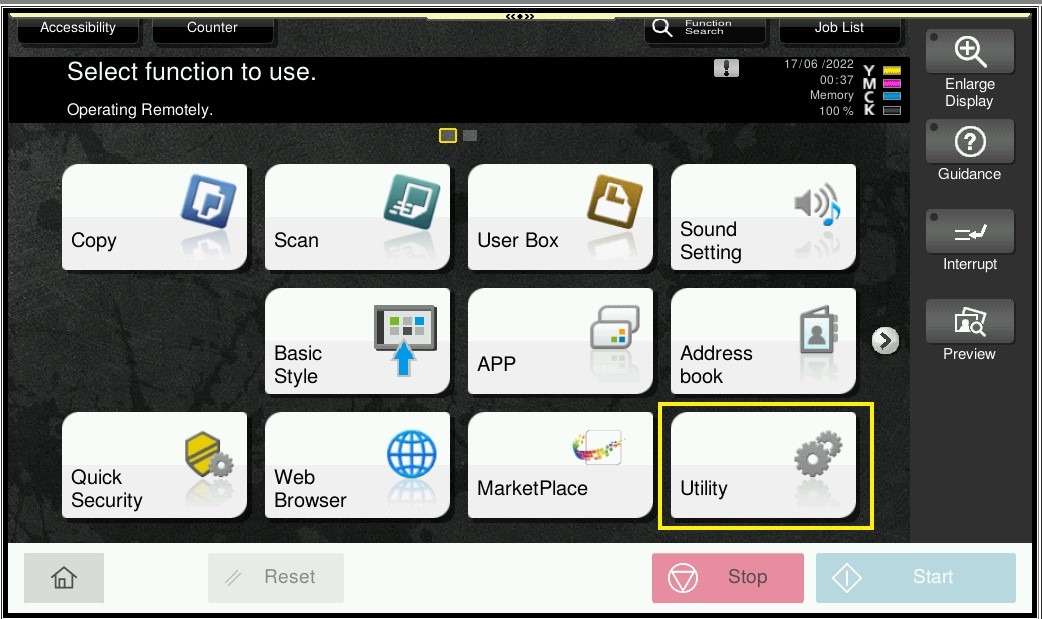
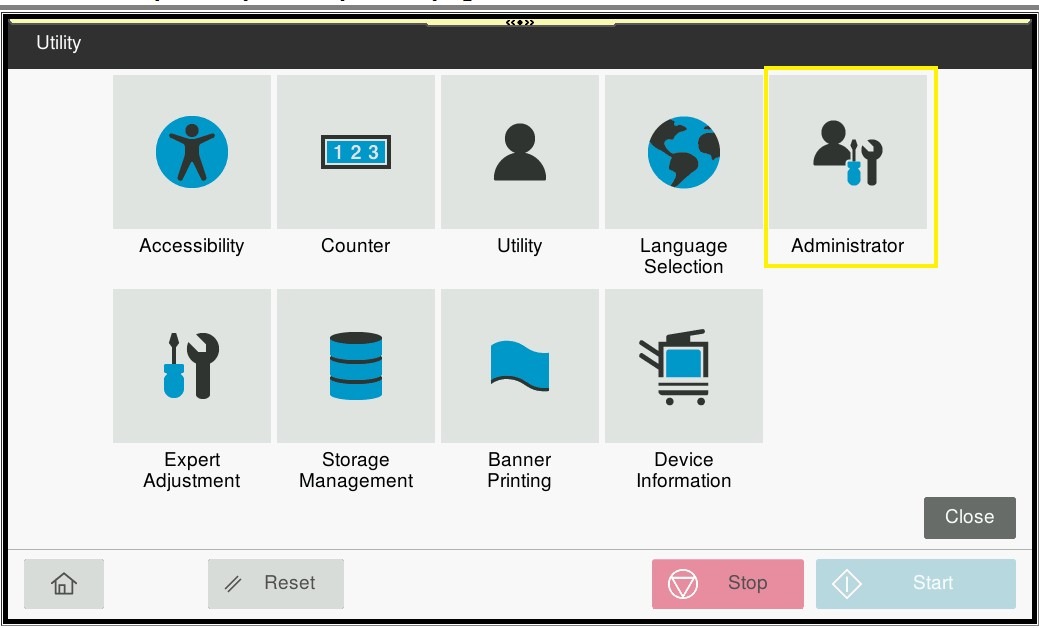
STEP 6 – Select [Administrator], and key in the Administrator password accordingly.
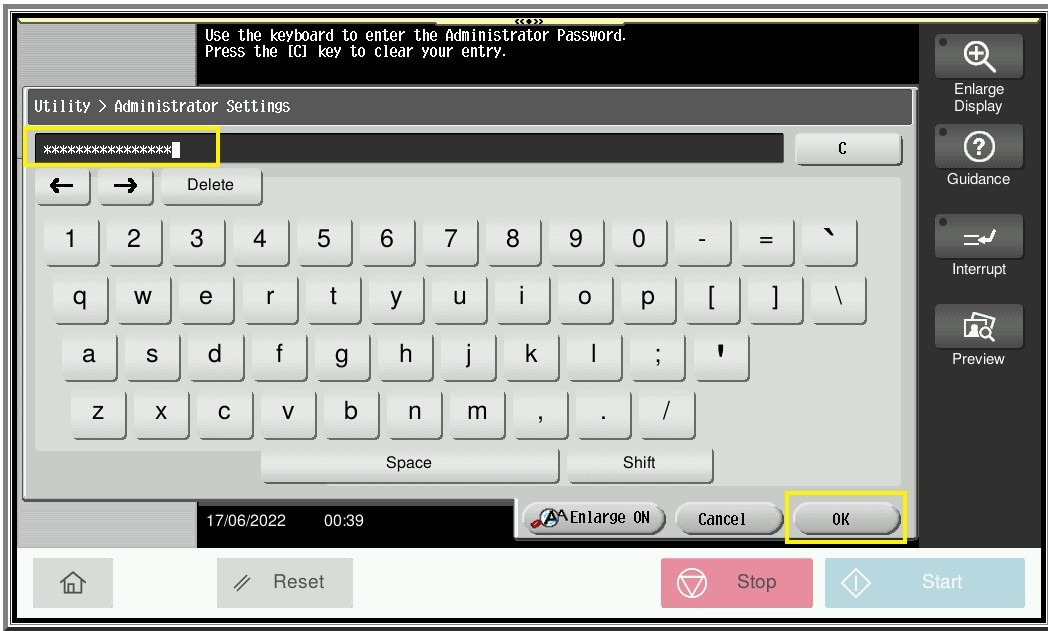
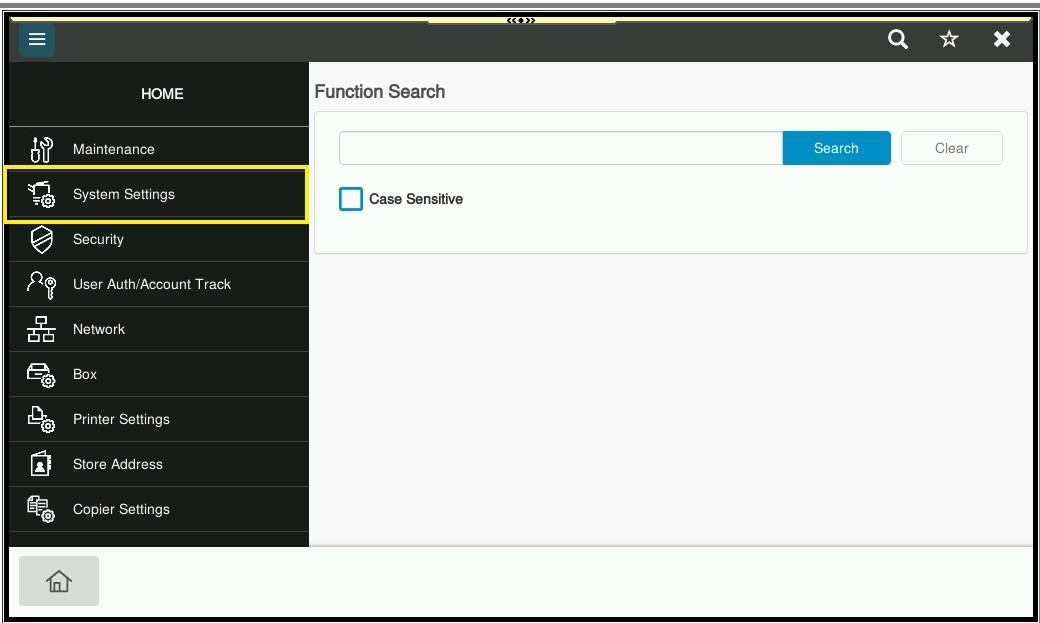
STEP 7 – Go to [System Settings].
STEP 8 – Select [Main Menu Default (Classic Style)], then select those who are stated [Not Set] under any Main Menu Key and select On, click on [Edit].
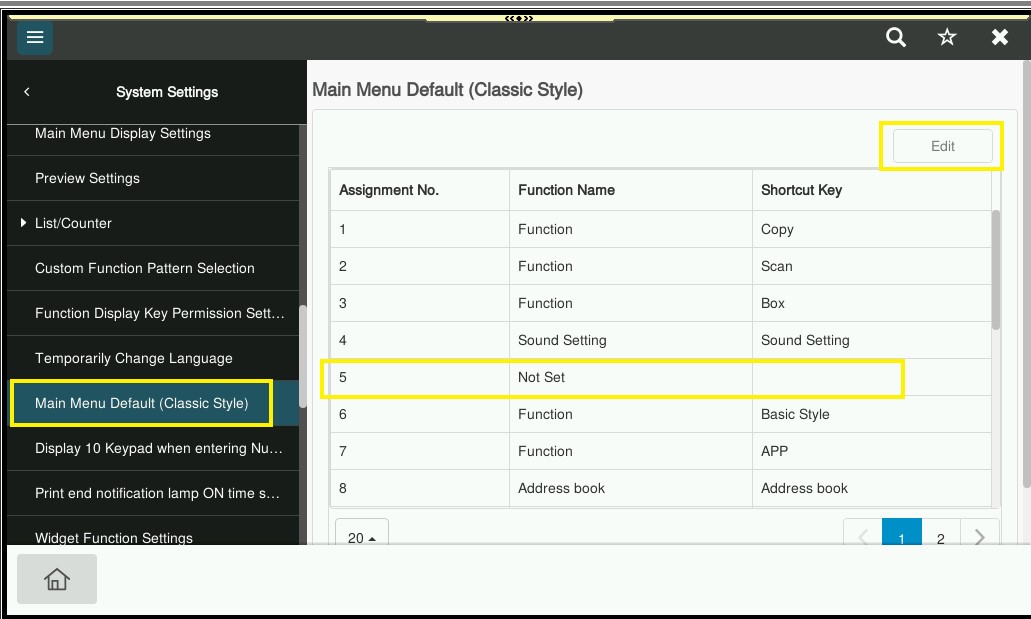
STEP 9 – Click [Not Set] under Function Name.
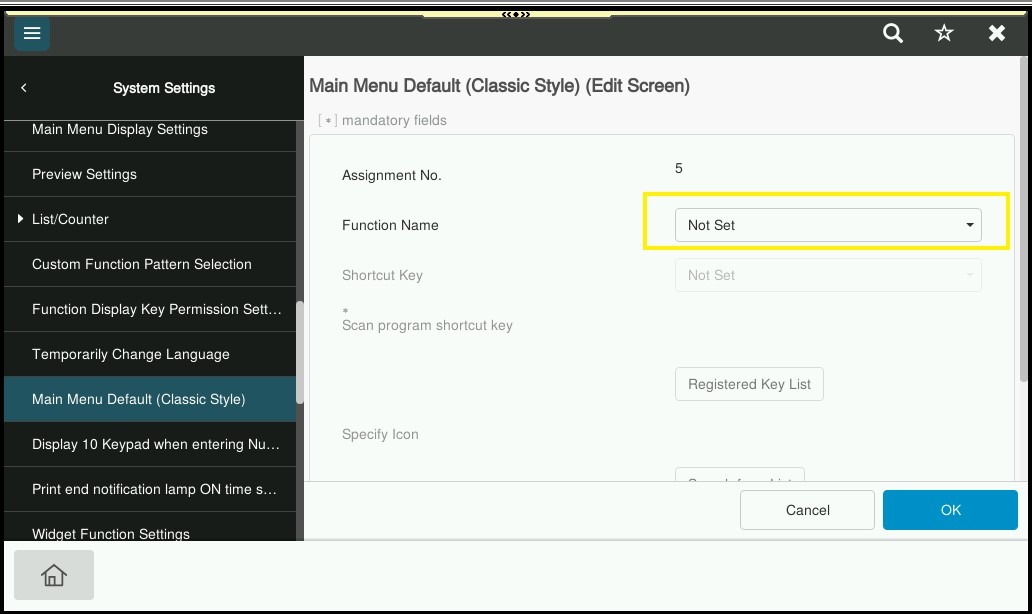
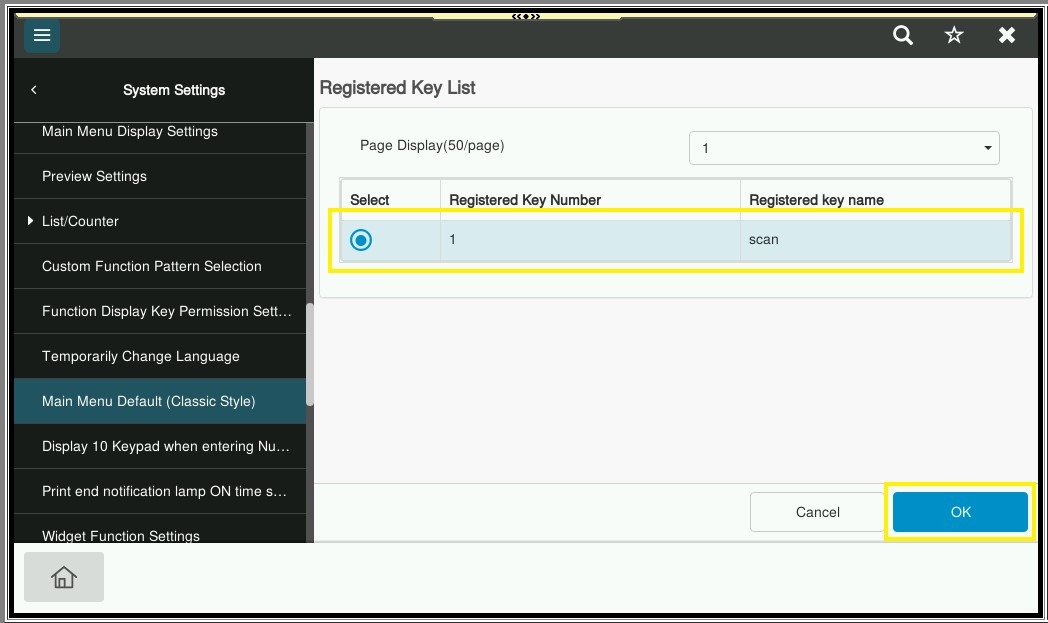
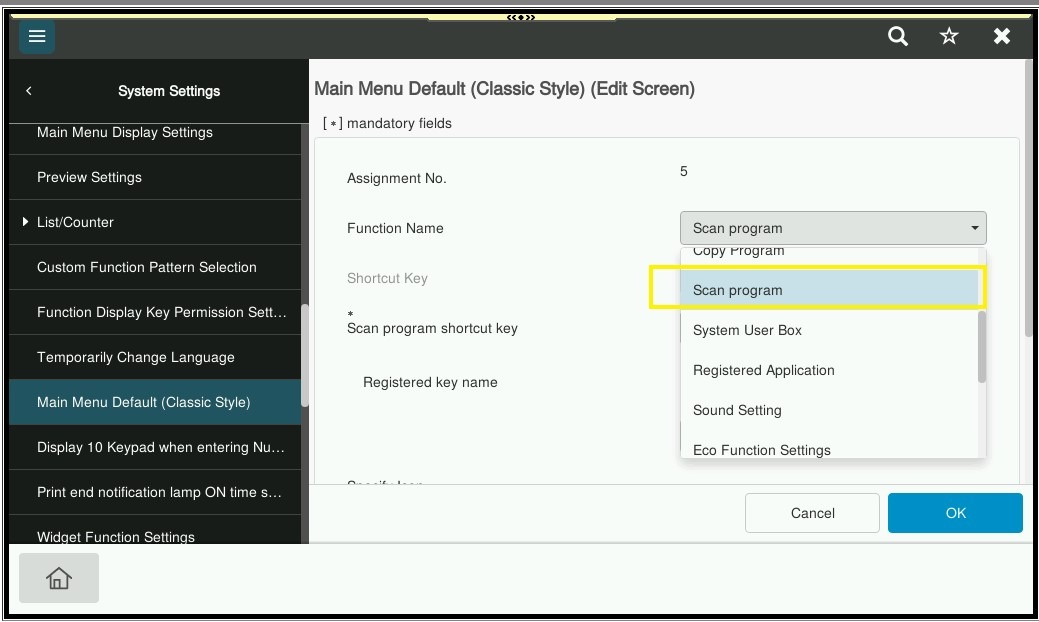
STEP 10 – Select [Scan Program] under Function Name, then click on [Registered Key List] to select the registered scan name.
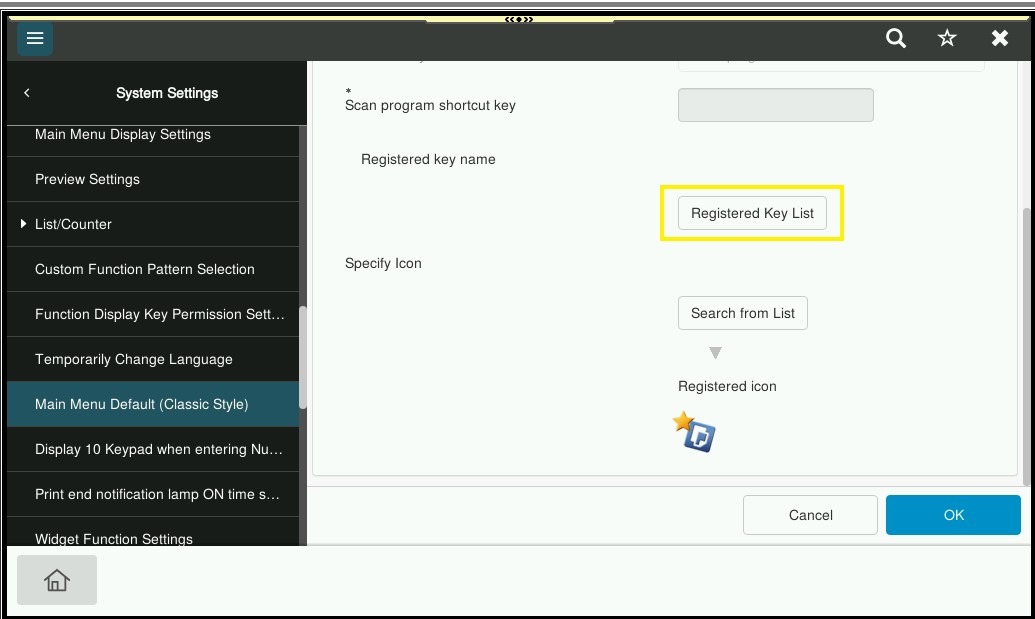
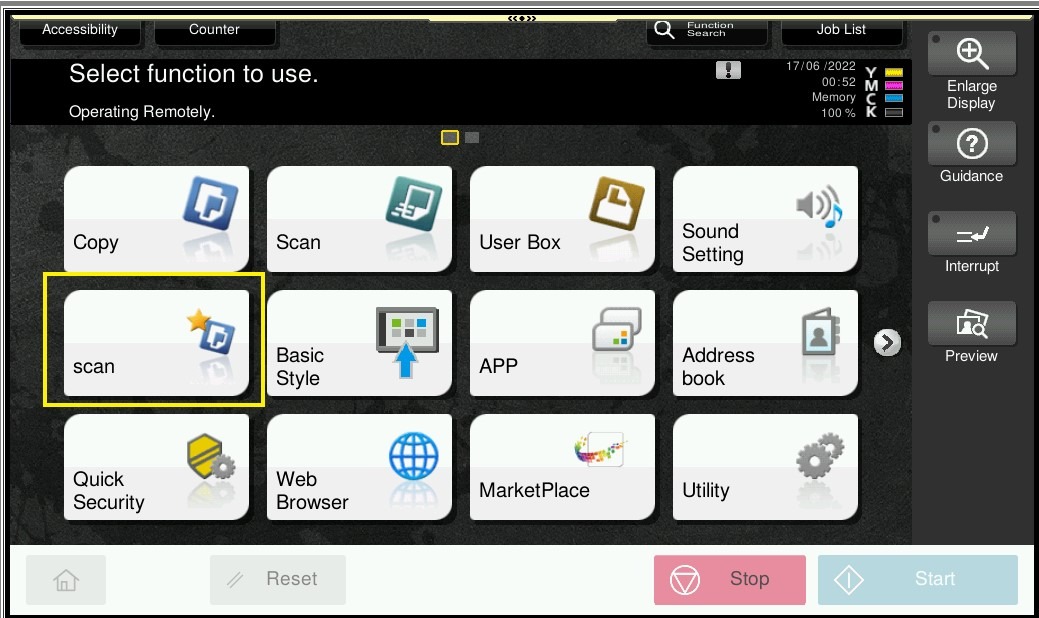
STEP 11 – Select the name that have been register just now, click [OK] twice to save the setting, the scan name will appear under the main screen, so it will be able to scan without need to go in to [Scan] name and select the name manually.