Guide on Adjust the Scan Density Setting on Printer
For the Older Machine series / Non I-Series Machine
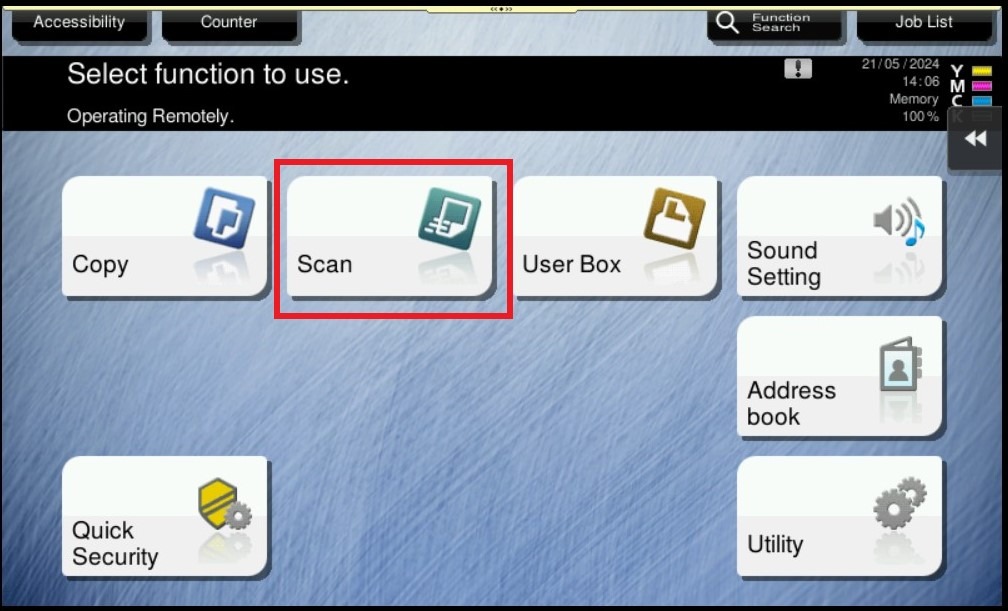
STEP 1 – On the Main Menu Screen, select [Scan] icon.
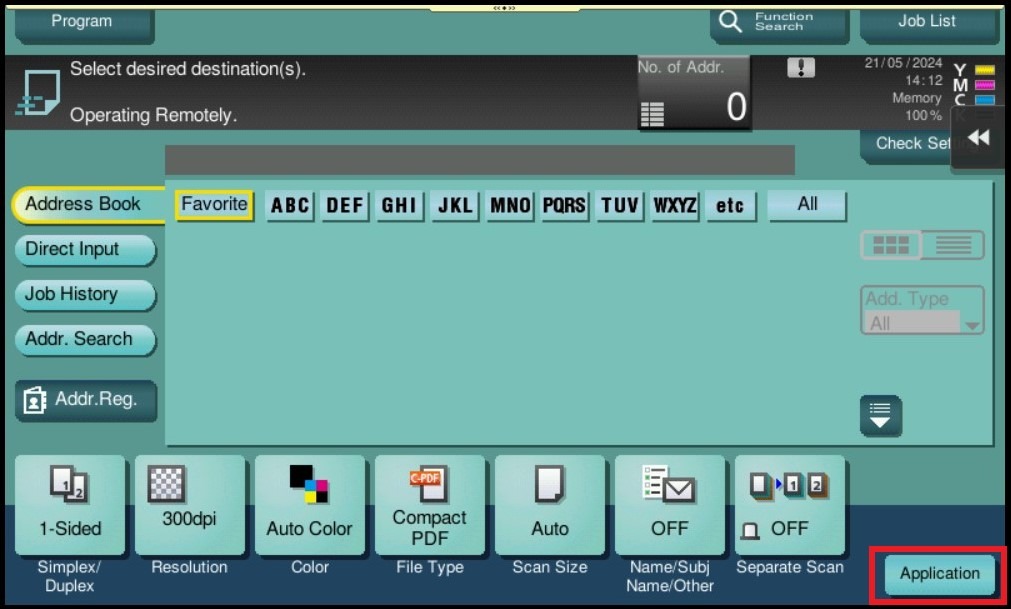
STEP 2 – Select [Application].
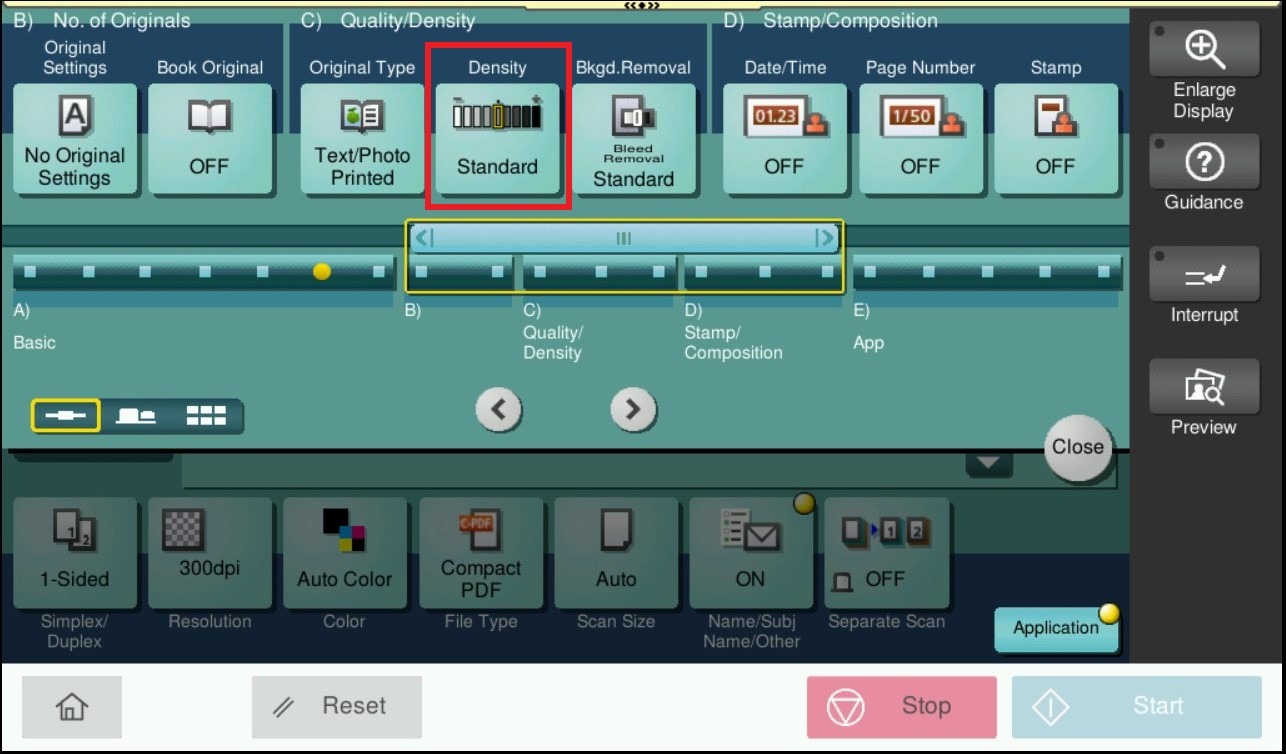
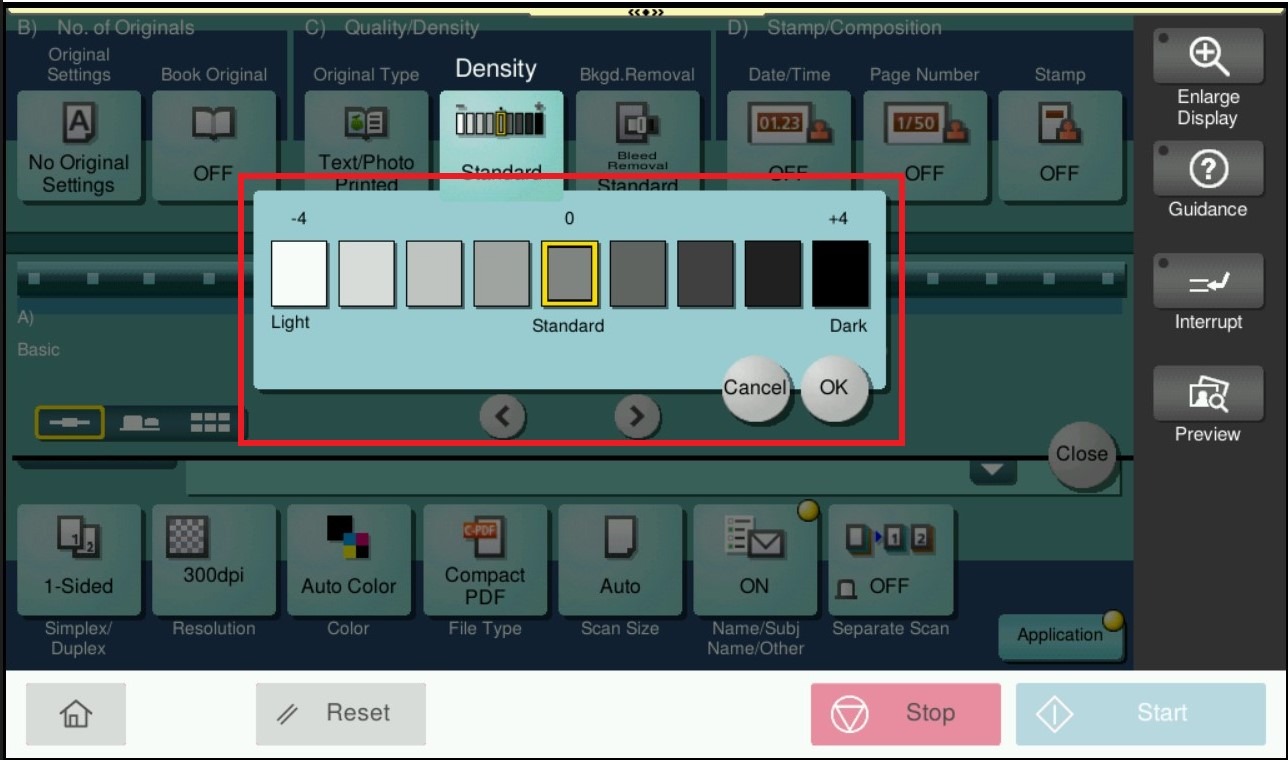
STEP 3 – Select the [Density] under [Quality/Density] Then Adjust the density according to the original.
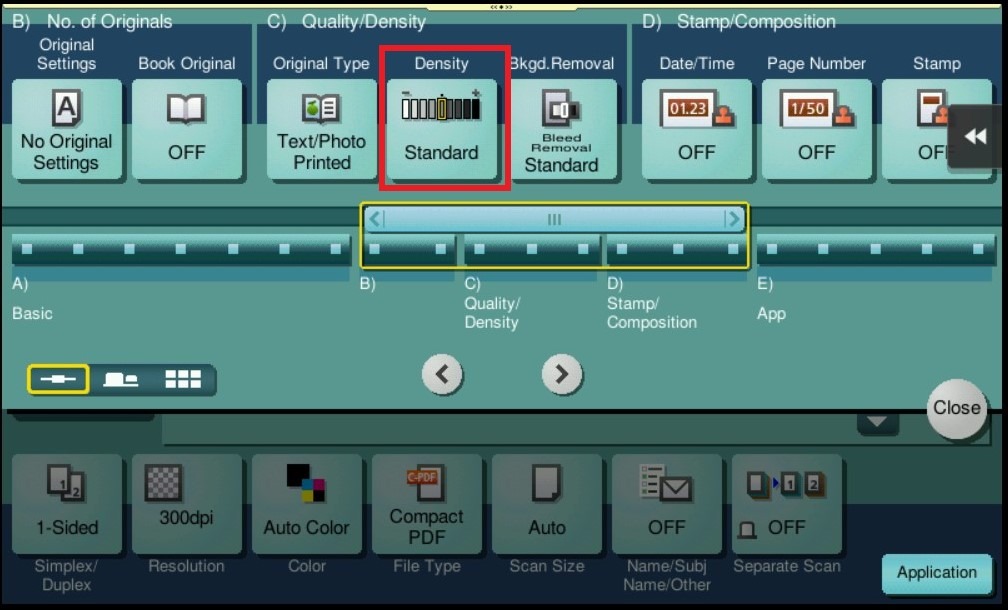
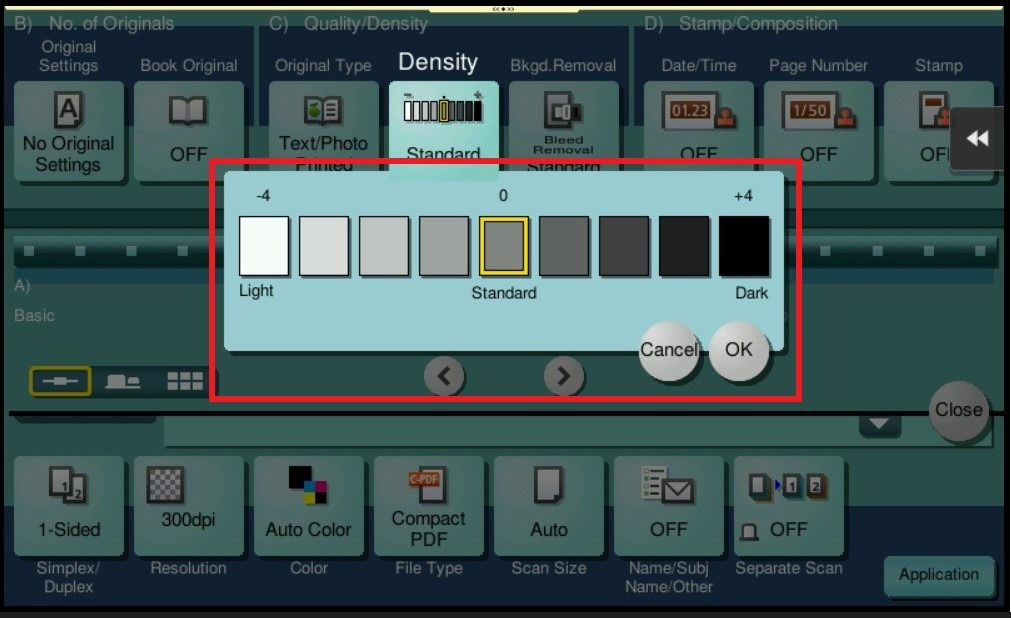
For the Newer Machine series / I-Series Machine
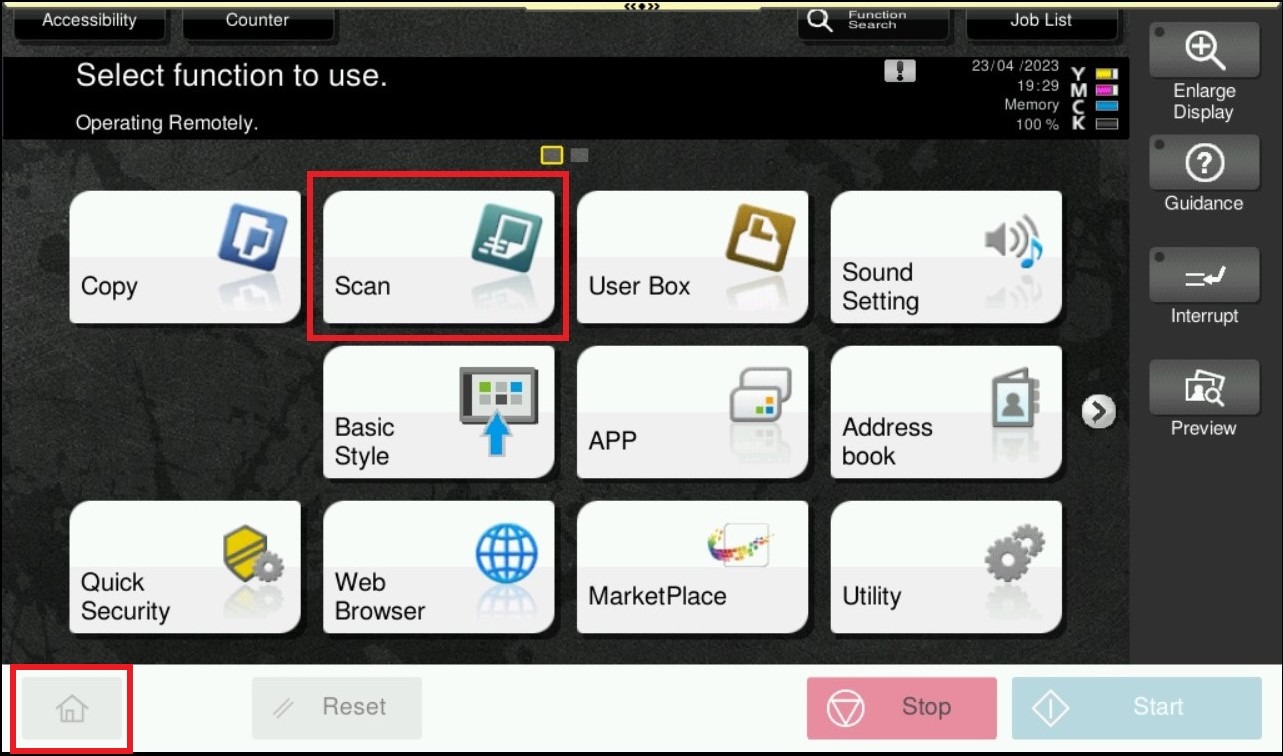
STEP 1 – On the Main Menu Screen, select [Home] – [Scan].
STEP 2 – Select [Application].
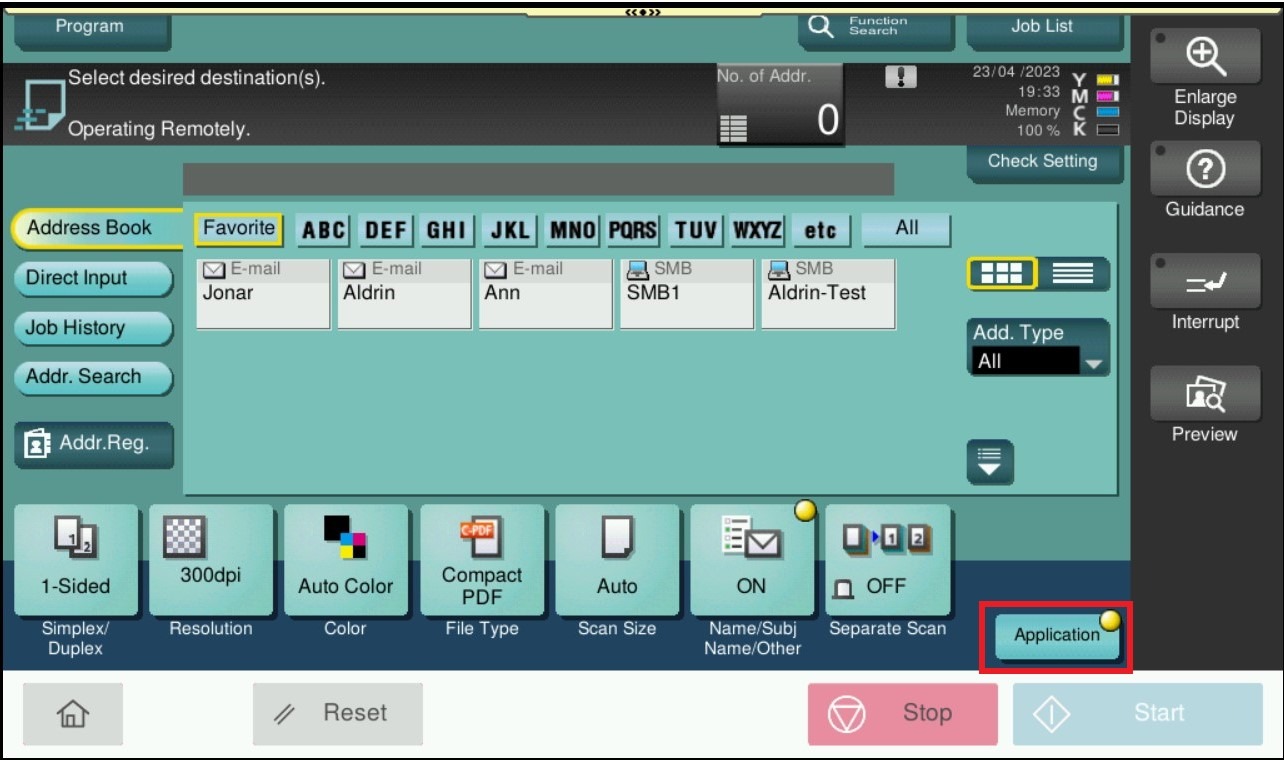
STEP 3 – Select the [Density] under [Quality/Density] Then Adjust the density according to the original.