Guide on how to enable the function to display the list of Document ID for Secure Print jobs on the printer.
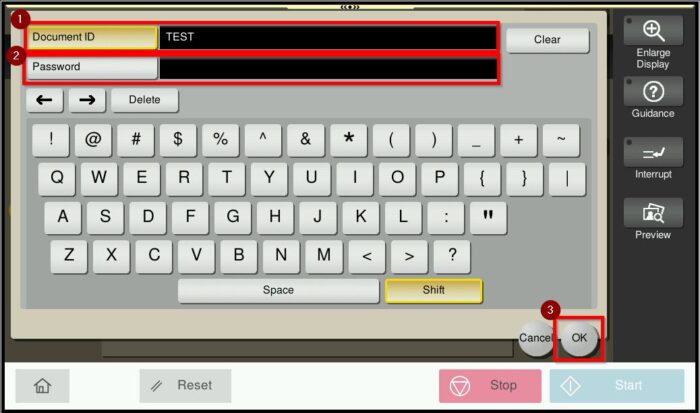
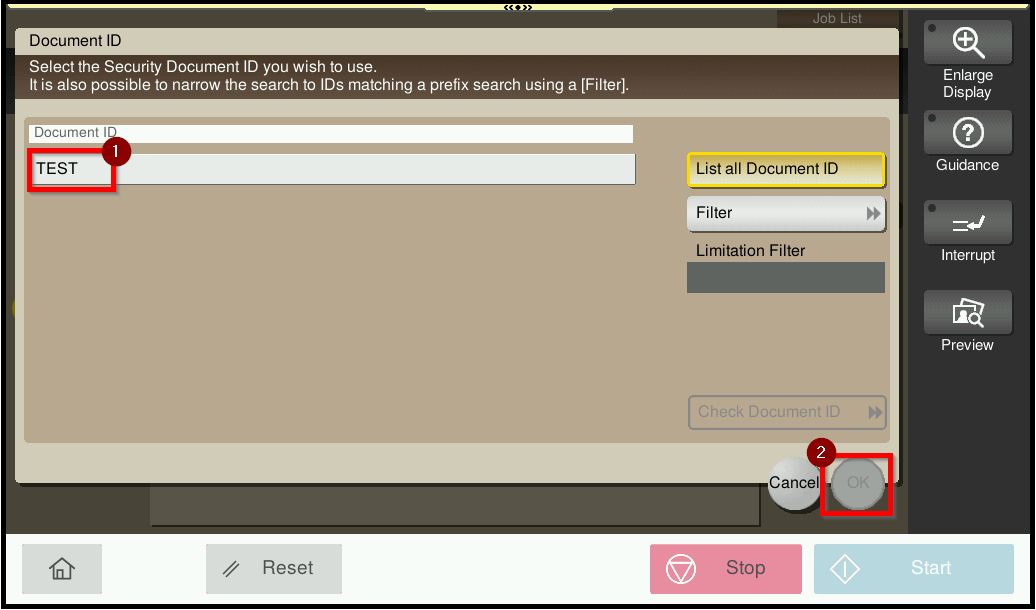
By default, Secure Print requires users to enter both Document ID and Password at the printer to release the print job. By enabling the setting below, users can select the desired Document ID from the list and release the print job using the password only
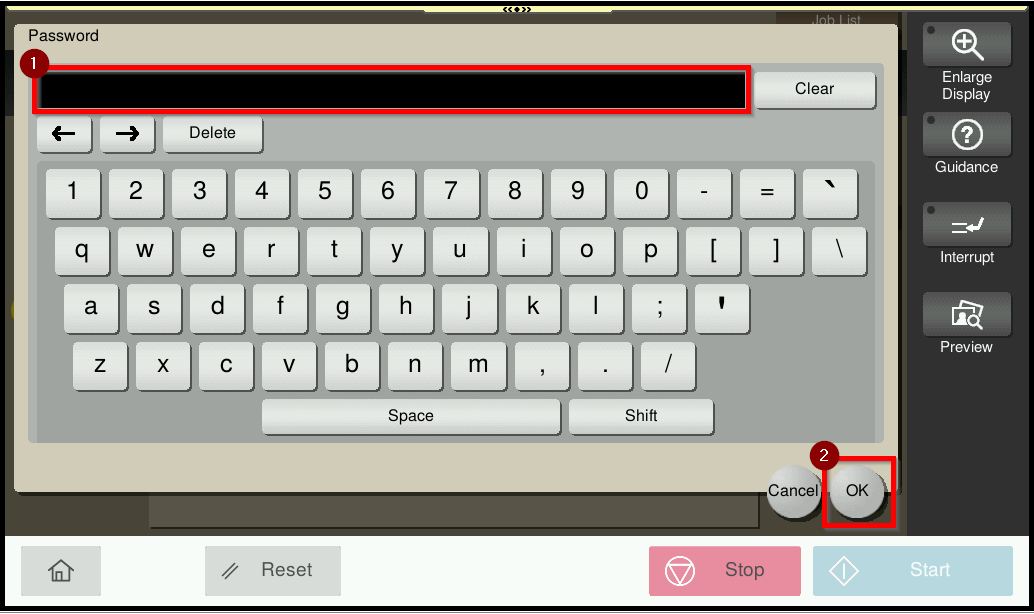
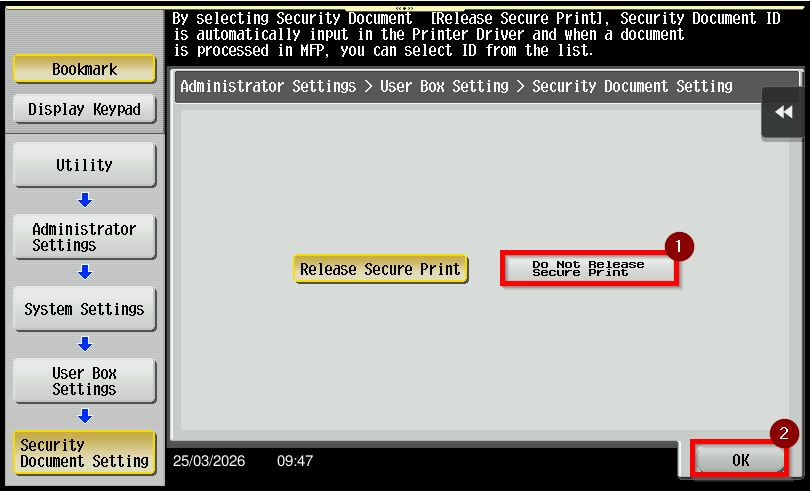
Option 1: Do Not Release Secure Print: The attachment below shows that users are required to enter both Document ID and Password to release the Secure Print job.
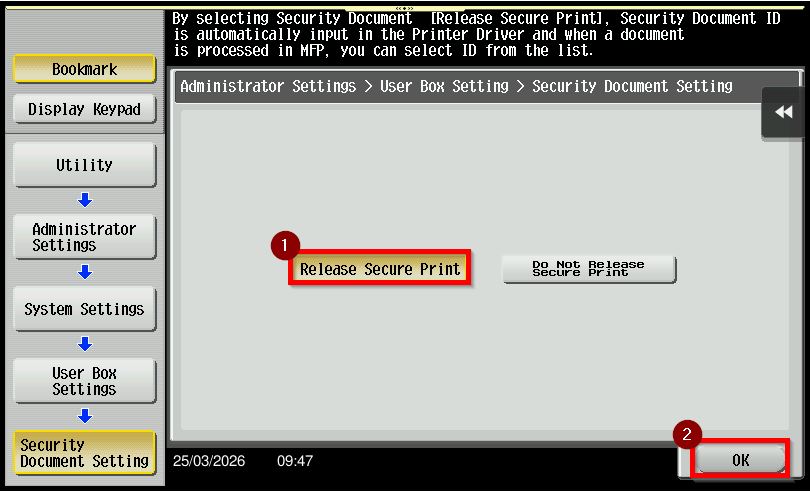
Option 2: Release Secure Print. The attachment below shows that users are required to select the desired Document ID and key in the Password only to release the Secure Print job.
For Older Machine series / Non I-Series Machine (Accessible via Screen Panel)
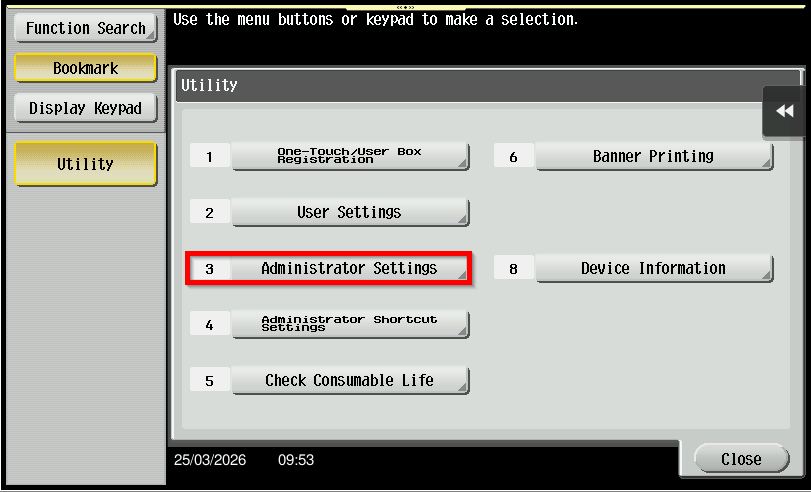
STEP 1 – Select [Utility].

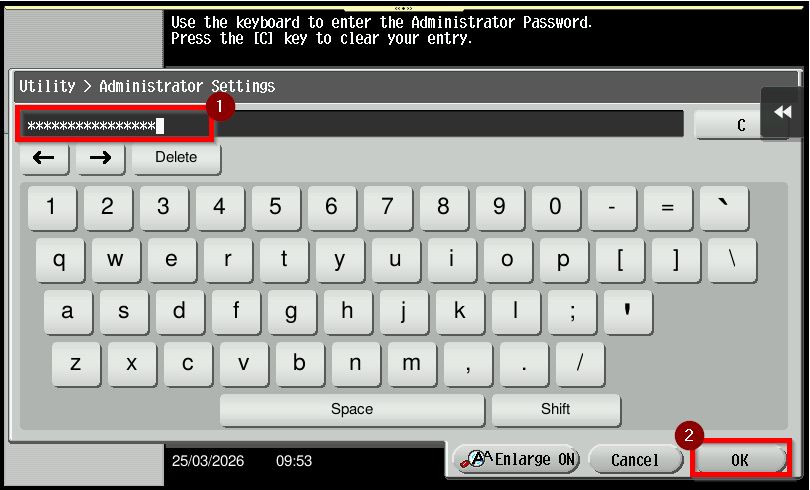
STEP 2 – Select [Administrator Settings] and Key in the default administrator password and click [OK] button to login.
Default administrator password: [7801261178012611] or [1234567812345678] or [12345678] or [12341234].
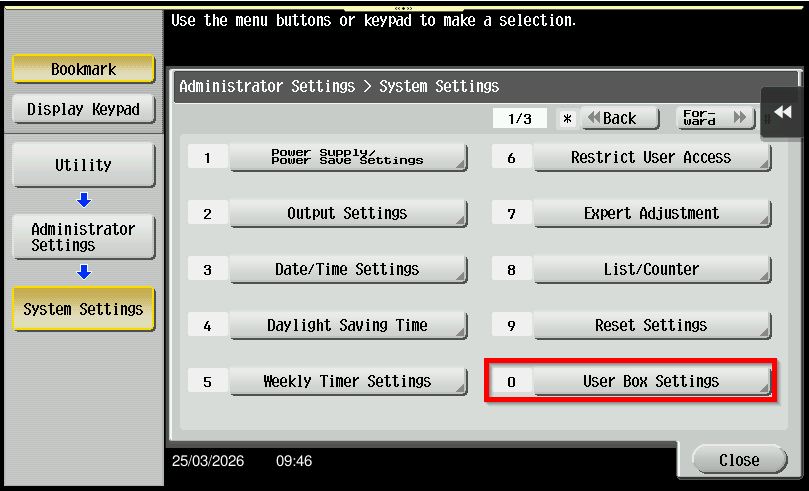
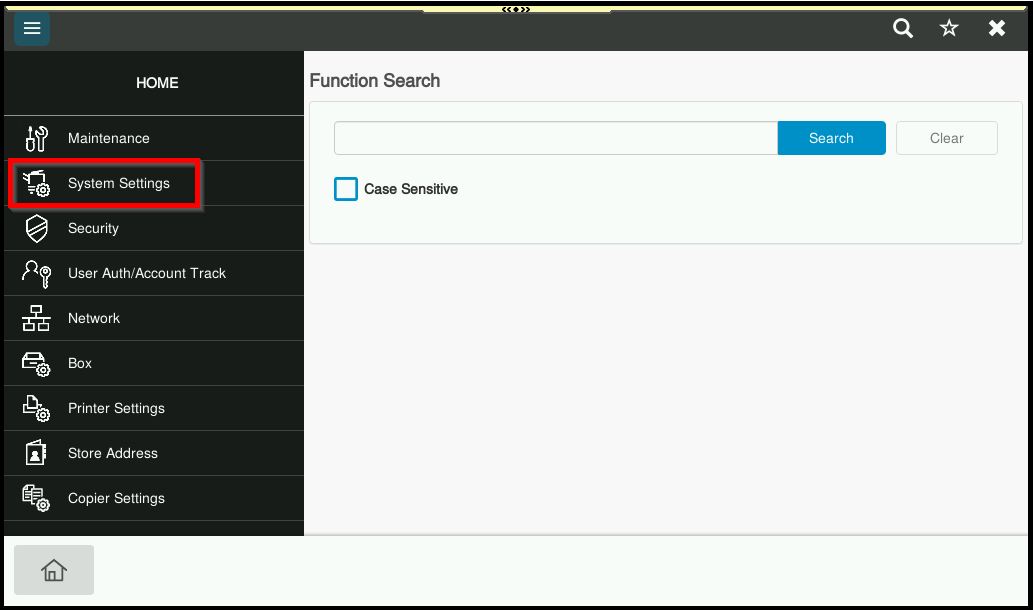
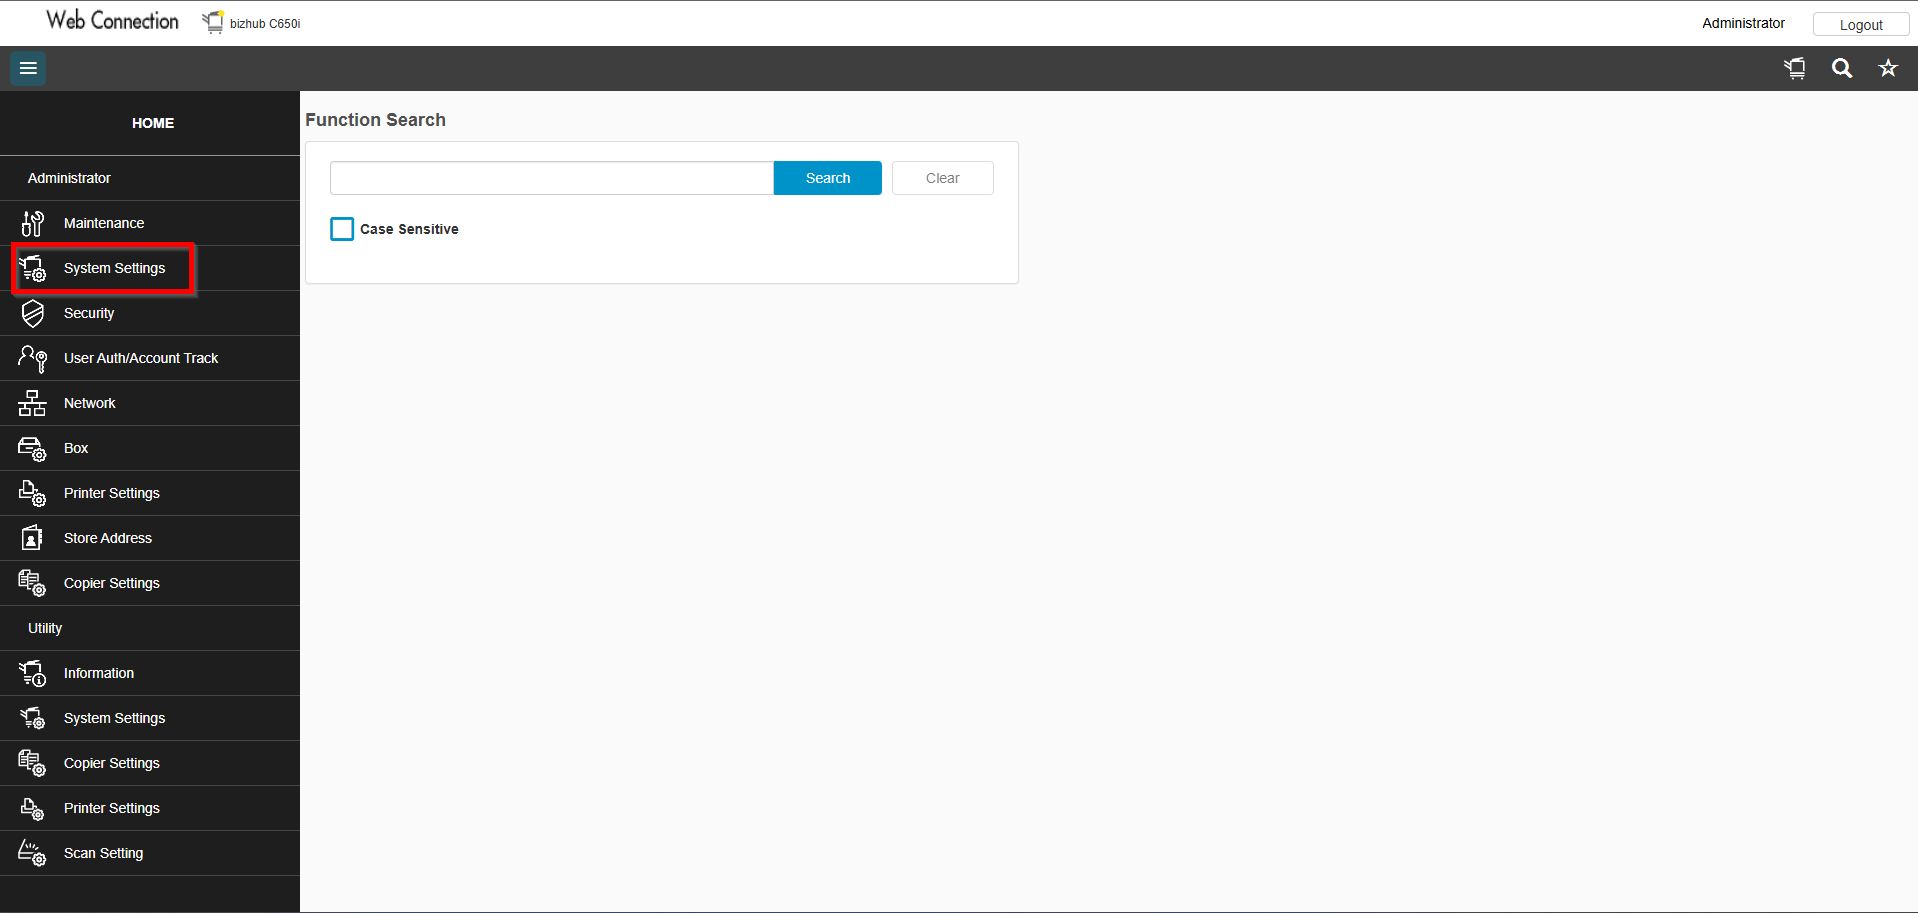
Step 3 – Go to [System Settings].

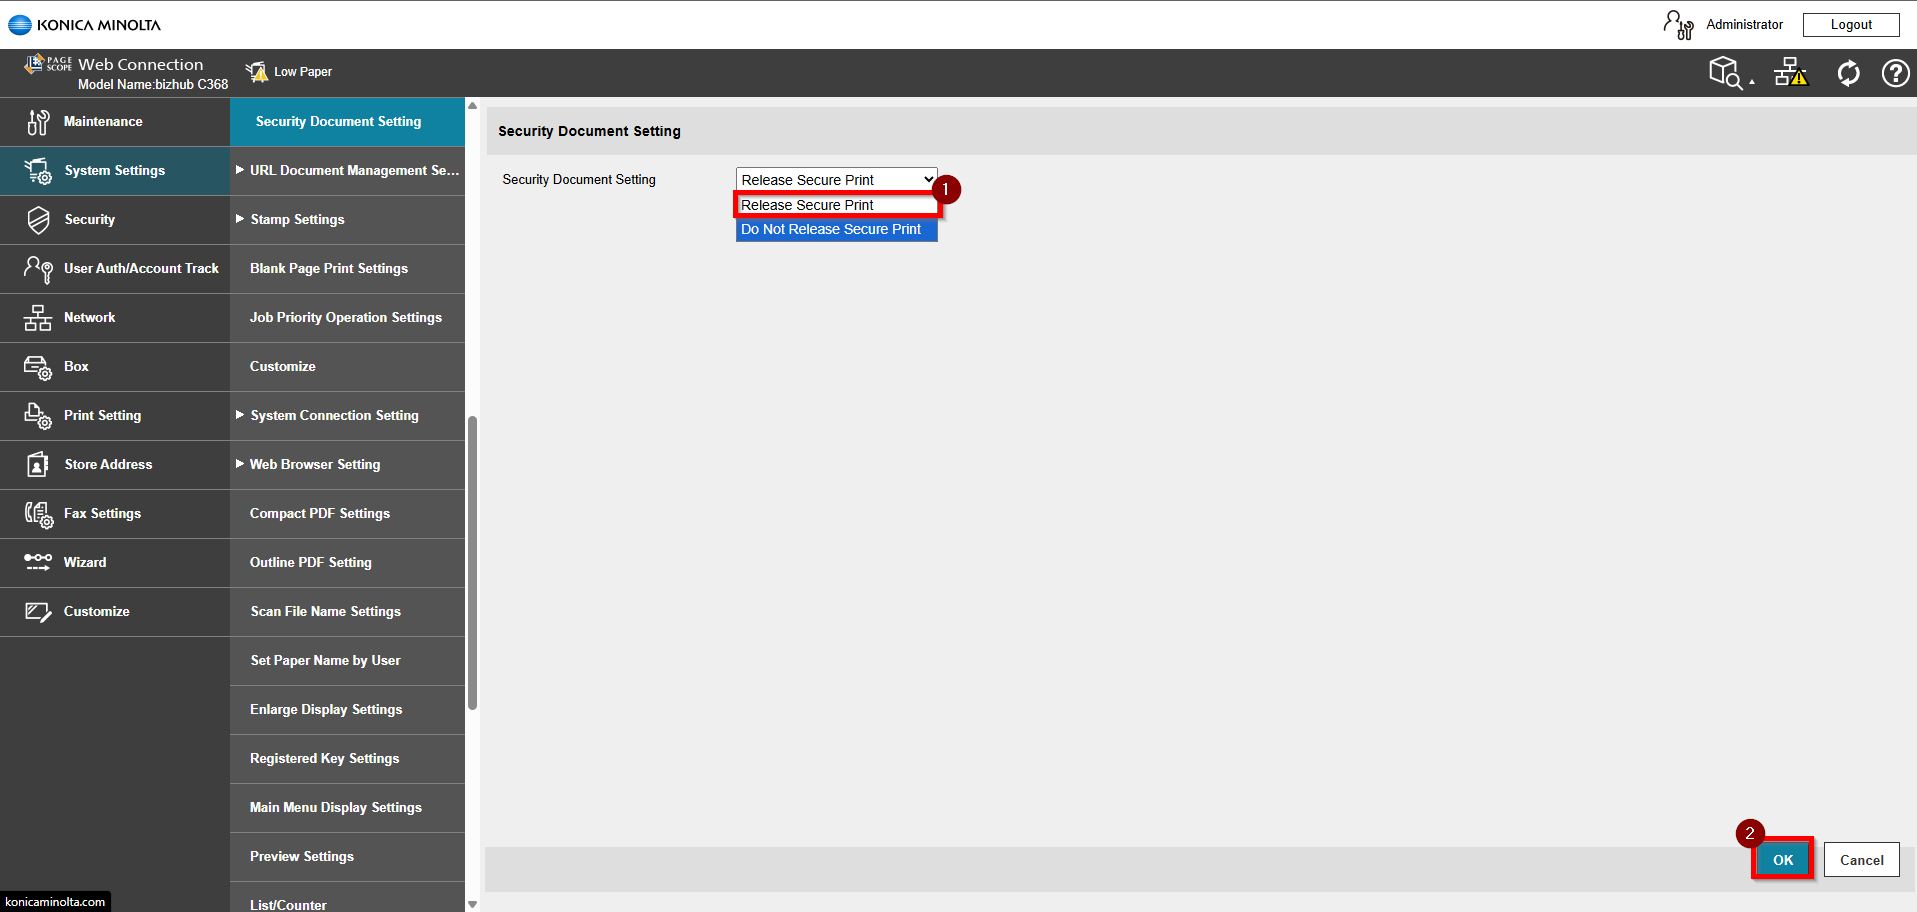
Step 4 – Choose [User Box Settings] – [Security Document Setting].
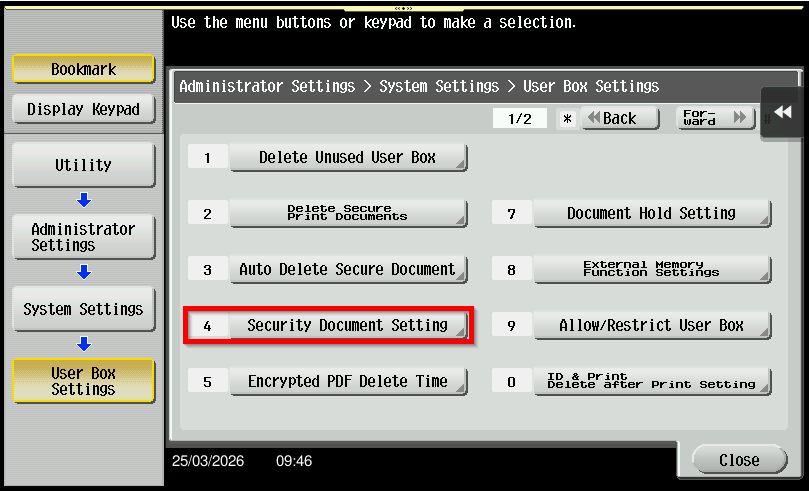
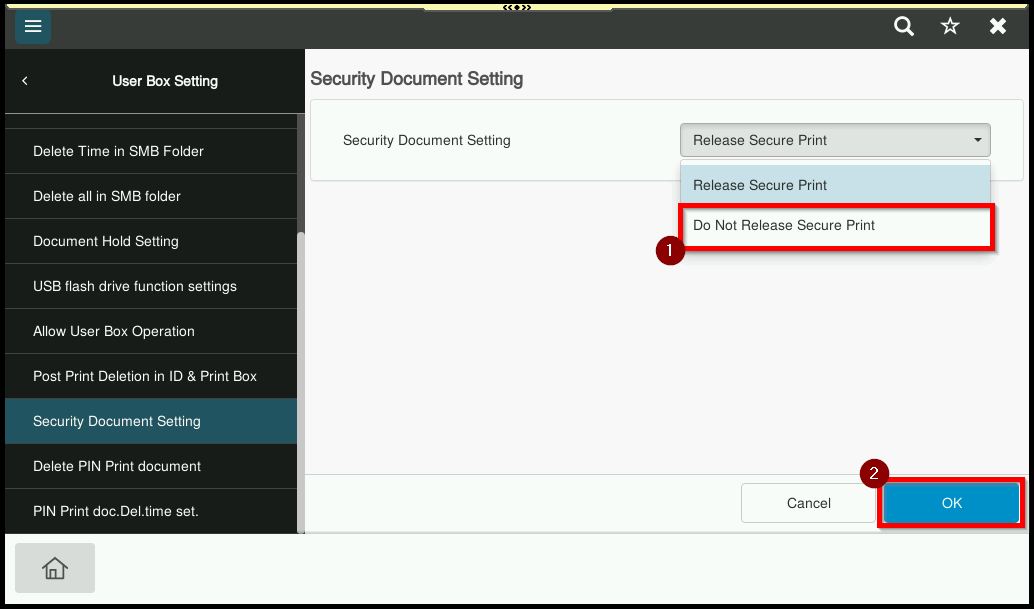
Step 5 – Under Security Document Setting there will have 2 options.
Option 1: Do Not Release Secure Print. When this option is selected, users are required to enter both the Document ID and Password at the printer in order to release the Secure Print job.
Option 2: Release Secure Print. When this option is enabled, users can select the Document ID from the list and enter the password only to preview or print.
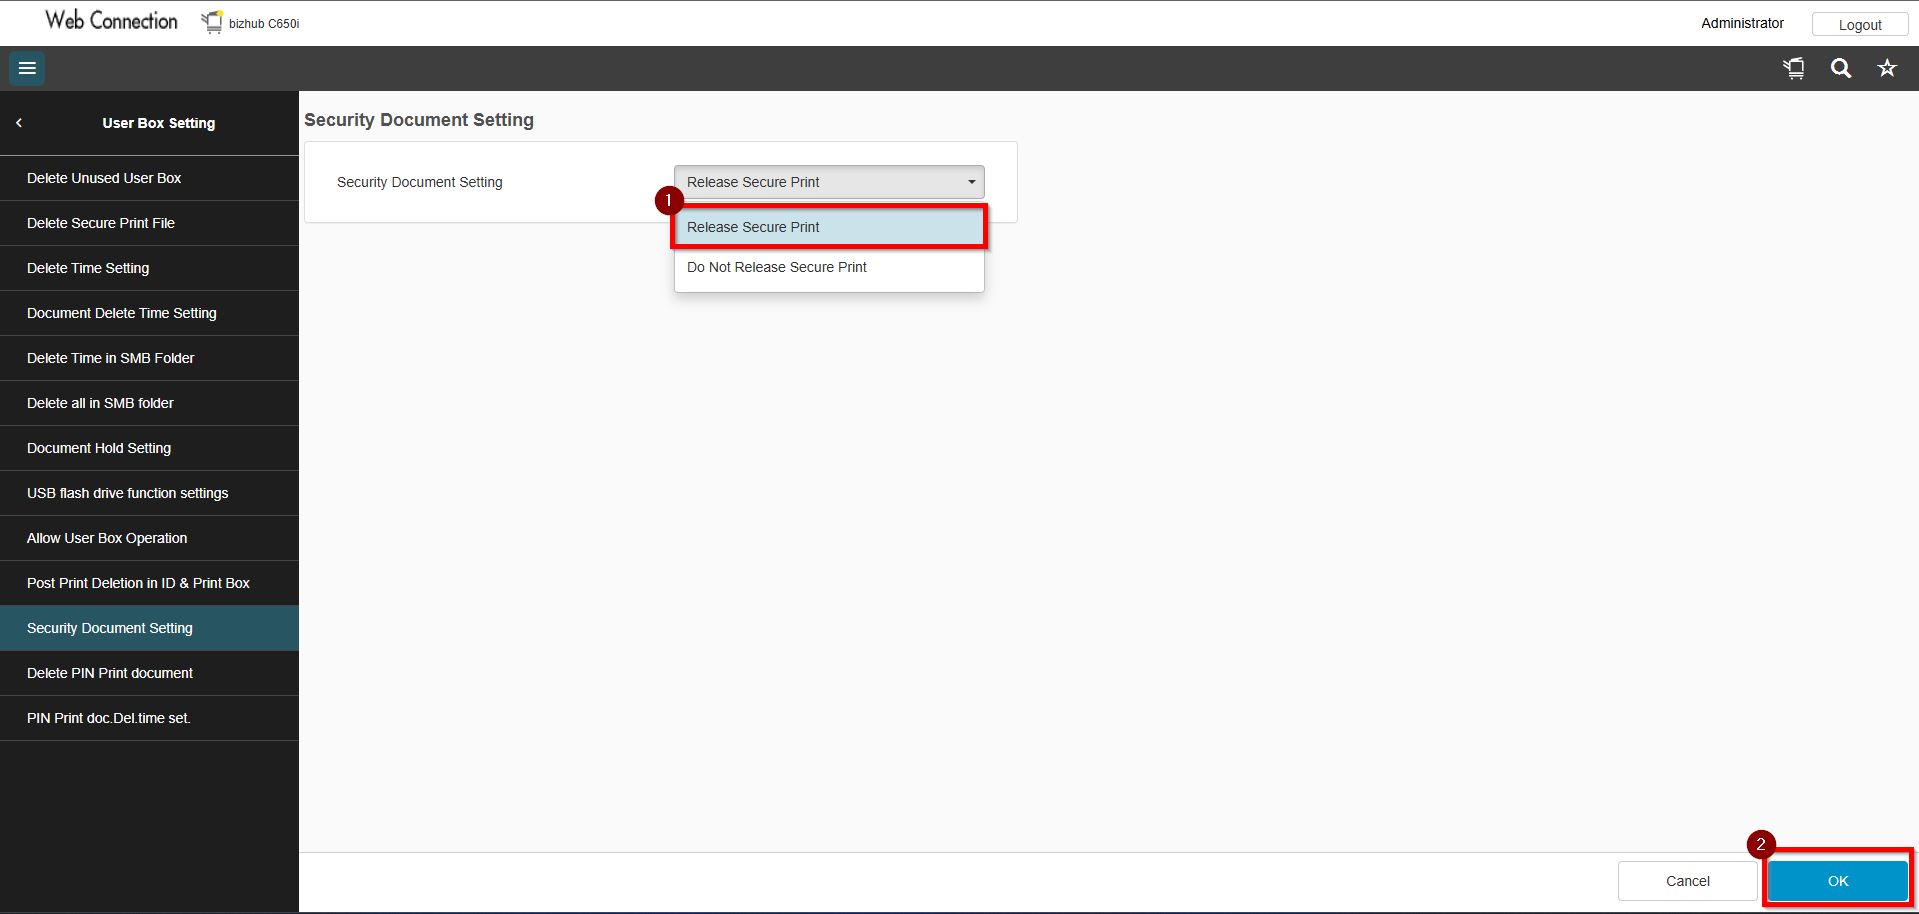
For Older Machine series / Non I-Series Machine (Accessible via Web Connection)
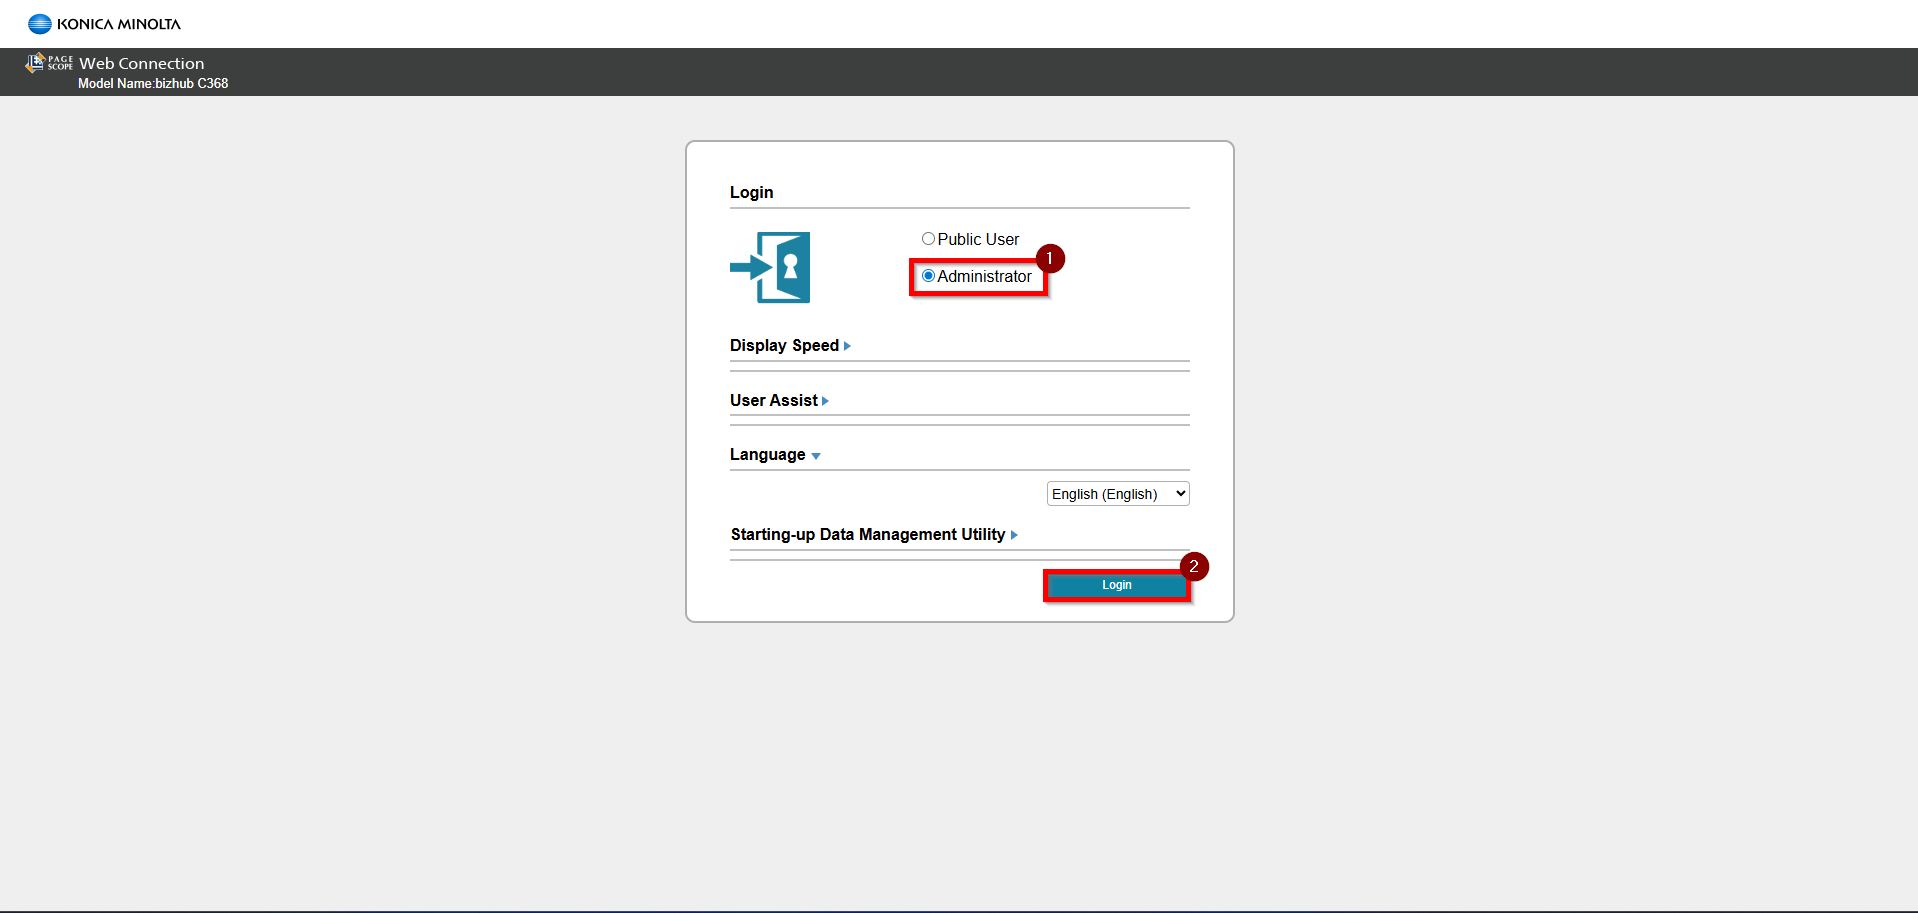
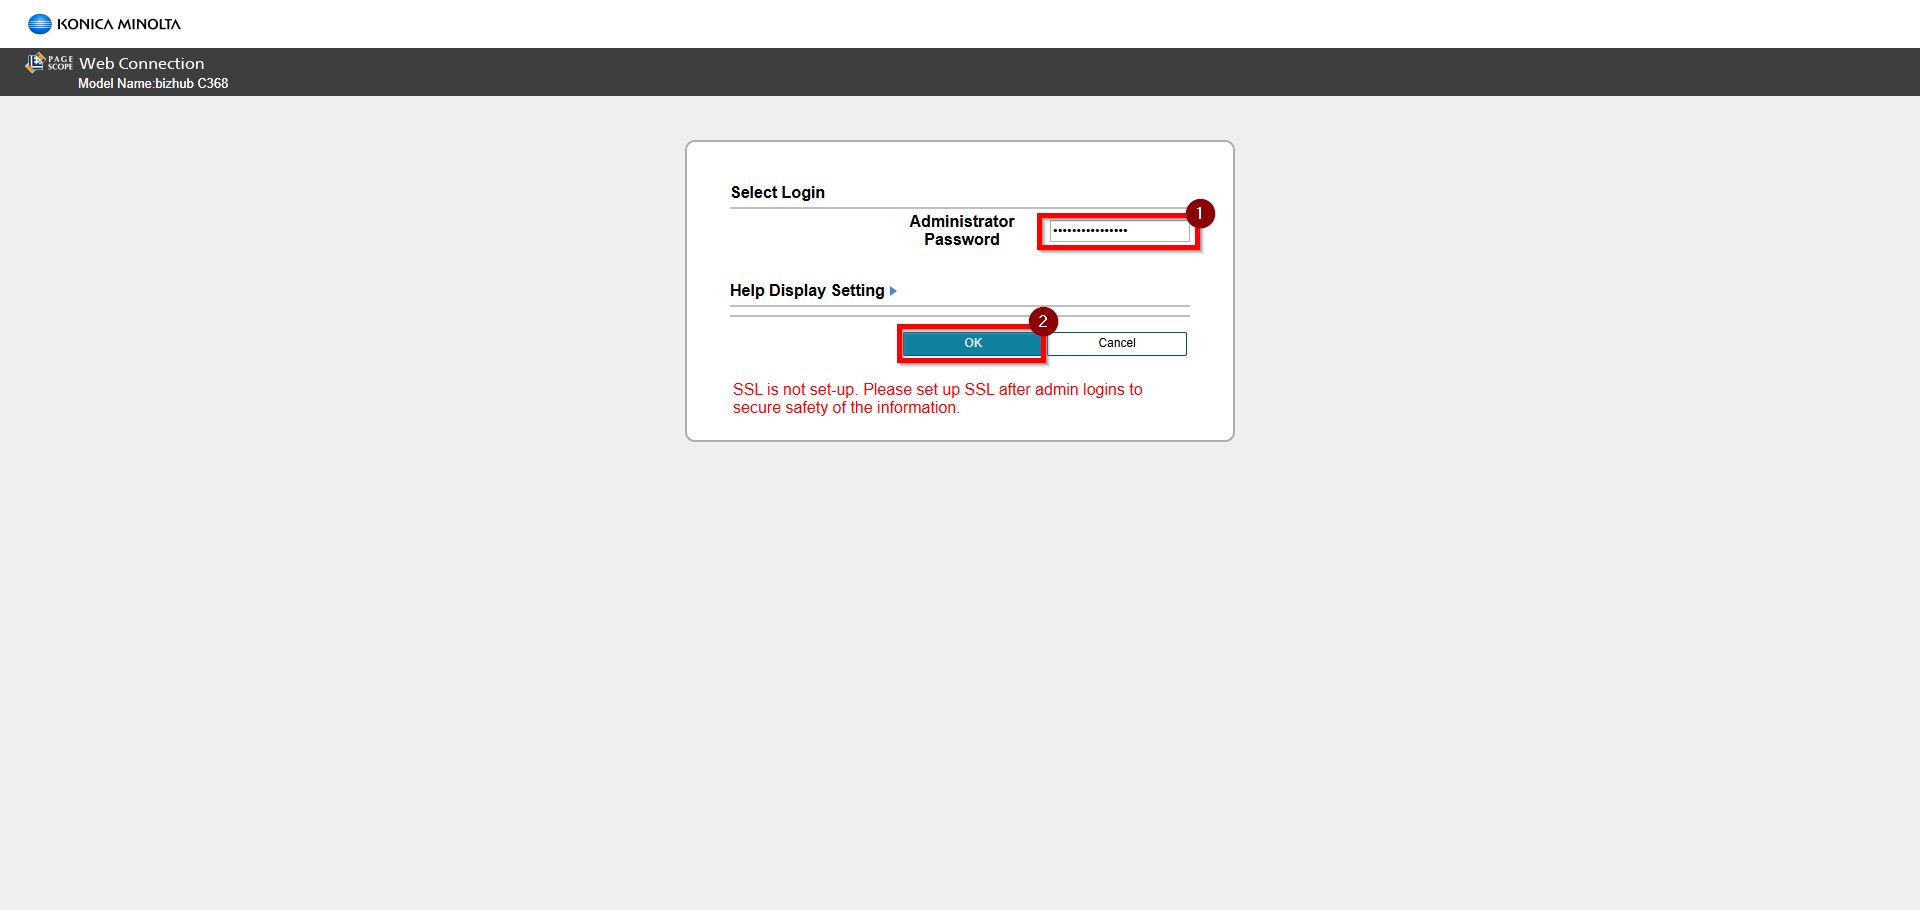
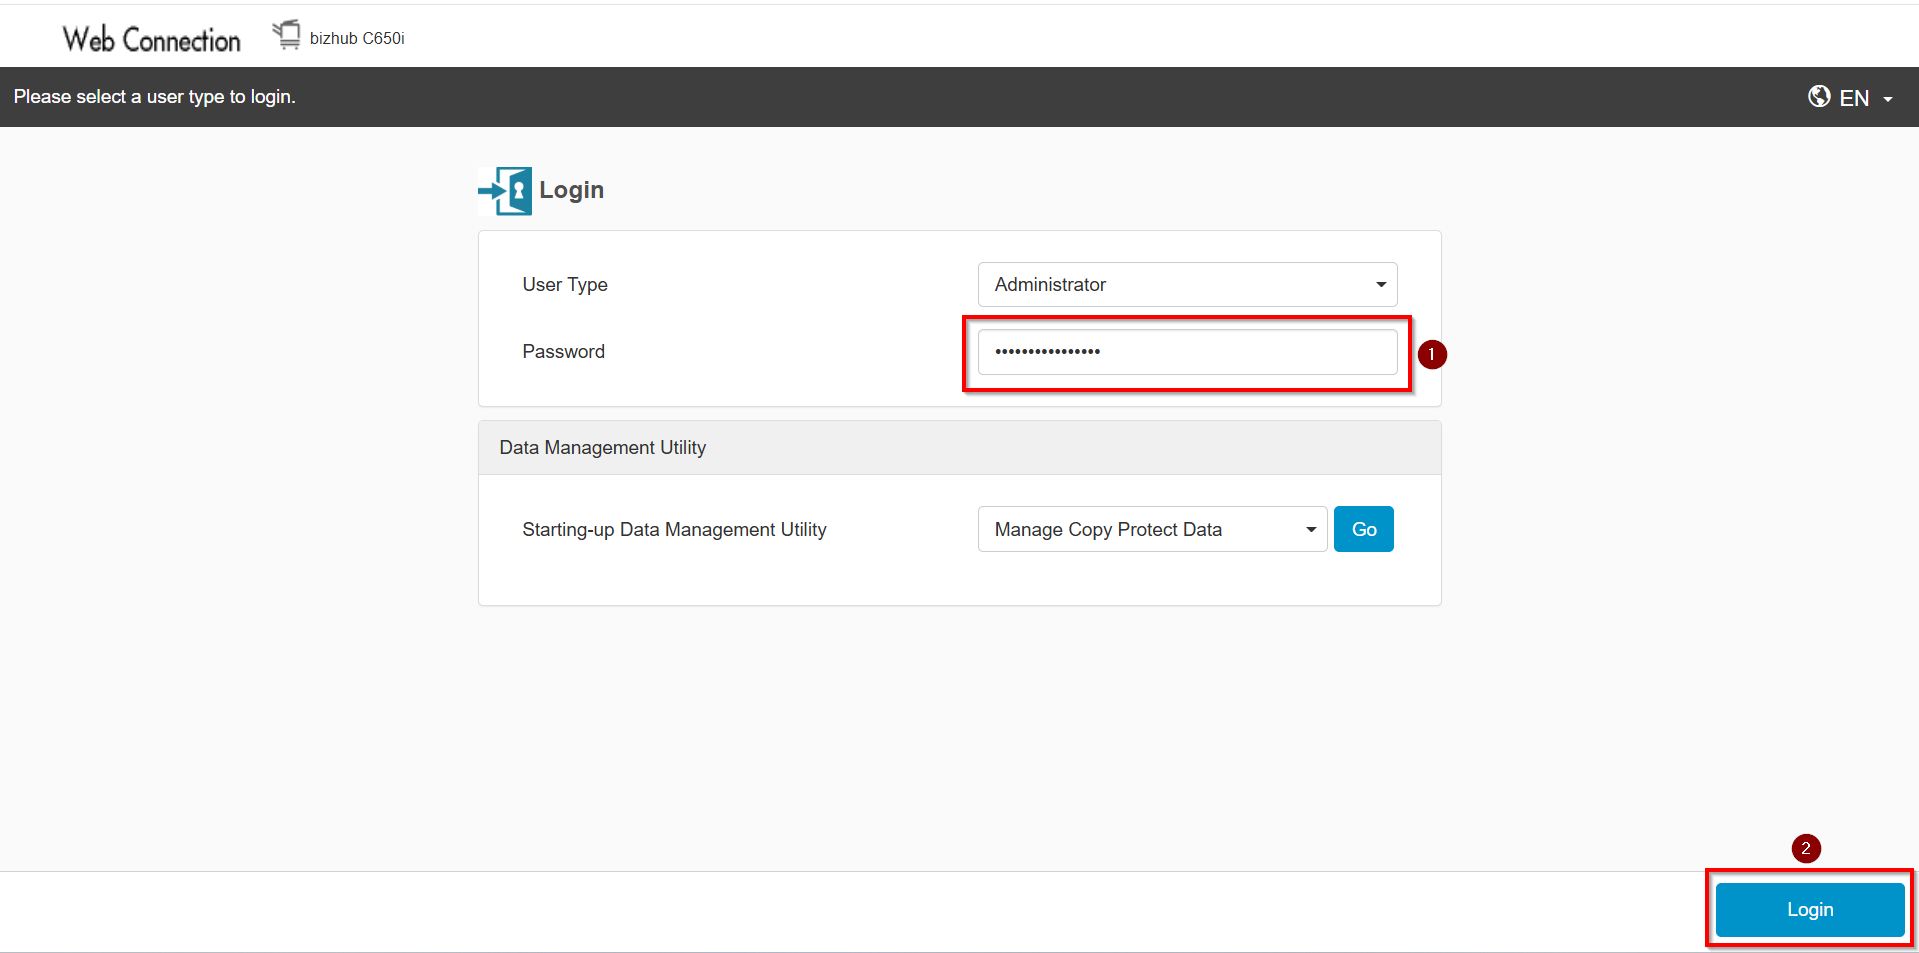
STEP 1 – Login as [Administrator].
**You may access to web connection via machine IP Address. Click on this to check how to get the IP Address from machine, then key in Konica Minolta Machine IP Address at web browser and log in as admin the Web Connection.
STEP 2 – Key in the default administrator password and click [OK] button to login.
Default administrator password: [7801261178012611] or [1234567812345678] or [12345678] or [12341234].
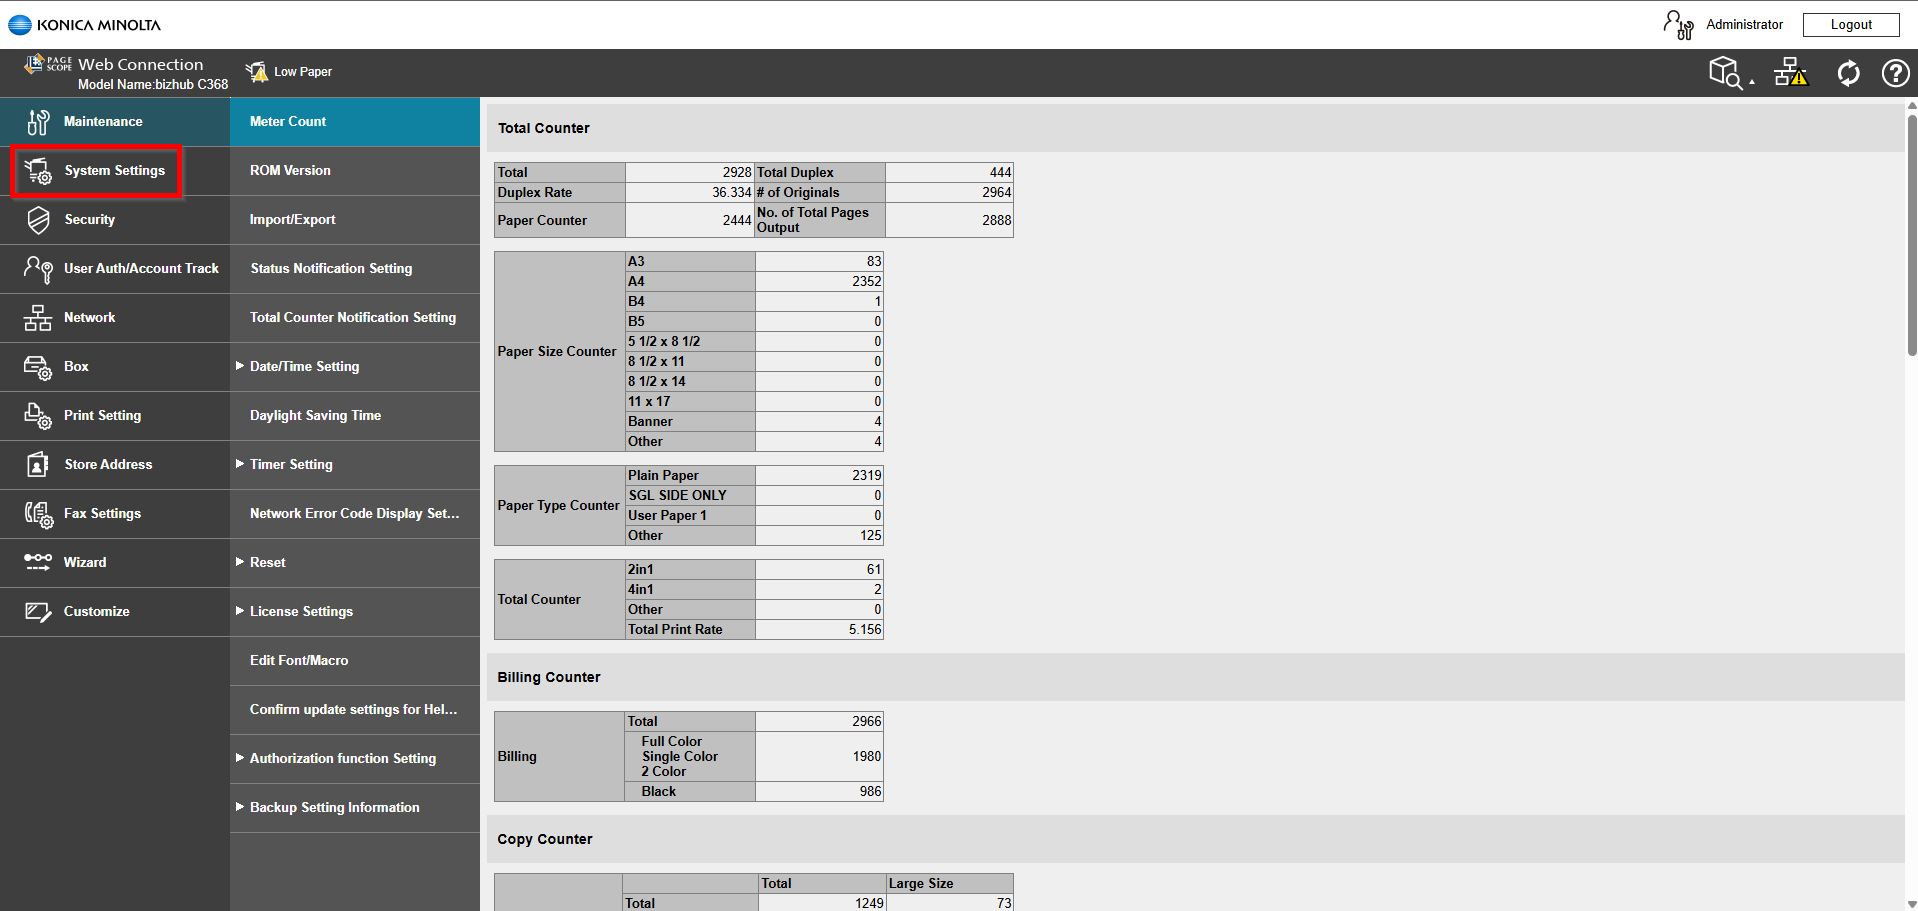
Step 3 – Go to [System Settings].
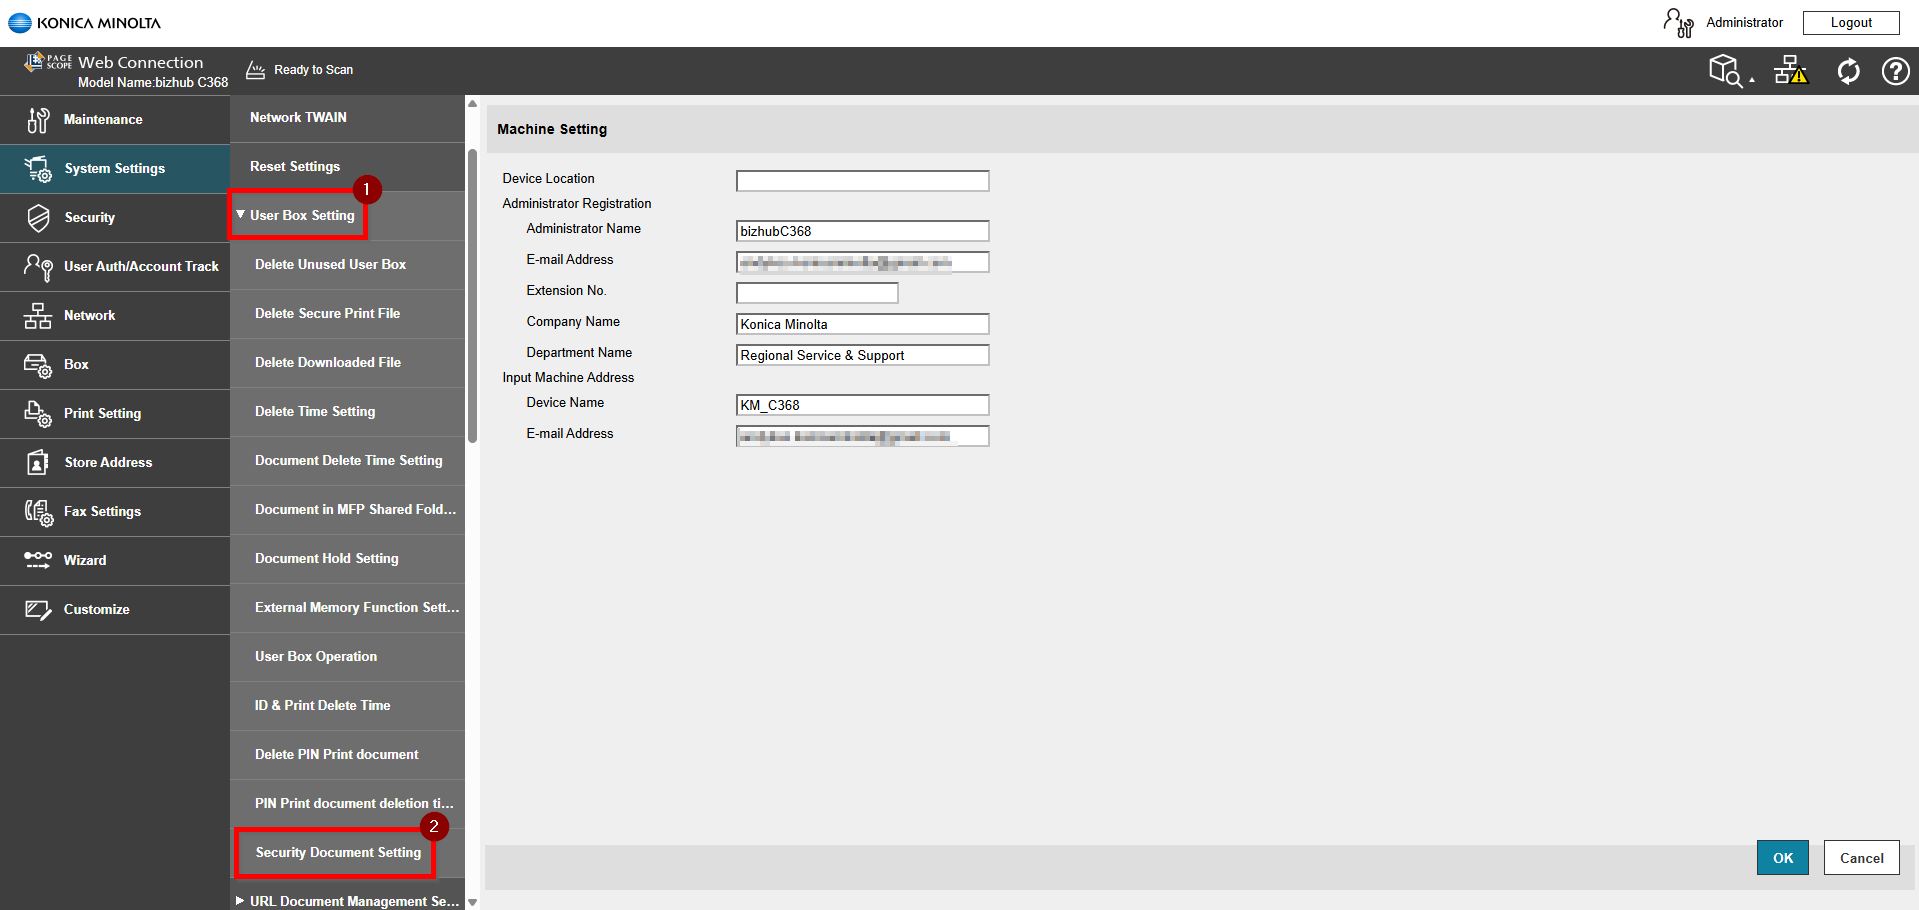
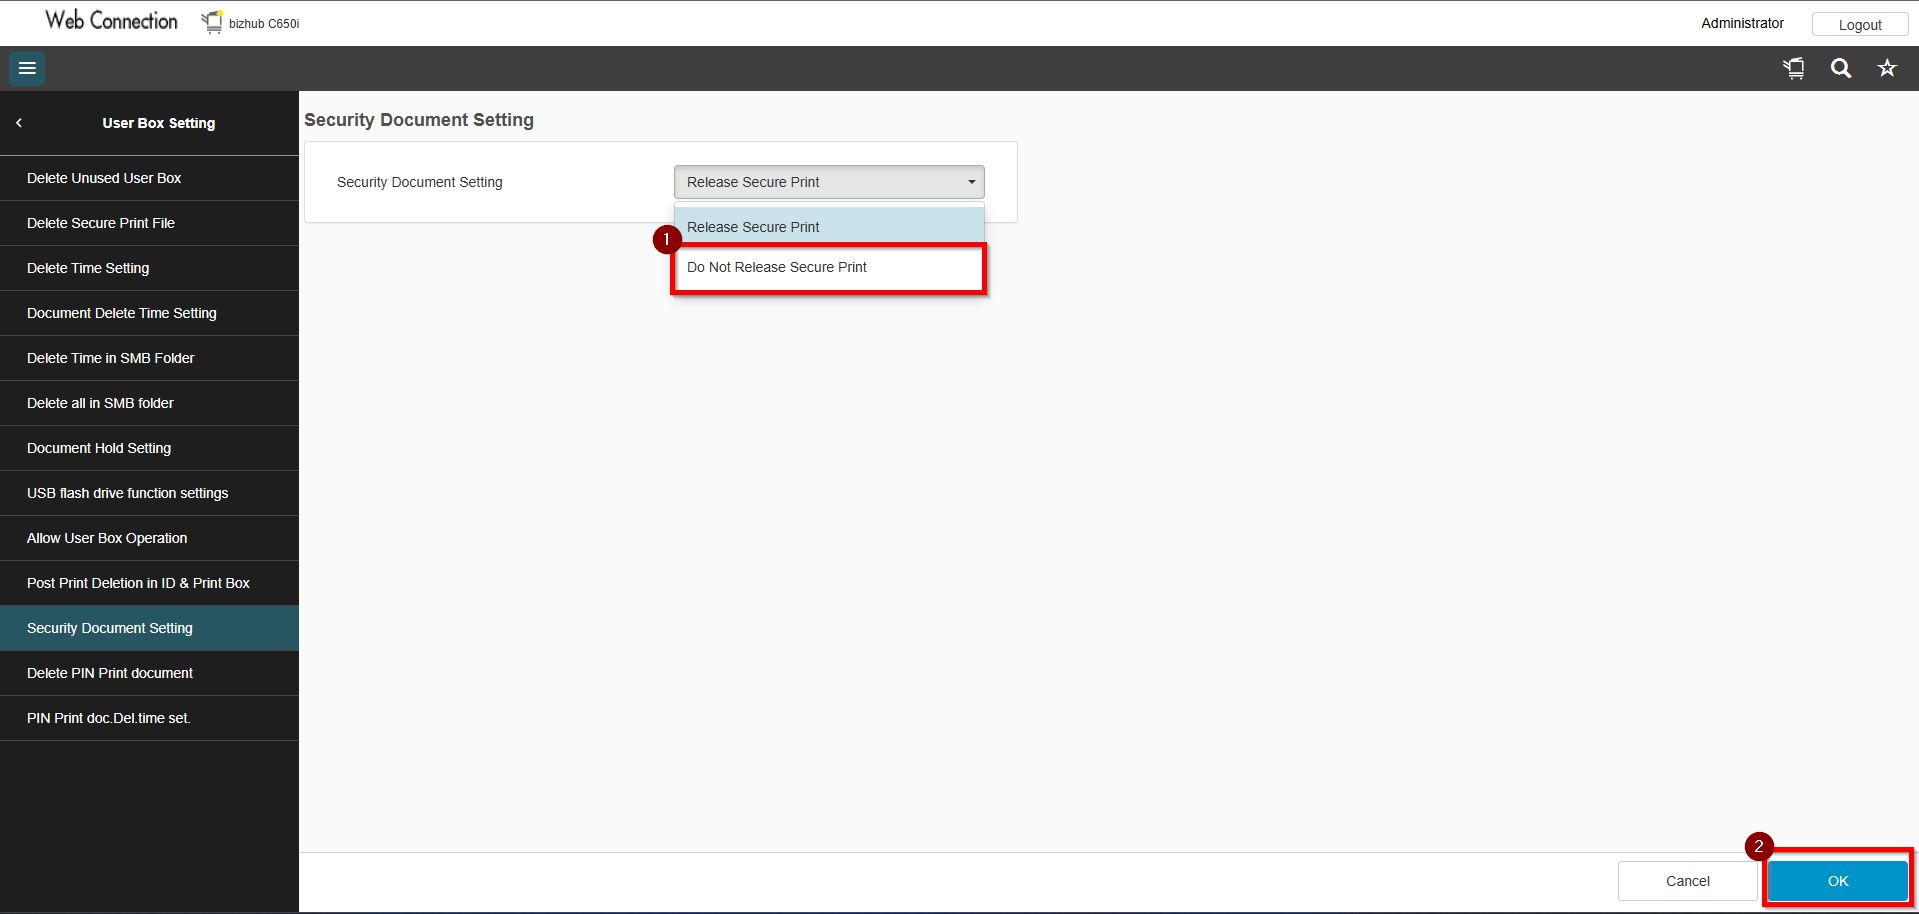
Step 4 – Choose [User Box Setting] – [Security Document Setting].
Step 5 – Under Security Document Setting there will have 2 options.
Option 1: Do Not Release Secure Print. When this option is selected, users are required to enter both the Document ID and Password at the printer in order to release the Secure Print job.
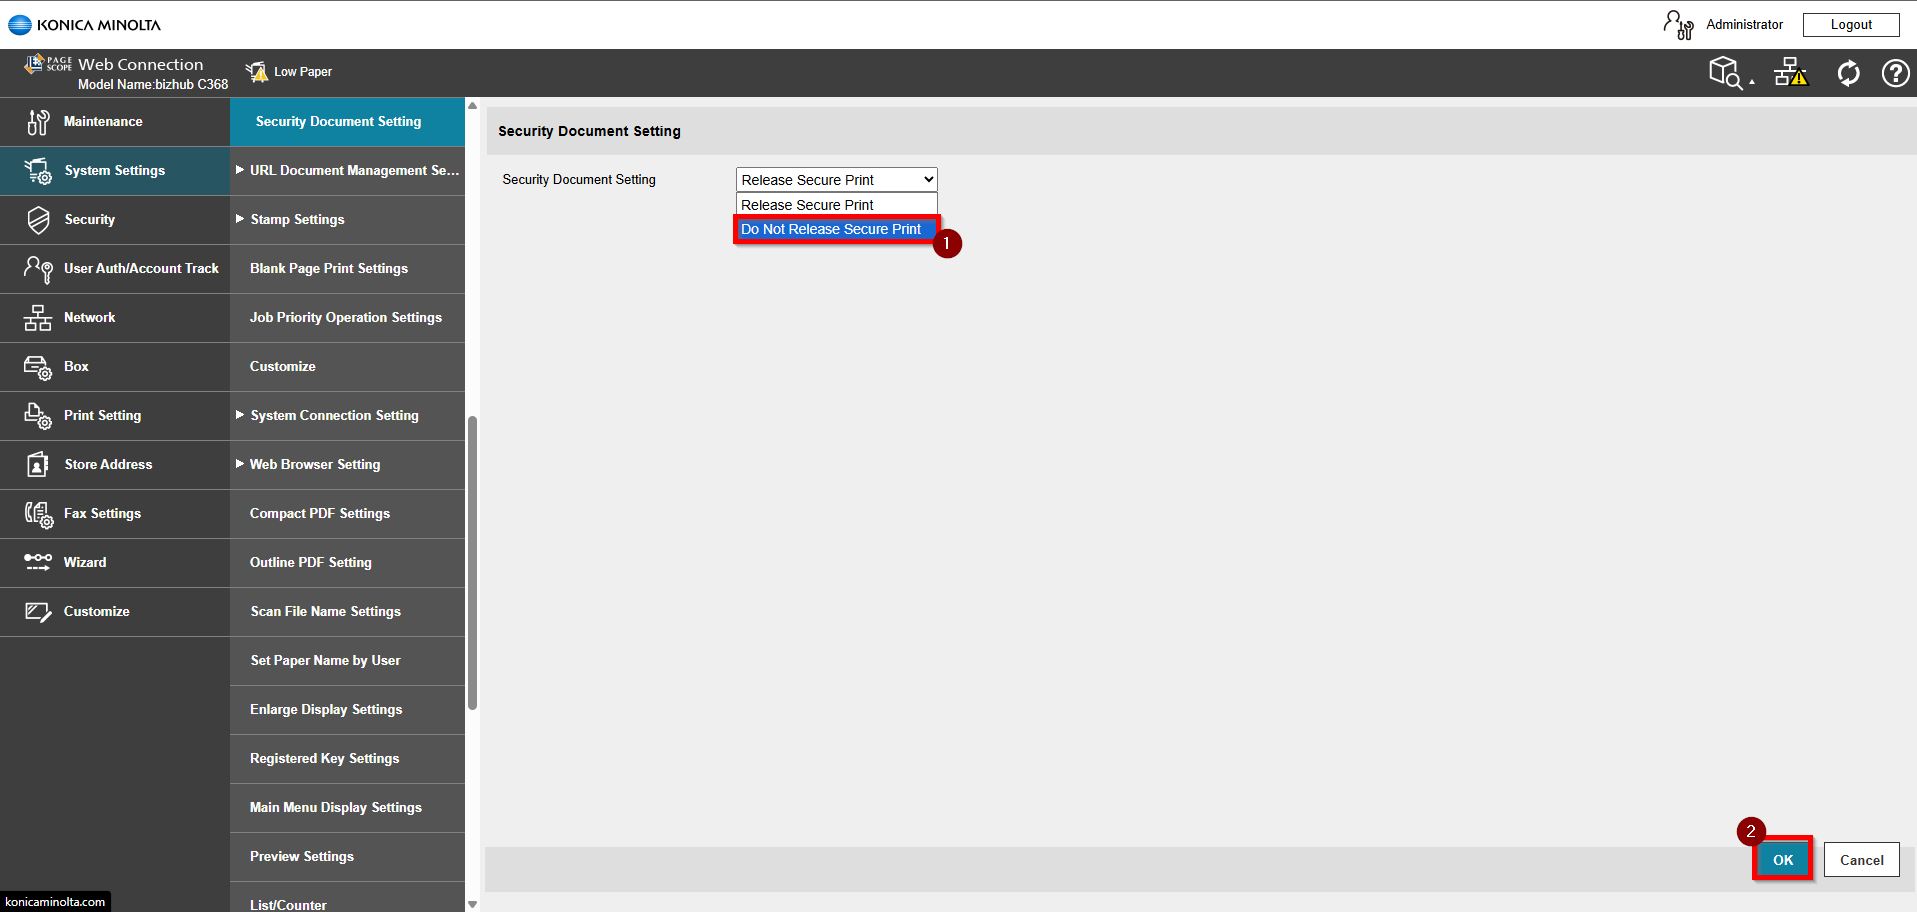
Option 2: Release Secure Print. When this option is enabled, users can select the Document ID from the list and enter the password only to preview or print.
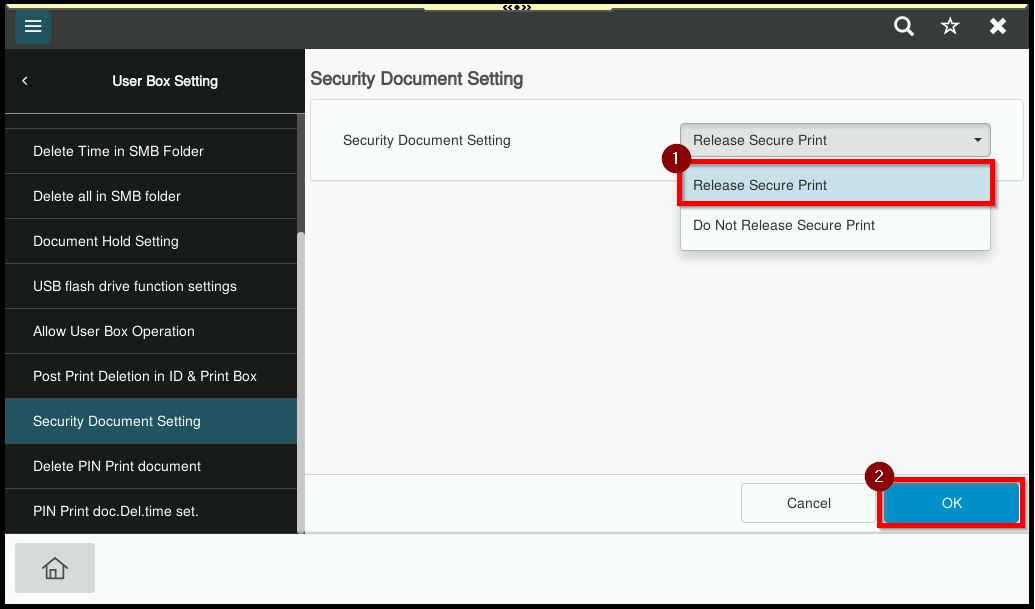
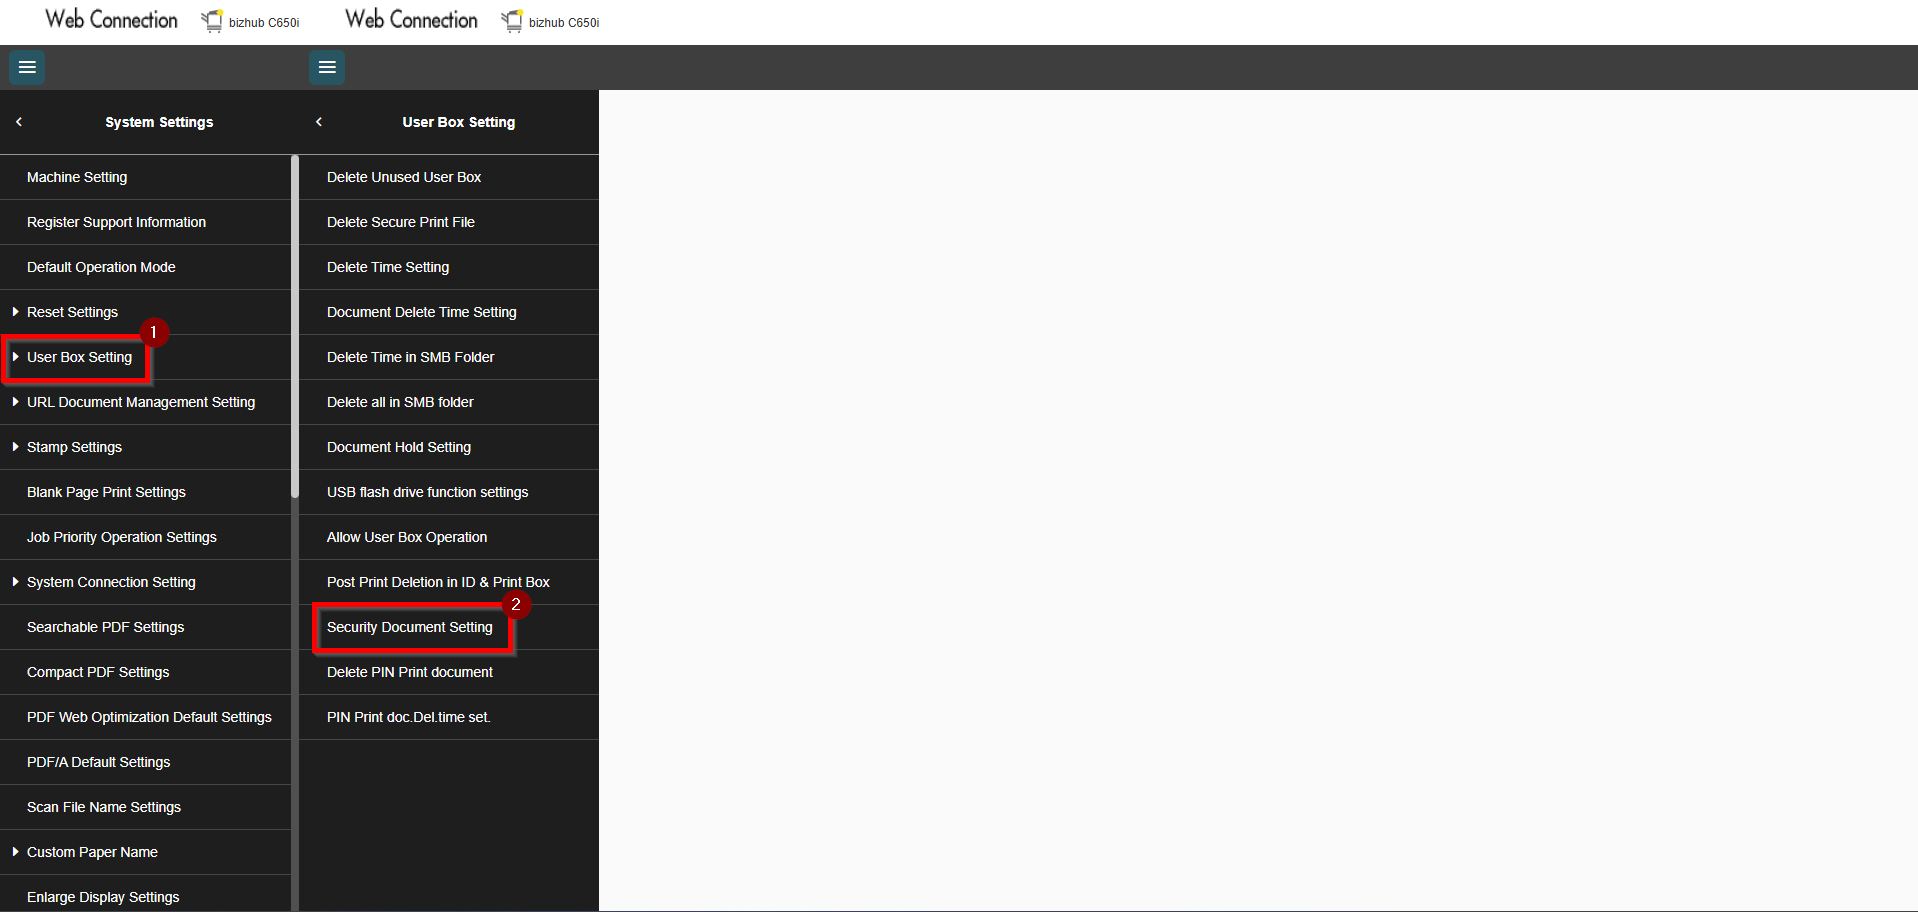
For Newer Machine series / I-Series Machine (Accessible via Screen Panel & Web Connection)
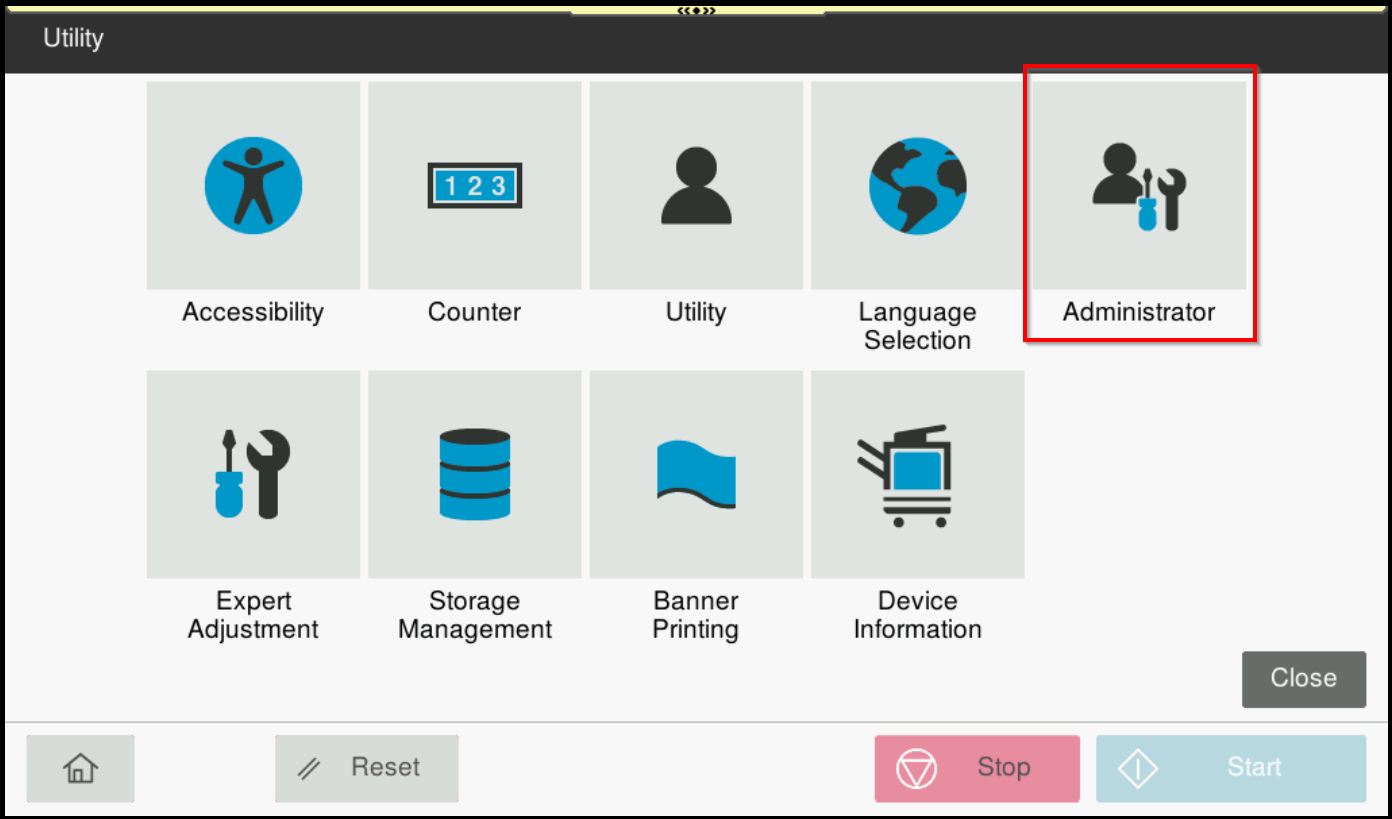
STEP 1 – Select [Home] – [Utility].

**You may access to web connection via machine IP Address. Click on this to check how to get the IP Address from machine, then key in Konica Minolta Machine IP Address at web browser and log in as admin the Web Connection.
STEP 2 – Select [Administrator].
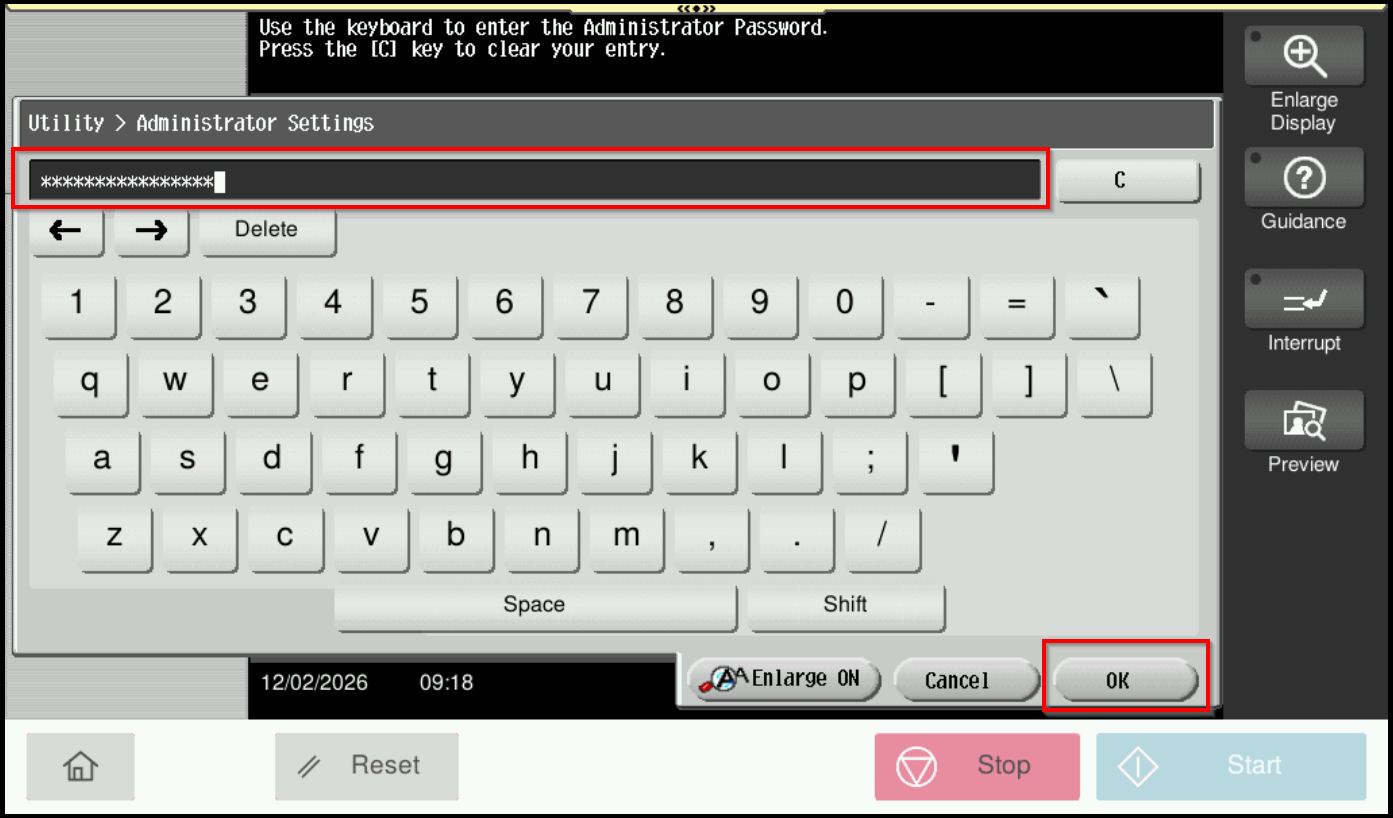
STEP 3 – Key in the default administrator password and click [OK] button.
Default administrator password: [7801261178012611] or [1234567812345678] or [12345678] or [12341234].
**On Web Connection login as admin mode by key in administrator password accordingly. The next step will be same option on below to change administrator password.
STEP 4 – Go to [System Settings].
STEP 5 – Choose [User Box Settings] – [Security Document Setting].
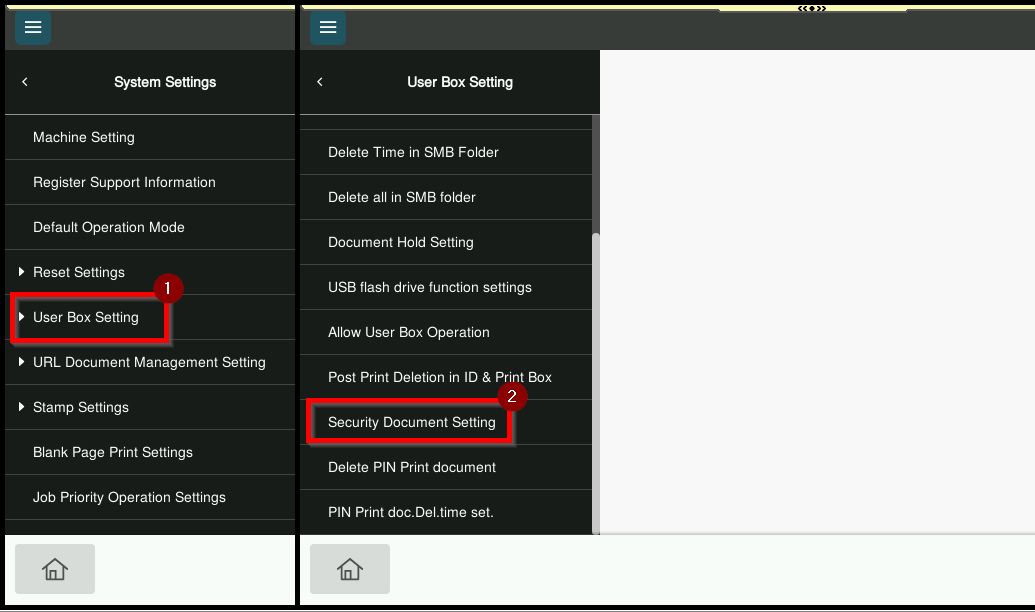
Step 6 – Under Security Document Setting there will have 2 options.
Option 1: Do Not Release Secure Print. When this option is selected, users are required to enter both the Document ID and Password at the printer in order to release the Secure Print job.
Option 2: Release Secure Print. When this option is enabled, users can select the Document ID from the list and enter the password only to preview or print.